The impetus for this post came from Ana Chavez, who emailed me to ask how to remove automatic captions that were appearing whenever she inserted a Table into Word. I couldn’t work out what was going on, and she kindly messaged me when she found out. Thank you, Ana, for your kindness in getting back to me!
This post covers Word 2010, 2013 and 2016 for PC and the images are from Word 2013. The solution may differ with Word for Mac.
What is auto captioning in Word?
Automatic captioning or auto captioning is a feature which adds a caption to any table (or other item) you insert into your Word document. It looks like this:
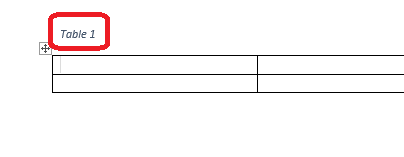
Here, I have inserted a table and the beginning of a caption has already appeared.
This is actually very useful, as it will remind you to add your captions and also sort out the numbering for you as you go along (you can make choices just as you do when inserting a caption manually – see this post for full information on that). However, my original question was about removing these – so this article covers both removing and adding auto captions.
How do I add / remove automatic table captions?
You can find the caption options in the Reference tab, in the captions section:

To access Auto Captions, first click on Insert Caption. This will give you the standard dialogue box allowing you to insert a caption:

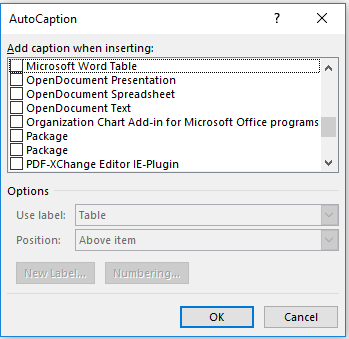
At the bottom of this dialogue box is the AutoCaption button. Press this to access AutoCaption options:

If you have found this article because you want to stop Word auto captioning, you will probably find one of these boxes ticked, and it’s probably Add caption when inserting … Microsoft Word Table. However, you can see from this screenshot that you can automatically add a caption to pretty much anything.
You can also see that you can automate the label, position and numbering system just like you can in the Insert Caption dialogue box when you’re doing it manually. However, doing it this way will automate the whole process. Your caption will appear automatically, as we saw in the first picture, and you just have to type in your caption text.
Once you have chosen your options, click OK and your AutoCaptioning will work as you want until you turn it off again.
How do I remove AutoCaption?
If you want to remove automatic captioning, un-tick whichever box is ticked:
Now press OK, and you will have removed automatic captioning.
This article has explained how to add or remove auto captioning in Word 2010, Word 2013 and Word 2016. If you’ve found it helpful, please comment below or use the sharing buttons to share it!
Related articles on this blog
Table of figures and table of tables
How to create a two-line figure caption and a one-line entry in the table of figures


Don Massenzio
February 20, 2017 at 11:01 pm
Reblogged this on Don Massenzio's Blog and commented:
Check out this great post on how to add or remove auto captions in Word from the Libro Editing blog
LikeLike