We can use pivot tables to display the number of times a value appears in a column or row in an Excel spreadsheet.
Why would I use a pivot table to display data?
I keep a record of my reading, including author, publisher, date, fiction or non-fiction, source, if there are any special features like mental health, immigrant experiences etc. I used to tot up some of this information manually using my book blog but this year it’s been in Excel so I can copy other book bloggers and share more detailed information.
I wanted to be able to display numbers of times I read books by x publisher etc. so taught myself this pivot tables / pivot charts procedure.
Setting up a pivot table to display my data counts
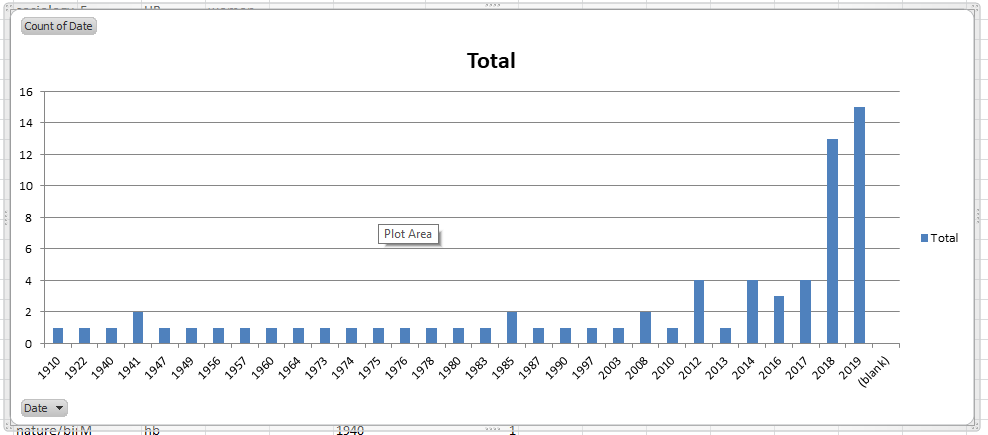
Say I want to count the number of times I’ve read books published in particular years in my spreadsheet of books read. I want a graph with the years along the bottom and number of books from each year up the side.
First I select the source data to use, by highlighting the Date column.
Then I go to the Insert tab and select PivotTable then PivotChart:

This brings up a dialogue box. I check the range is in there and then tick the Existing Worksheet option, because I want to display this on my worksheet.
I select the first cell of the destination range to tell it where to paste (I’ve not filled that in yet here), and click OK .

The PivotChart Fields pane appears on the right-hand side of the worksheet. Date (or whatever field you selected) should be showing at the top. Click the tick box next to Date and drag Date down to the Axis section and then the Values section.
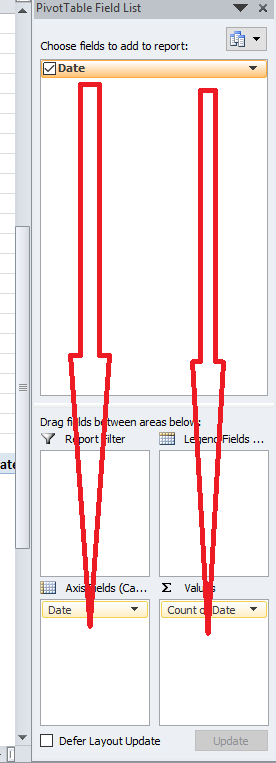
The empty Values section populates with Count of Date: this is correct. Once I’ve dragged them down …
As if by magic, a chart appears with my data!
I can move this around and resize it using the arrows that come up as you hover over the box containing the chart.
In this article I’ve shown you how to use pivot tables and pivot charts to make your data display in an easily readable form in Excel.
This works for Excel 2010 and above for PC.
Find other Excel tips in the Excel category!
If you found this article useful, please let me know in a comment!

