RSS

Monthly Archives: October 2016

How do you create a two-line figure caption and a one-line entry in your Table of Figures? Word 2010, 2013, 2016

This one was suggested by a regular reader of this blog in a comment, and I promise to write about it quite a long time ago.

This is a very specific situation where the style guide for your organisation or publisher demands that you have Figure and Table captions set out over two lines, but you want the Table of Figures to have one line including both Figure label and caption, so it looks something like this:

caption with two lines table of figures with one

How not to create a two-line figure caption

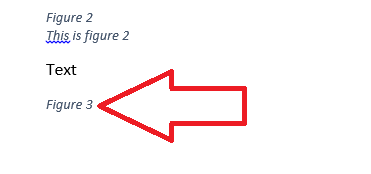
The natural inclination is to use the Return key to split the Figure label and caption, either by entering it all in one line in Insert Caption then splitting it up or using Insert Caption to add the title, hitting Enter then adding the caption. However, when you create your Table of Figures, it either won’t pick up the second line at all or will create two entries in the Table of Figures:

incorrect two line caption and table of figures

How to create a two-line figure caption so the Table of Figures only has one line per figure

This is how you do it correctly. The key is to use the soft line return (Shift+Enter) rather than a hard, paragraph return (Enter).

Place the cursor where you want to insert your caption and go to the References tab, Insert Caption:

Insert caption

Make sure the figure label reads as you want it to (adjust the label to Table, etc.) and then hit OK

Insert caption word

Place the cursor at the end of the figure label and hit Shift+Enter to start a new line:

Adding a new line to your caption word

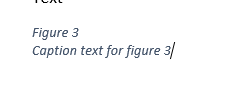
Type in your caption:

word second line of caption

ALTERNATIVELY

Type the whole caption into the Insert Caption box and press OK:

word insert whole caption before splitting

Place the cursor at the start of the caption and press Shift+Enter to move it down to the next line:

4b-split-whole-caption

Now create your Table of Figures using References, Insert Table of Figures and you should have one entry per Figure:

caption with two lines table of figures with one

This article has taught you how to create two-line figure captions which show on one line in your Table of Figures.

If you have found this useful, please comment using the comment box below and/or share using the social media sharing buttons. Thank you!

Other useful posts on this blog

How to create a Table of Contents

Table of Figures and Table of Tables

How to update your Table of Contents, Table of Tables or Table of Figures

Editing and the Table of Contents

 
12 Comments

Posted by on October 26, 2016 in Copyediting, Short cuts, Students, Word, Writing


Tags: , , ,

What questions should I ask my beta readers? #amwriting

Using beta readers is vital for any book, fiction or non-fiction. But you have to use them well and in a focused way, so that you can work with their feedback and make sure your book is the best it can be. Here are some questions you can ask your beta readers (these are based on questions I’ve been asked and questions I’ve asked people about my non-fiction books)

What is a beta reader?

A beta reader is someone you get to test-read your book before it goes through the final stages towards publication. You can have several rounds of beta readers, of course, but they generally come somewhere before your final rewrite and edit:

  1. Plan
  2. First draft
  3. Second draft
  4. BETA READERS
  5. Third draft
  6. Edit
  7. Fourth draft and preparation for publishing (layout artist)
  8. Proofread
  9. Publish

Note: You might have a substantive edit before or just after the beta readers; if you have one after that stage, it’s an idea to add another beta read in afterwards, which would give you this:

  1. Plan
  2. First draft
  3. Second draft
  4. BETA READERS
  5. Third draft
  6. Substantive edit
  7. Fourth draft
  8. BETA READERS
  9. Fifth draft
  10. Edit
  11. Sixth draft and preparation for publishing (layout artist)
  12. Proofread
  13. Publish

Questions for fiction books

Questions for fiction readers will revolve around plot, character and setting:

What is your very first thought upon reading the first paragraph?

Do the characters seem realistic / attractive / interesting to you?

Did you spot any plot holes or huge errors? (I would ask the beta reader to mark up any small issues along the way)

Did you enjoy the story?

Did the pace of the story flag or go too fast at any point?

What made you want to keep reading?

What did you think of the ending?

What did you think of the setting? Would you have liked more or less description?

Did the characters speak naturally? If not, what could I do to improve this?

What was your favourite bit of the book?

What was your least favourite bit of the book?

If it’s a book in a genre: did this fit the way this genre works? Was there anything that jarred with the usual way this genre works?

Questions for non-fiction books

These questions will be slightly different and will relate to the audience for the book and the information it provides.

What do you think about the way this book is arranged?

What did you think the aim of the book was?  Do you think it achieves that aim? What could help it to achieve that aim (even) better?

Who did you feel the book was aimed at?

Was the book personally useful to you? Can you think of people it would be useful to?

Were any sections unclear or confusing? What could I do to make them better?

Were any sections particularly good? Why do you think that is?

Questions for all beta readers

Some questions are universal:

Would you recommend this book to a friend or contact?

Who do you think this book was written for?

What kind of person would most enjoy this book?

I hope you’ve found this post interesting and/or helpful. Maybe you’re a beta reader and this has helped you to do that job! Do share any other questions you ask or have been asked in the comments so this can build into the most useful resource possible – and please share using the buttons below, too! Thank you!

 
10 Comments

Posted by on October 19, 2016 in Reading, Writing


Tags:

How do I include quotations in my document? Should I change their language and spelling?

How do I include quotations in my document? Should I change their language and spelling?

Thank you to Vedrana Vojkvić for suggesting this topic to me via Twitter. She asked me for my input on a question she was discussing: what do we do if we are following UK spelling conventions and there’s a direct quotation that follows US spelling conventions? She also introduced the idea of [sic], asking to clarify that that is used only for actual errors in quotations, not just to highlight use of a different variety of English.

How do I include quotations in American English in my British English document?

This, of course, works both ways. If you are following US spelling and grammar conventions in your document and you need to quote something from a British English source, or you’re writing UK English and want to quote from an American source, should you change the spelling in your quotation to match the standard you are using in your main text?

Short answer: no.

Quotations are quotations from the original text. They should be quoted as they are, in the original.

When can I change a quotation?

There are a few occasions when you can and should change a quotation.

Note: every change you make to a quotation should be placed in [square brackets] to make sure it is clear that you have made the change.

  1. To make the grammar match the sentence in which the quotation is included. For example, you might write this: “Smith (2013) instructs the runner to ‘[go] with the flow, not setting off too fast’ (33), which is good advice,” where the original quotation ran, “A good runner goes with the flow, not setting off too fast”.
  2. When you need to explain something: “Smith (2013: 43) further states, ‘Those people [the running club members] can be very supportive’ in her seminal work.”
  3. When you need to cut text from the original quotation: “In this long passage, Smith (2012: 33) tells us to, ‘Watch out for your own over-excitement […] you must rein things in’.”
  4. If the quotations are in very archaic English and you have updated them into modern English OR the person you are quoting had a very individual use of punctuation or spelling and you have regularised it – in this case, you MUST state that you have done this in your introduction or a “Note about the quotations” at the beginning of your document. I would prefer to add modern English versions after the original in the first example and leave the quotations in the original in the second example.
  5. If you have translated the quotations out of their original language yourself – in this case, make sure to make a note of this in your introduction or a “Note about the quotations,” and if you have only translated some of the quotations, put a note [translated by the researcher] after those you have translated.

If you choose to emphasise something in the quotation that was not emphasised in the original, you must say that you have done this: “Smith says, ‘Everyone can run at their own speed and should not be pushed too far’ [emphasis added by the researcher].” (If the emphasis appears in the original, it’s good practice to add [emphasis in the original] after the quotation instead, to make that clear.)

When can I use [sic] in a quotation?

Almost never! I think that’s one for another article … However, to answer the original question, you would not need to use [sic] when quoting in one language (variety) in a text that is in another language (variety).

The golden rule of including quotations in your text

Always, always, always reference them fully so the reader can go and find them in the original!

This article has discussed how to insert quotations into a text, including what to do if they are in a different variety of English, whether you should change the spellings of quotations and when it is acceptable to change a quotation.

If you have enjoyed this article and/or found it useful, please do add a comment and/or share using the buttons below. Thank you!


Tags: , , ,

Why are my tracked changes altering their colour when I save in Word 2010, 2013 and 2016

We’ve already learned what Track Changes is, why we use it and where to find it, and how to customise Track Changes to suit our own preferences and learned how to work with a document that has Tracked Changes.

This article explains what to do when your tracked changes alter their colour when you press the Save button. It’s weird, it can be annoying, and your initials might disappear, too, which can be confusing if more than one person is commenting on the text.

Screen shots are from Word 2013.

Has your track changes markup ever changed colour?

This has only happened to me when working with a document that has originated from someone else.

You have made lots of changes in a document, and they show up in red, as normal (or whatever colour you have set for your corrections), but when you save, yours go into blue and your initials disappear. This might also happen if you’re working on a document which already includes someone else’s tracked changes: yours show in a different colour to theirs until you press Save. Then they’re all blue (or whatever colour the first person’s were).

What is happening here?

The original owner of the document has specified that the personal information of whoever is working on the document will be removed when they Save the document.

How to check whether your personal information is being removed upon Saving the document

To check whether this is the reason for your tracked changes changing colour, follow these steps.

Go to File (the extreme left tab in Word) and Options:

word options for checking trust center

Clicking on Options will give you this Word Options menu; choose Trust Center:

accessing the trust center in word

Click on Trust Center and then go into Trust Center Settings by clicking the button at the bottom right:

Trust Center in word

Once in the Trust Center Settings, you need to go into Privacy Options (it will default to Macro Settings):

Privacy settings in trust center in word

…. and once you have accessed Privacy Options, you will see that Remove personal information from file properties on save is ticked, which means that when you save, all references to your name are removed from both track changes and the properties of the file itself:

remove personal identification on save in word

Now, at this point, this can be “unticked” so that your changes stay in your colour (in your own view, only, of course) and with your initials (everywhere). But do stop to think: did the person who created the document do this on purpose? It’s quite a lot of clicks to make by accident, so I do tend to check this, see why it’s happening and then leave it as it is. I might change it so I can see my own changes then make a note to change it back before my final save, but in general, I leave it.

Why might someone choose to remove personal information in a document?

I’m not entirely sure that I have an answer to this. Maybe they have edited the document and don’t want their end client to be confused by lots of different names on the file. Maybe they’re a student who wants to make sure no one else’s name is on the file. I do tend to assume they have a reason, and respect that.

But this is how and why the tracked changes colour sometimes changes when you save your document.


This article has taught you how to work with a document that has been marked up using Track Changes where the colour of the track changes alters. You can read more about what Track Changes is and why we use it, how to work with a document including tracked changes and how to customise Track Changes.

If you have found this article useful, please share or “like” it using the buttons below, or leave me a comment to tell me what you think. Thank you!

This is part of my series on how to avoid time-consuming “short cuts” and use Word in the right way to maximise your time and improve the look of your documents.

Please note, these hints work with versions of Microsoft Word currently in use – Word 2010, 2013 and 2016 all for PC. Mac compatible versions of Word should have similar options. Always save a copy of your document before manipulating it. I bear no responsibility for any pickles you might get yourself into!

Relevant articles on this website

Track changes 1 – why use it, where can you find it, what can you do with it?

Track changes 2 – customising Track Changes

Track changes 3 – working with a document with tracked changes

How do I accept one reviewer’s changes?


9 Comments

Posted by on October 5, 2016 in Copyediting, Errors, New skills, Short cuts, Word, Writing


Tags: , , , ,