In this article we will learn about assigning shortcut keys or keyboard shortcuts or short-cuts in Word 2010, 2013 and 2016 for PC. Please note that these instructions are for these versions of Word and might not work in the same way on a Mac or in an older version of Word.
What is a keyboard shortcut or shortcut key?
A keyboard shortcut allows you to use the keys on your keyboard to do tasks that you might normally need to use your mouse for, or which are buried deep in layers of menus. Click a couple of buttons and you have done what you wanted to do.
What is the purpose of assigning shortcut keys?
The clue is in the word “shortcut”. Assigning a keystroke or two to carry out common tasks will save time and is also used by people who need to use the mouse less, for example if they suffer from or are prone to RSI.
Are some actions in Word covered by shortcut keys anyway?
Yes, some actions in Word are already doable by using keyboard shortcuts. For example, you can copy text by pressing Control and C at the same time, or paste it somewhere using Control and V. You can also look for text pretty well anywhere there’s text by using Control and F together.
What we’re talking about here is assigning a new shortcut key to an activity that doesn’t already have one – or assigning a new key to a different shortcut.
How do I assign or change keyboard shortcuts?
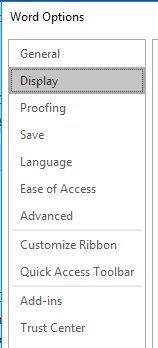
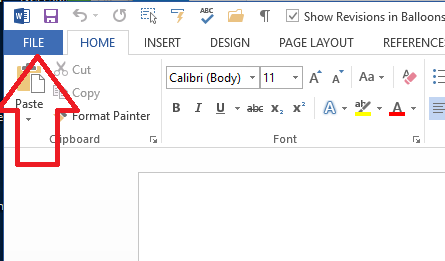
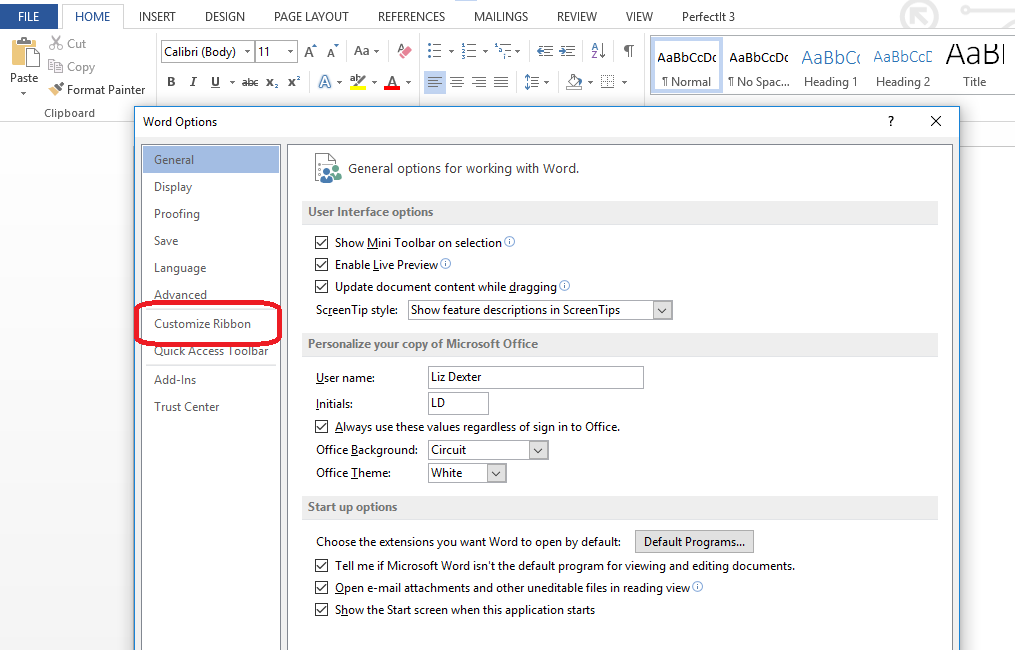
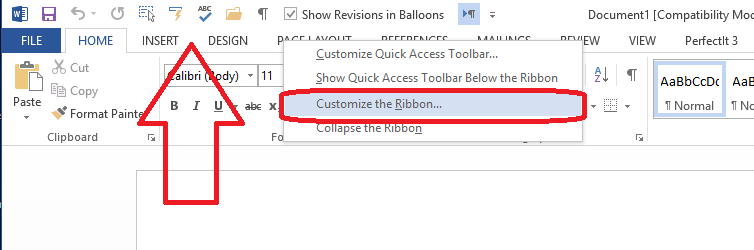
To assign or change keyboard shortcuts or shortcut keys, you need to access the Customize Ribbon menu.
In brief, you can use one of these two paths:
- File – Word Options – Customize Ribbon
- Right-click on the tabs in the Ribbon – select Customize Ribbon
See this article for screenshots and more detail.
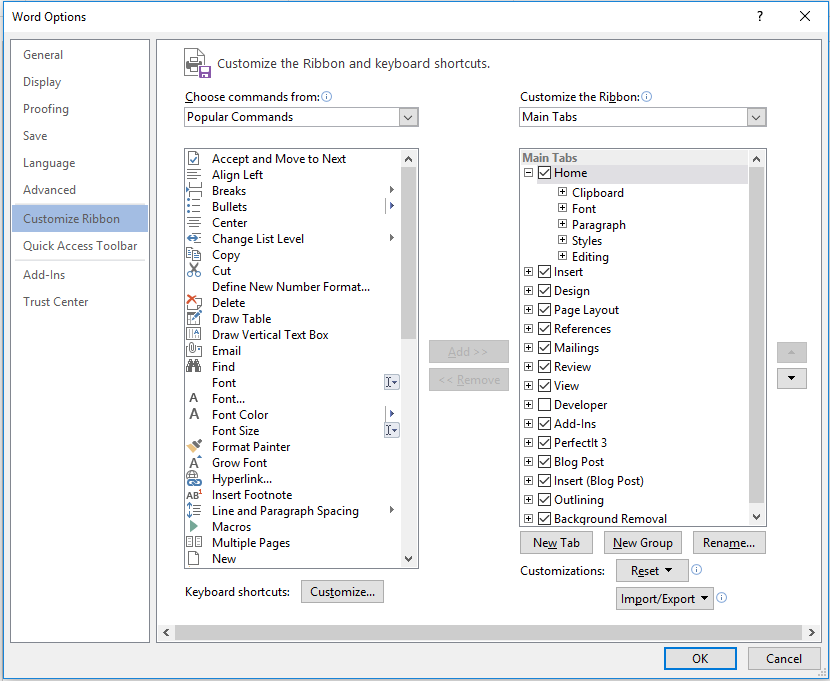
Once you’ve followed the trail to the Customize Ribbon dialogue box, you should be here:
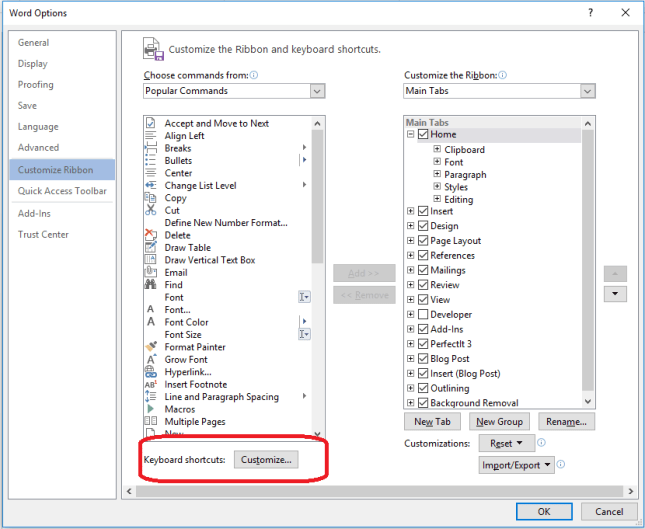
Now click on Keyboard shortcuts: Customize.
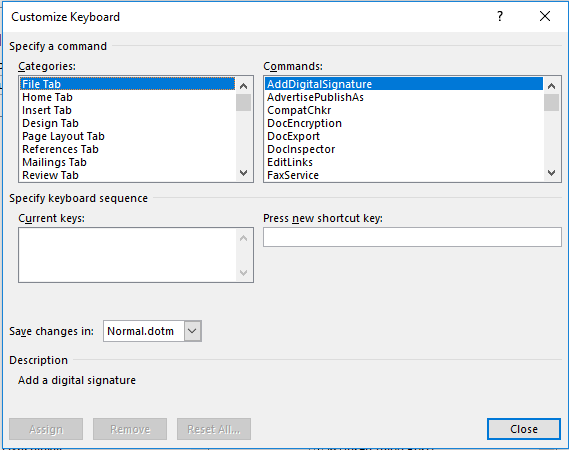
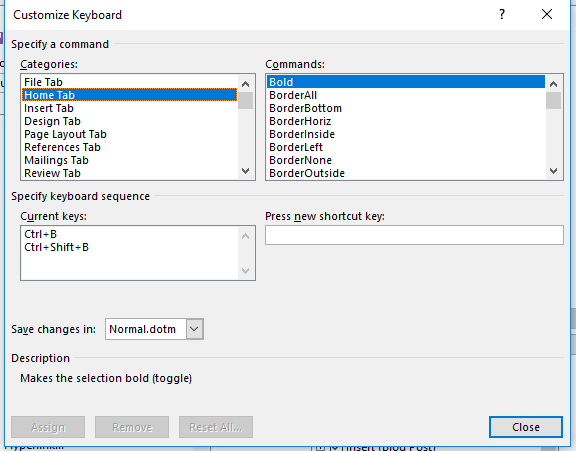
The Customize Keyboard menu
This looks a bit weird at first. Basically, in the left-hand box you will find all of the tabs (and a few more) that you see in your Word ribbon. In the right-hand box, you will find all of the commands or actions associated with that tab. So when you first go into this menu, you’ll see the File Tab and a load of things you probably don’t normally do:

However, if you move to the Home Tab (by clicking on it) you will see some more familiar items – and note that they’re in alphabetical order.
Here you can see under Current keys that Bold has the shortcut keys Ctrl+B and Ctrl+Shift+B, which means that you can hold down Control and the b key at the same time, or Control and Shift and the b at the same time to make the text that’s highlighted or the next text you type bold. You might have known how to do that already: here is where that shortcut can be set, removed or changed.

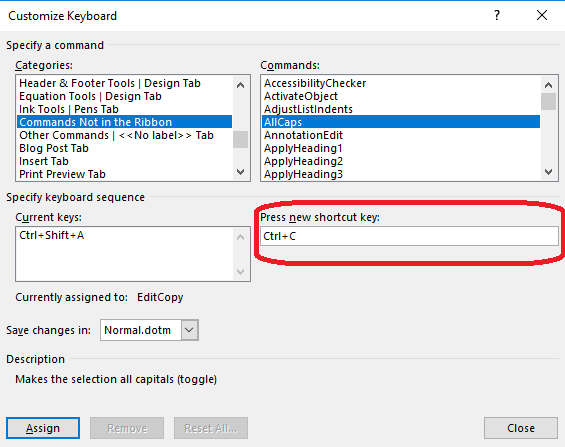
If you scroll down the list of tabs, headed Categories, you will find one called Commands Not in the Ribbon which is a useful list.
Let’s say I wanted to change the shortcut for AllCaps (i.e. to change the highlighted text or next text I type to be ALL IN CAPITALS).
I click on the AllCaps Command and then press the new shortcut key I want to assign to that – in this case I’ve chosen Ctrl+C – so I hit those keys and Ctrl+C gets added into the box under Press new shortcut key:
What if the shortcut key I want to use has already been assigned?
Here we can see that Ctrl+C is already assigned to EditCopy. If I assign Ctrl+C to AllCaps, it will then move over from EditCopy to AllCaps and will no longer be available for EditCopy.
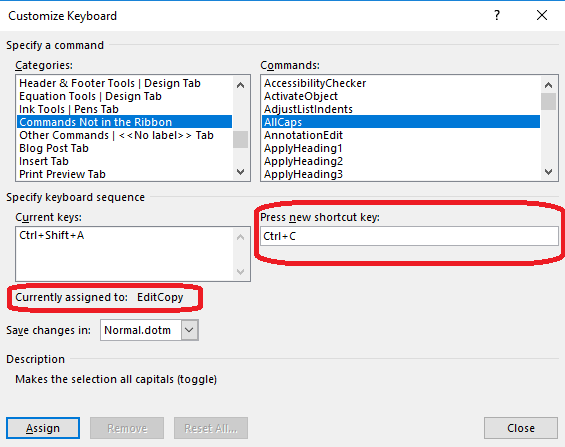
Of course, this might not matter, if the other command is one you don’t use anyway. If you want to assign this shortcut, go ahead and press Assign. The shortcut will move into the Current keys section.
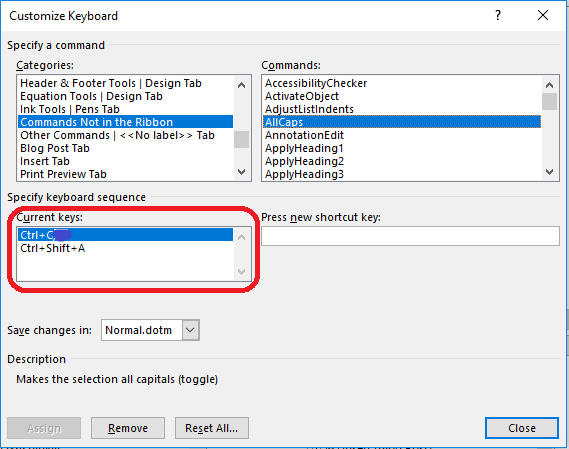
How do I remove or cancel a keyboard shortcut?
If you want to remove the keyboard shortcut you’ve just created, or one that you keep hitting by accident, highlight the one you want to remove and press the Remove button beneath it. Note: if you’ve reassigned a shortcut key and want to put it back to how it was, you will need to find its original command and add it back in there.
How do I save my keyboard shortcuts?
When you’ve assigned your shortcuts, press the Close button on the Customize Keyboard menu and the OK button on the Customize Ribbon menu.
Note: you can save changes in a new template, if you want to keep your standard Word template as it is. Drop down the Save changes in: list to do that.
In this article I’ve explained how to assign and remove keyboard shortcuts or shortcut keys to give a short cut that will save your mouse hand. If you’ve enjoyed this article and found it useful, please share using the sharing buttons below, or comment if you’ve searched for it and used it and I’ve helped you. Thank you!
Related articles on this blog
How to customise the Quick Access Toolbar
How do I customise the Word Ribbon?


Here’s a problem: when I add comments to a Word document don’t show my picture by them although I’m signed in to my Microsoft account. This article explains how to make sure that your personal picture appears in your Word Comments (in Word 2013 and going forward to 2016 and beyond, for PC). If your picture has disappeared from your Word comments, it tells you how to get it back. If you don’t want to see your picture in Word comments, it tells you how to remove it.
I always try to be responsive to my commenters (see this post on comments for why!) and so I’m writing this post as a direct consequence of a comment I received on one of my articles about comment boxes in Word.
The basic problem is this: you can have your image appear next to your comments in Word. Because Word 2013 and beyond are designed largely to be used with an active subscription account with Microsoft, it can pull details from your Microsoft account through to the software to enhance your user experience.
Why would you want your image next to your comments?
I’m going to repeat the comment here (with many thanks to commenter and correspondent Lark Lands) so you can see what the problem is and why it’s important:
So this comment writer uses the picture to scan down and find their own comments.
Please remember the golden rule of Track Changes and Comments here, however: how you choose to display your Word document comments and changes has no effect on what your client sees. So you can add your picture to your own view, but don’t expect this to carry through to your client’s or collaborator’s view of the document.
Where is the picture in my comments in Word?
In Word 2013 or 2016, you might see a picture in your comments: it will appear in this position if you have it set up to show pictures:
The arrow is pointing to the placeholder picture (if you’re not logged into your Microsoft account online) or your own picture (if you are logged in)
If you don’t have pictures enabled, your comments will look like this:
How do I add or remove my picture from Word 2013 comments?
The first thing you need to do here is to make sure that you’re logged in to your online Microsoft account. If you don’t do this, the “picture” that appears by your comment will just be a little placeholder symbol and your efforts will be wasted to an extent.
Now you need to make sure boxes are ticked (or unticked) in two places and then do one final but very important process.
1. Set up Track Changes options
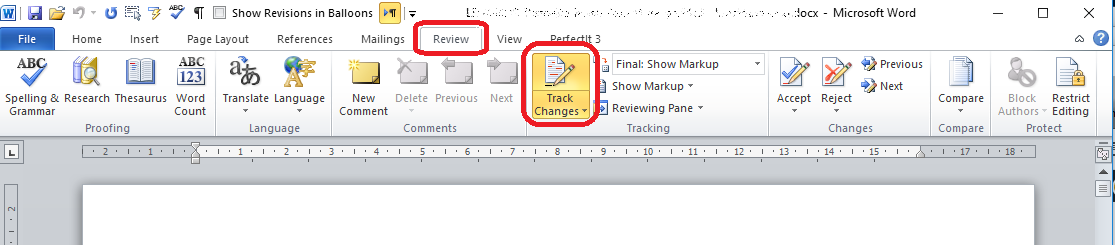
First, set up your Track Changes options to show pictures.
In the Review tab, find the Track Changes area and click on the arrow in the bottom right corner:
When you’ve clicked on the arrow, this dialogue box will appear: make sure that Pictures by Comments is either ticked or unticked, depending on whether you want to see the pictures or not:
Click OK and the first part of the process is done.
2. Check your Word Options are appropriate
Now you need to go into Word Options and make sure that your picture displays whether or not you are logged in to your Microsoft account (you should be logged in when you do this)
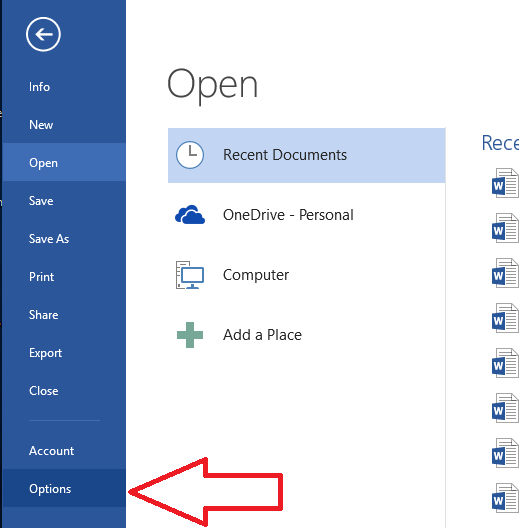
Go into Word Options using the File tab …
… and then choosing Options
The Word Options dialogue box will appear. Make sure that Always use these values regardless of sign in to Office is NOT ticked (even though this seems counter-intuitive):
Click on OK and process 2 is complete.
3. Restart your computer (do not ignore this one)
After an amount of correspondence on this topic, my original comment poster noted that they hadn’t fully restarted their computer. It’s not enough to restart Word – you need to restart Windows.
So, restart your computer and now your picture should appear or not appear as you wish.
This article has told you what to do if your picture does not appear next to your comments in Word 2013 or you want to add or remove your picture from Word comments.
Please do click the share buttons or comment if you’ve found this article interesting and/or useful.
Other relevant articles on this blog
Customising comment boxes in Word
What to do if your comment boxes go tiny in Word
What to do if your comment boxes start running from right to left
Changing the language in your comment balloons
Customising Track Changes