This article explains how to access the Customize Ribbon menu, from where you can customise your ribbon. This will link in to posts on customising the ribbon and assigning keyboard short-cuts.
This information applies to Word 2010, 2013 and 2016 for PC.
What is the ribbon in Word?
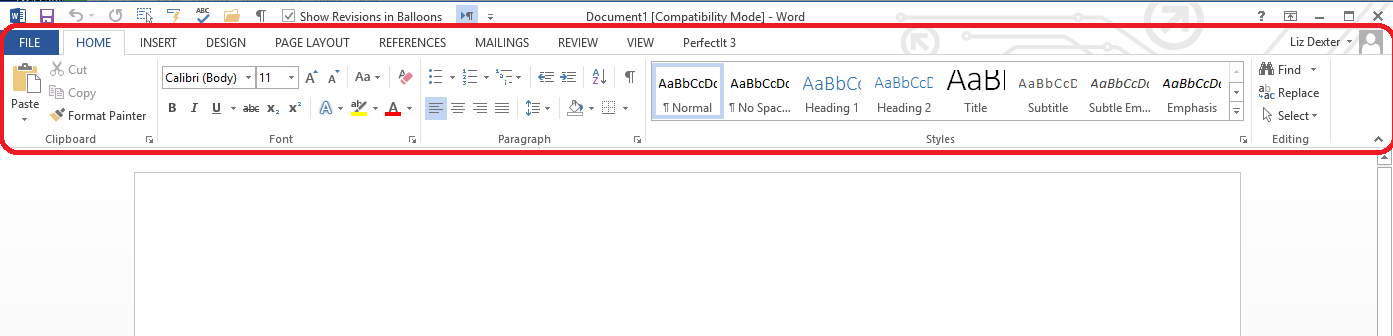
The ribbon is the set of menus found at the top of your screen in Word which allow you to do all sorts of things, from changing the font to merging documents and adding tables. You can use short-cut keys for some commands, and I’ll explain that in another article. You might call it a toolbar, too. Here it is:
Why would I want to customise the ribbon in Word?
The ribbon in Word is filled with things Microsoft thinks you will want to use, in places it thinks you will look for them. But you might well want to customise it to add your own favourite short-cuts and commands. Or you might want to remove a particular tab altogether, and Word allows you to do this.
How do I find the customize ribbon menu?
There are (of course) two ways to get to the dialogue box where you customise the ribbon.
The first way uses the File tab, the second uses a right-click.
Using the file tab:
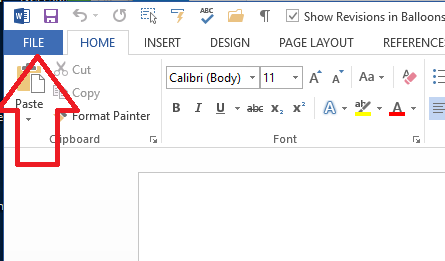
Navigate to the Word Options menu:
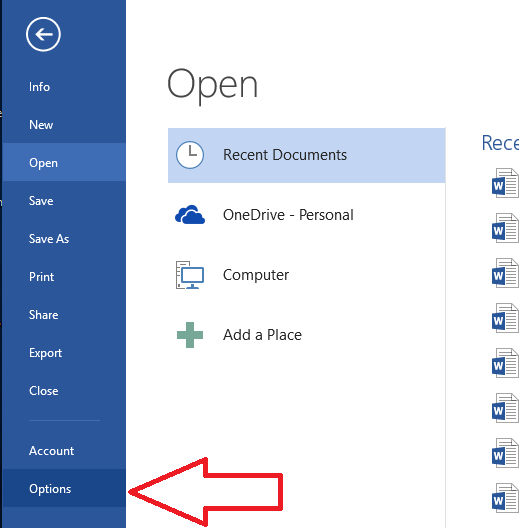
And once in Options, select Customize Ribbon:
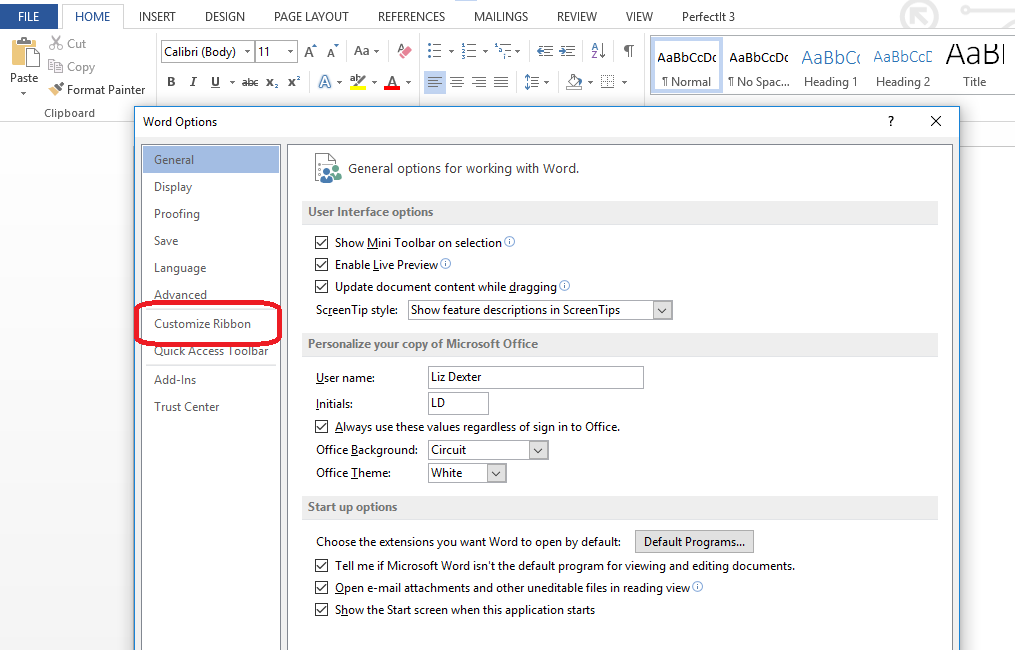
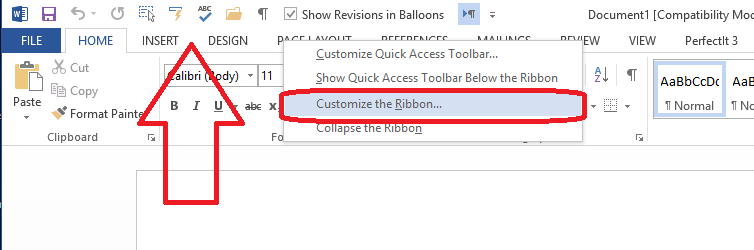
The alternative way is to right-click anywhere on the tabs in the ribbon and then select Customize Ribbon:
How do I customise the Word ribbon?
Following either of the routes described above, you should come to this menu:
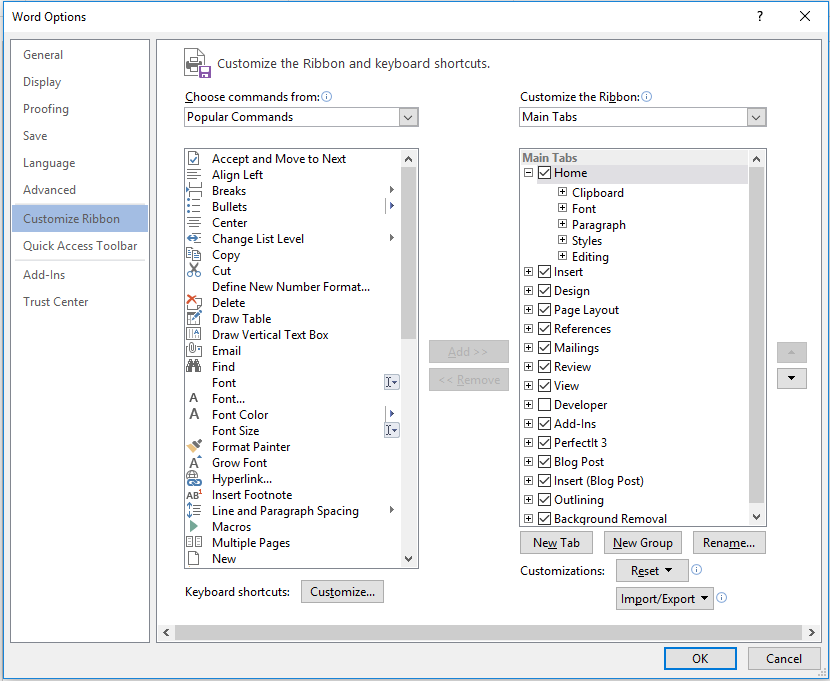
On the left-hand side, you can see a list of commands, and on the right-hand side you can see a representation of the tabs you have in Word at the moment.
Here are some things you can do:

- Add an item to the Word ribbon (see above) – highlight the item you want to add, highlight where you want it to go, and click the Add button in the middle
- Remove an item from the Word ribbon – find the item you want to remove by expanding all the menus on the left, highlight it and click the Remove button
- Create a new tab – maybe you want to make a tab that only contains commands you use a lot – you can use the New Tab button on the left to create a new tab, then add items to it (an item can be in more than one tab)
- Rename your tabs – rename them to whatever you want!
Don’t forget to click OK before you exit from this menu – or Cancel if you don’t want to change anything after all.
In practice, I wonder how many people do much customisation – do let me know in the comments if you’ve either customised your ribbon already or have followed these instructions to do so.
This article has shown you how to find the customize ribbon menu, why you might want to customise the ribbon in Word, and how to do it.
Related articles on this blog
How to customise the Quick Access Toolbar


The Story Reading Ape
March 29, 2017 at 10:17 am
Reblogged this on Chris The Story Reading Ape's Blog.
LikeLike
Kate McClelland
March 30, 2017 at 10:26 pm
Reblogged this on Kate McClelland.
LikeLike