Today I’m going to share with you how to turn off notifications for a single Facebook post, and control what you see and when.
Use these instructions if Facebook usually notifies you with an email when there’s a new comment on a post by somebody.
Why would I want to turn off notifications on a Facebook post?
Sometimes you want to post a comment on a Facebook post but you don’t want to see all of the replies and comments that come after it. Why might this be? Here are some examples …
- Your friend has had a good (or bad) event in their life and posted about it, and you want to post a message of congratulations or support but you know about a million other people are going to post a similar comment and you don’t want lots of emails flooding your mailbox.
- You’ve entered a competition by commenting on a business’s post but you don’t want to see all the other entries.
- You’ve commented on a news item someone’s shared but it’s quite upsetting and you don’t want to be reminded of it every time someone else comments.
These instructions work for posts in either your main timeline or a Facebook group, but they look slightly different so I’ve broken it down into two sections.
So, how do I prevent Facebook from emailing me every time there’s a comment, if I don’t want to change my whole Facebook alerts settings?
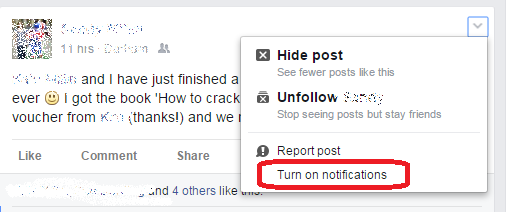
How do I turn off Facebook notifications in a post on my timeline?
If you want to keep a post available in your timeline (i.e. you don’t want to hide it) but you don’t want to get notifications of further comments on the post once you’ve commented, here is how to Stop notifications.
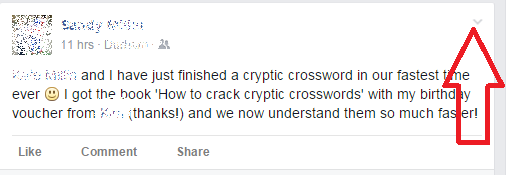
First, find and press the little down-arrow in the top right-hand corner of the post:

This will give you a menu of things you can do:
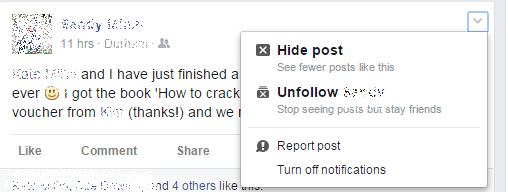
You can see here that you can also Hide the post or unfollow the person who posted it. But we want to click on Turn off notifications at the bottom of the list.
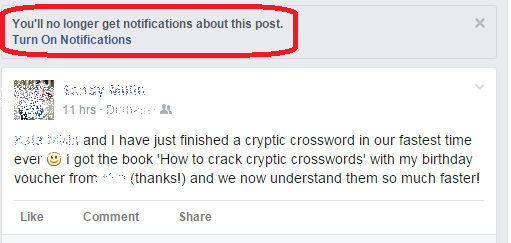
Now Facebook will confirm what you’ve done:

This is useful, as you can click Turn On Notifications if you did this by mistake.
If you want to turn your notifications back on at any time (so that you receive an email every time someone else comments), go and find the post, click on the down-arrow and choose Turn on notifications:

Now you will receive an email every time someone comments on the post.
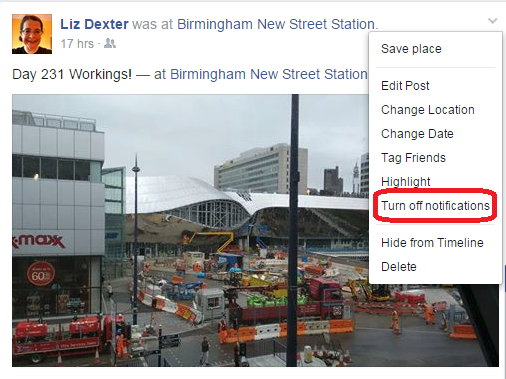
How do I turn off Facebook notifications on my own post?
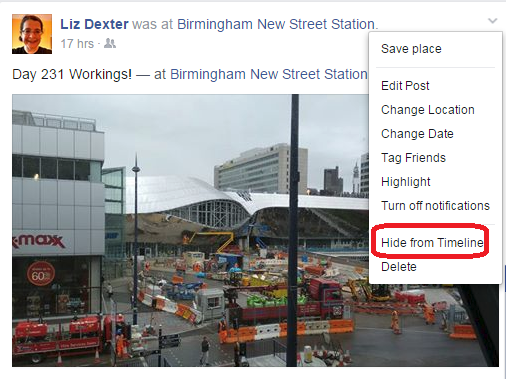
Of course this is slightly different – if you want to turn off notifications on one of your own posts, you get more options when you click that down-arrow:

How do I turn off Facebook notifications in a Group?
If you are a member of a Facebook Group but choose not to have it come up in your timeline (for example, if you’re in a photo-a-day group and would end up with 80 posts a day in your Facebook timeline), there’s a slightly different way to turn off notifications.
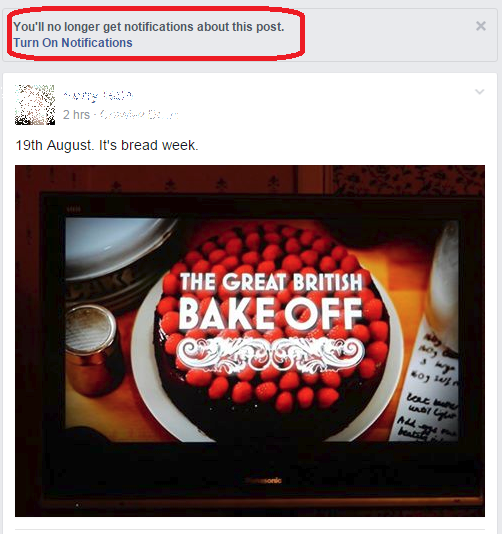
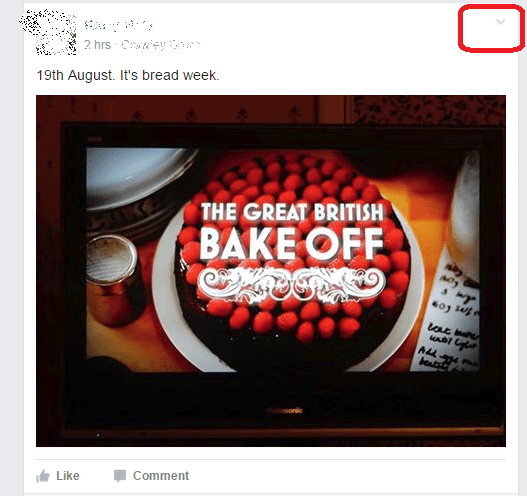
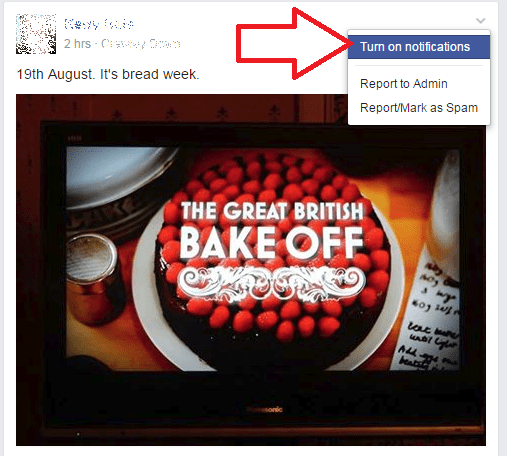
In this example, a friend has posted about the Great British Bake-Off and another friend has mentioned, and tagged me in their comment, that I haven’t seen it yet and will be watching it tomorrow. I don’t want to see any more comments in case someone lets slip who’s left the competition.
Click on the little down-arrow in the top right corner of the post …
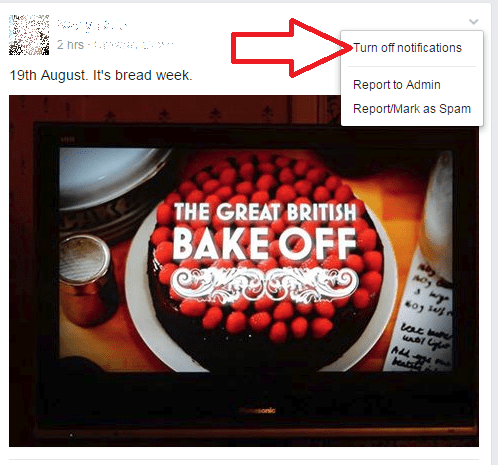
This will bring up a menu. Here you can also report a post as spam if you need to – but we’re going to concentrate on turning off the notifications. You do that by clicking on Turn off notifications:
Once you’ve done that, you’ll see a message above the post telling you that you will no longer get notifications about this post. This means that whenever anyone comments on the post, you won’t get an email telling you that this has happened.
Note that you will also see a clickable link allowing you to Turn On Notifications – which is very useful if you’ve done this by accident. You can click Turn On Notifications to make sure you still get comments emailed to you:

If you want to turn notifications back on for a post, go and find the post (you haven’t hidden it, so it will still be in your timeline or the group it was posted in). Click on the down-arrow again and choose Turn on notifications:
Now you will receive an email every time someone comments on the post.
This post has shown you how to turn off notifications in your Facebook timeline, on your own posts and in Groups. You can find more on social media in the Resource Guide or by using the Search box in the right-hand column.
If you’ve found this post useful, please share it using the buttons underneath!