RSS

Monthly Archives: April 2014

WordPress 8 – setting a static Home page

This post and the next one will walk you through setting a static Home page for your WordPress blog or website, and then creating a Menu item to allow people to access your blog posts.

Why would I want to set a static Home or landing page?

If you’re writing a blog, the content will update regularly, and the first page that any viewer will come across by default will be your latest blog post. This may not necessarily get across who you are and what the blog / website is for – especially if you’re using it to publicise a company, books, products or whatever else, rather than just using it as a private diary.

We’ve already learned how to add pages to a blog, It’s generally considered a good idea to have a single “static” (i.e. unchanging) page for people to “land on” when they type in your URL or search for your website. For example, the Home page for this website is the one you will reach if you type http://www.libroediting.com into your address line or search for Libroediting.

How do I set a static page to be my landing page?

As I mentioned above, by default, WordPress will show visitors to your page your latest blog post. For example, if I enter the URL http://www.lyzzybee.wordpress.com, the first thing that I will encounter is the latest blog post on my blog. It’s particularly important in this case NOT to have this showing first, as I only post test and illustrative messages on this blog!

default WordPress view - blog posts

Instead of this long list of blog posts, I want to display a static page when people visit the site (remember – pages are static, unchanging pages like you find on any website; posts are constantly updating, dated diary entries).

Let’s remind ourselves of how to view what pages we have set up. In the Dashboard, select Pages then All Pages:

Pages menu in WordPress

Now you will be able to have a look at what pages you have set up. In this case, I’ve just got one page, called “About”. I might want to set up a Home page in the future, as I have on the blog you’re reading right now, but for now, I know I’ve got at least one page I can use as a landing page.

List of pages

To set one of these pages as the landing or Home page, go into Dashboard, then Settings and Reading:


Setting home screen

Once in the Reading Settings screen, you can choose what the Front page (or landing / home page) displays. Here, the default is currently set, so “Your latest posts” is selected, meaning that the first page your viewers see will be those blog posts.

Setting home screen

Select “A static page”, then drop down the list of pages. In this case, we only have one, but if you have more than one page, a list of all of them will appear here:

Choose a static page

Click on the page you wish to select and then the Save Changes button at the bottom of the screen. When viewing my website now, people will see my About page first of all.

Public view of landing page

But how do people find my blog posts now?

Read my next post for instructions on how to make your blog posts more visible … Don’t panic, though – as you can see on the screenshot above, WordPress defaults to showing your recent posts in the sidebar, so your readers can click there to navigate to your blog.

I hope you’ve found this post useful. Please do share it using the buttons below so that other people can find it and benefit from the instructions! Thank you!

Related posts on this website

You can find all of the social media and blogging posts, including WordPress, in my Resource Guide

Adding pages to WordPress blogs

 
4 Comments

Posted by on April 30, 2014 in Blogging, WordPress


Tags: , ,

How to Set up a WordPress blog 7: Adding your profile picture or avatar

In this post about WordPress I’m going to tell you how to add your image to your blog, so that it appears on your comments and replies to comments. This gives a human face to your blog (if you choose to use an image of a human face, of course!) and makes it nice and tidy and complete.

To add or change your user image, go to the Dashboard and choose Settings then General:

12 setup

The General Settings are where you do things like changing the title and tagline for your blog – and over to the right, you can change your blog picture or icon. Click on Choose File:

14 setup

This will take you into your standard File Explorer, where you can navigate to find the picture file you want to use. Once you’ve clicked on the image and OK, you need to click Upload Image:

15 setup

Once the image has uploaded, you’ll have the opportunity to crop it. The image will be quite small on the page, so it’s important to have your face (or the main part of whatever image you use) filling the little square. Move the dotted lines around the square until you’re happy that you have a big, central image:

16 setup

Then click Crop image and you will return to the main screen. Once there, click on Save Changes:

14.5 setup

You will be shown what your image will look like in various places on your blog. Go Back to blog options anyway, but you can always go back around the loop and change or upload a new picture.

17 setup

This article has told you how to add and update your image on WordPress. If you found it useful, please add a comment and share using the sharing buttons below. Thank you!

Related posts on this blog:

WordPress 1 – the basics

WordPress 2 – adding pages to create a website

WordPress 3 – adding images to your post or page

WordPress 4 – adding slideshows and galleries of images

WordPress 5 – linking your blog to your social media

WordPress 6 – sharing buttons


12 Comments

Posted by on April 24, 2014 in Blogging, WordPress


Tags: , ,

Formally or formerly?

DictionariesOne of my readers, Graham, suggested this troublesome pair – I always l like to receive suggestions of pairs to write about, so do drop me a line if you’ve checked the index first and I haven’t written about your favourite!

Formally is an adverb formed from the adjective formal, and means being done by the rules of convention or etiquette, officially recognised, with a conventional structure, form or set of rules. “He replied formally to her gilt-edged invitation”, “I was dressed formally as it was a high-class event run by the establishment!.

Formerly is an adverb that means in the past; before whatever is being discussed now.

“Formerly, for example in the 19th century, social visits were done much more formally, according to established rules and customs. Now everything is much more relaxed and informal, with people dropping in to see each other without having to leave a card in the hall first.”

You can find more troublesome pairs here and the index to them all so far is here.


Tags: , , ,

How to allow comments on your WordPress blog posts

I recently had a cry for help from a friend: she’d posted her first blog post but it wasn’t letting anyone post comments. I told her about the standard way to allow / disallow commenting on blog posts, but that wasn’t helping, and I ended up rolling up my sleeves and ferreting around in her blog Dashboard myself before discovering the answer to our dilemma. So here I’m going to share the correct way to allow comments, and then the way to change your preferences on individual posts – which I have to say is not obvious.

Please note that this works for WordPress.com blogs and not for self-hosted blggs and their themes – you will need to look at the widgets you can download for that.

How do I allow comments to be made on blog posts?

We all want people to be able to interact and make comments on our blog posts (well, most of us). The way to set this up is in the Dashboard, Settings, Discussion. I’ve talked about this at length in another post, so have a look here if you want all the details, but basically you can choose to allow comments on blog posts here:

18 setup

As I said above, have a look at my basic WordPress article for all of the information about how this page works: for now, just make sure that Allow people to post comments on new articles is ticked.

allow comments

How do I allow / disallow comments to be made on individual blog posts?

So now we know how to allow comments in general. But what if you’ve created a post and people can’t comment on it? Here we have a post with no place to add a reply or a comment:

no comments

I want to encourage people to post comments – so how do I do that? You might think that this is done in the Edit screen for your post. But it isn’t.

To enable or disable comments on an individual post, you need to go to Dashboard, then Posts, then All Posts, until you get this view of all of your posts in a table:

all posts

Now, hover with the cursor over the post that you want to edit – in this case the top one, and a list of options will appear. Click on Quick Edit:

quick edit

Now you will see the Quick Edit screen, where you can change things like tags and categories, the blog title and … the comments. Here the Allow comments box is unticked:

allow comments option

Tick Allow Comments:

allow comments option ticked

Press the Update button. When we view the page, now anyone can add a comment:

comments

This post has sorted out the problem of how to enable comments on an individual blog post. If you found it useful, please do let me know in a comment, and click on the sharing buttons below. You might want to explore the related WordPress articles on this blog, too.

Related posts on this blog:

WordPress 1 – the basics

WordPress 2 – adding pages to create a website

WordPress 3 – adding images to your post or page

WordPress 4 – adding slideshows and galleries of images

WordPress 5 – linking your blog to your social media

WordPress 6 – sharing buttons

 
48 Comments

Posted by on April 16, 2014 in Blogging, WordPress


Tags: , ,

Phase or faze?

DictionariesI find these two words being mixed up quite commonly, and it’s one of those ones that … I won’t say it annoys me, because I try to remain calm and focused on the sense of the writing in the face of errors, but it sometimes makes me a bit tense.

The incorrect usage is always in one direction of the confusion. I’ll show you what I mean …

A phase is a distinct period of time or stage (“we are doing the building work in three phases: foundations, walls and roof, with gaps to raise money in between”) and it has some complicated scientific meanings which are related to this idea of separateness and which we probably don’t need to go into here.* The verb to phase (in/out) means to carry out a process gradually (“We are phasing in the new hires so everybody doesn’t arrive at once”) and is used in those scientific contexts I talk about below.

What phased does not mean is confused or discombobulated.

To faze is to confuse, disturb or discombobulate – so the past tense is fazed. “I was fazed by the information he was bombarding me with and had to take a break”.

Faze – confuse. Phase – time period or other separate thing.

“I was not fazed when the phases of the traffic lights were altered, because I had read the notices and knew it was about to happen.”

*Oh, alright then, if you insist: in physics, it’s the relationship in time between the cycles of a system and a fixed point in time; in chemistry it’s a distinct form of matter that is separate from other forms in terms of its surface; and in zoology, it’s the variations in an animal’s colouring depending on the seasons or genetics.

You can find more troublesome pairs here and the index to them all so far is here.

 
1 Comment

Posted by on April 14, 2014 in Errors, Language use, Troublesome pairs, Writing


Tags: , , ,

Using LinkedIn for your business

Using LinkedIn for your business

LinkedIn is seen primarily as a networking tool for the more corporate end of the market. However, you can set up your own business page on LinkedIn now, and there is a lot more interactivity and ‘social’ activity than there used to be – or than you might think.

Setting up a LinkedIn profile

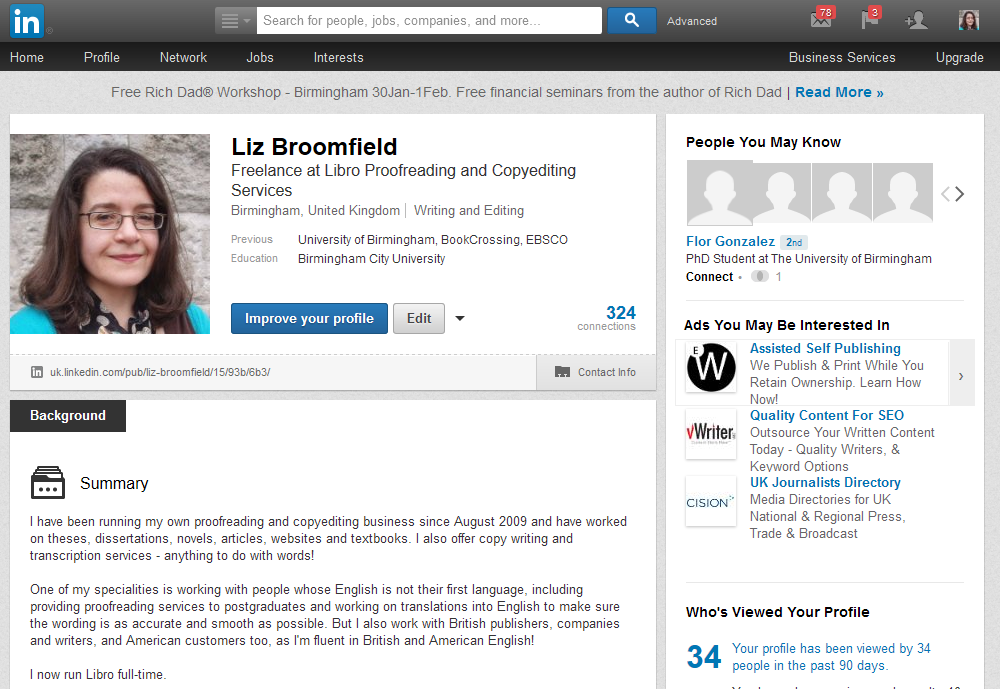
Once on www.linkedin.com you can join up and set up your profile.

1 profile

It’s a good idea to include as much information as you can on here – and in a professional way. While it’s never a good idea to allow typos and grammatical errors on any professional profile, it’s vitally important here, as people tend to make more of an effort, and so any errors will be very glaring.

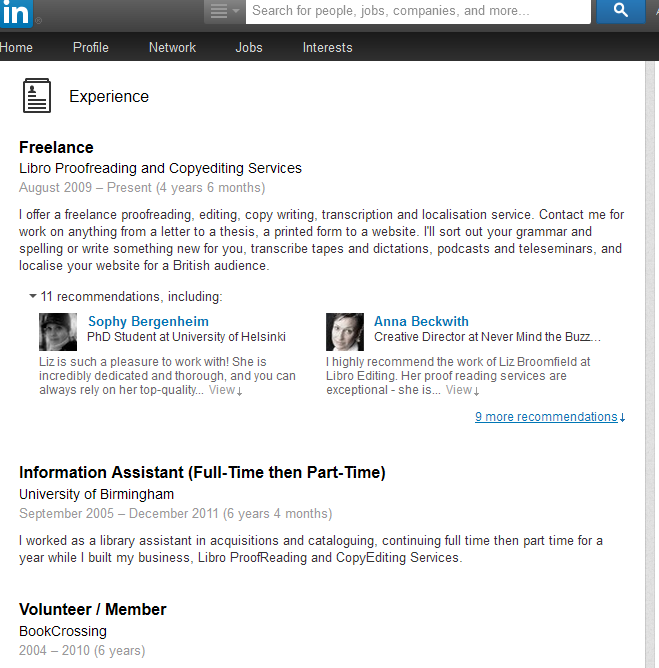
There are various sections to fill in on the profile; including past jobs allows your ‘network’ to grow, as LinkedIn, unlike other social media, will not let you even request to connect to just anyone. For example, I’ve added my experience in here:

2 profile

… and I’ve added information about the books I’ve written in the Publications section:

3 profile

Find your way around LinkedIn

Your home page will contain a feed a little like your Facebook timeline, with updates from people to whom you’re linked. To find people to link to, you can search in the search box at the top of the screen. Once you’re linked to someone, they will appear in your Connections list, which you can access by clicking the [number] connections icon to the bottom right of your profile picture area.

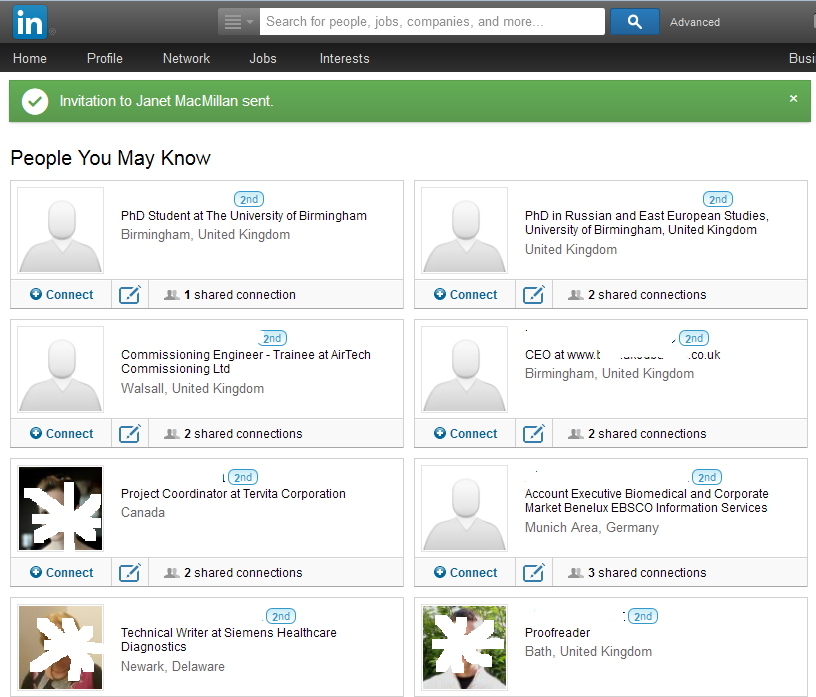
Your profile also includes a link to People You May Know. This will give you people in networks connected to you by other connections, workplaces or interest groups to whom you might want to link.

4 connections

Click on People you may know and you’ll be given a list of possible connections (I’ve blanked out names and obscured photographs because this is my own LinkedIn profile):

10 people you may know

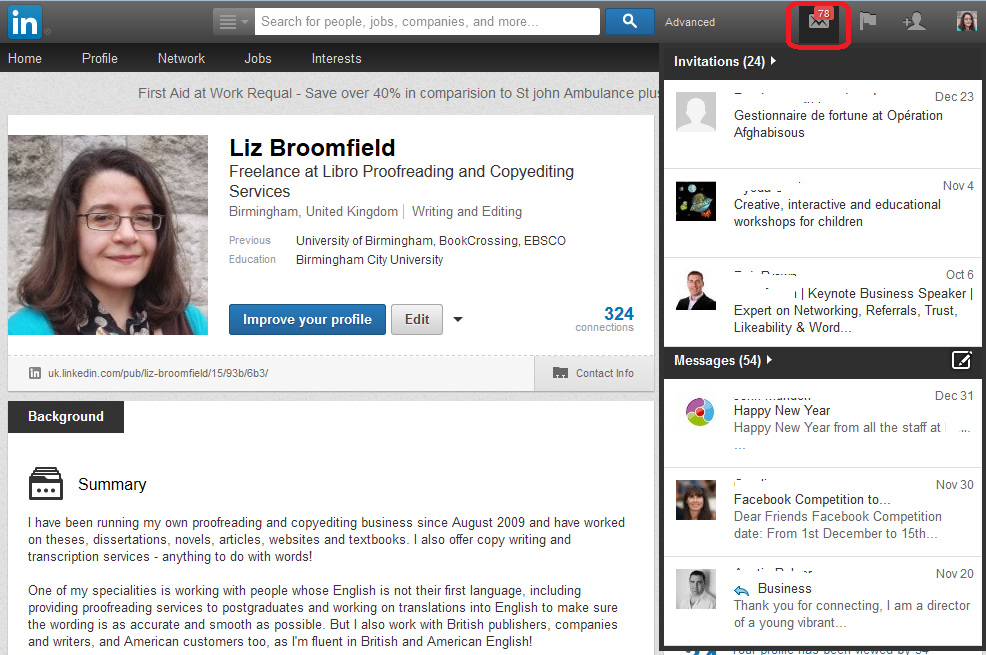
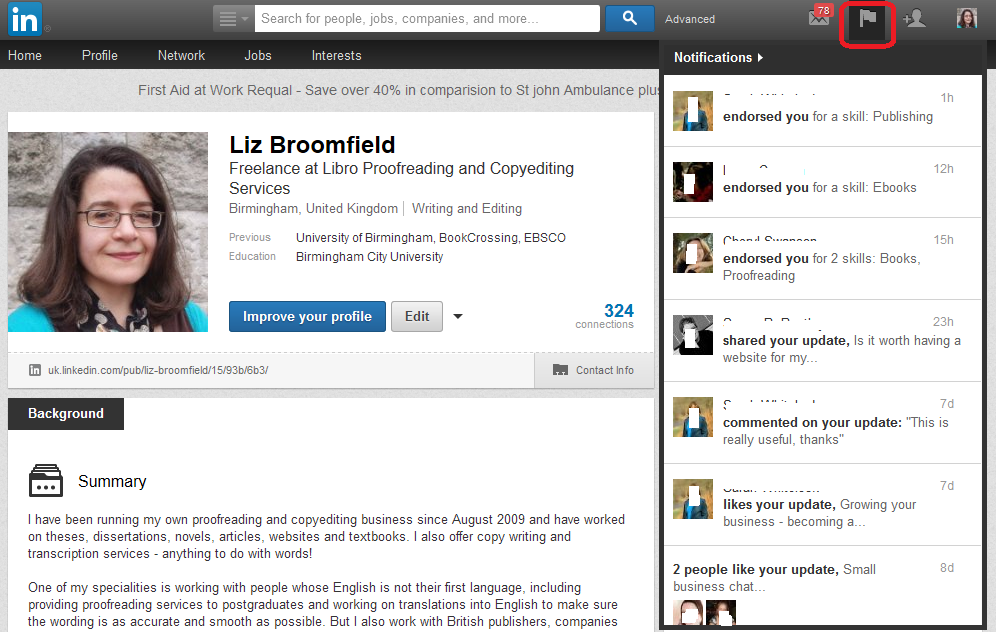
You can see your invitations and notifications at the top right.

Invitations allow you to see who has invited you to connect and any messages they’ve sent you via LinkedIn:

11invitations

Notifications show you who has liked your updates or shared your profile:

12 notifications

Linking to people on LinkedIn

LinkedIn is different from other social media networks, in that you have to have a tangible connection to a person in order to ‘Link’ to them. If you find someone you want to link to and press Connect, you’ll be asked how you know that person. If you say that they’re a colleague, or that you’ve done business with them, you’ll be asked which of your jobs they are a colleague from – that’s why it’s important to list all of the companies that you have worked for on your profile. If you say that they’re a friend, you’ll be asked to prove you know them by providing their email address.

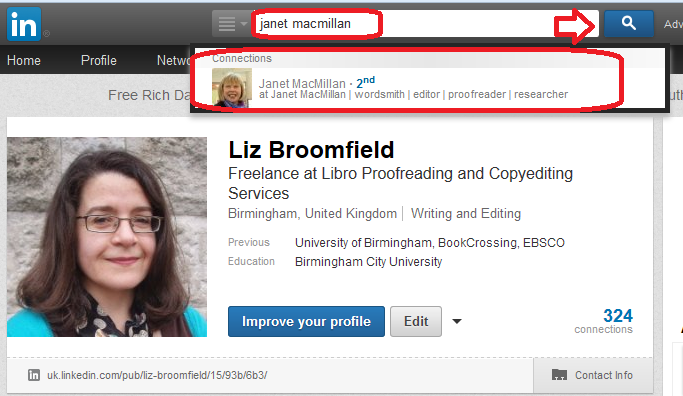
You can find people just outside your network by clicking on the People You May Know link. This will give you a list of either friends of friends or people who have said that they work or have worked at the same organisations that you’ve worked at. You can connect to these people in the same way. You can also search for people using the search box at the top of the screen (Note; I asked Janet’s permission to use her profile in these images):

5 search

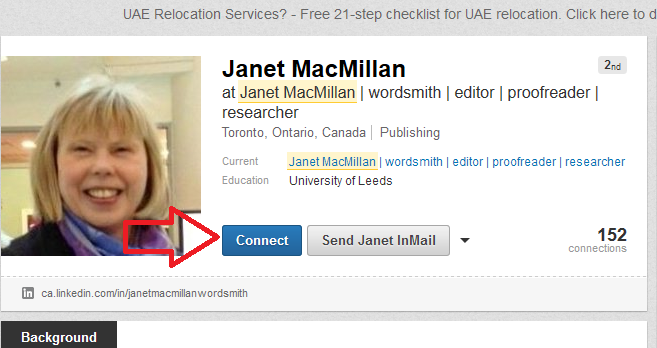
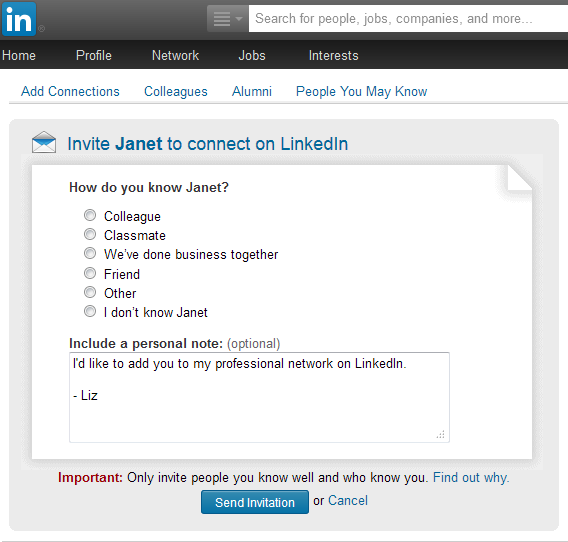
However you access them, click on the person’s name to see their profile and then use the Connect button to ask them to link to you:

6 connect

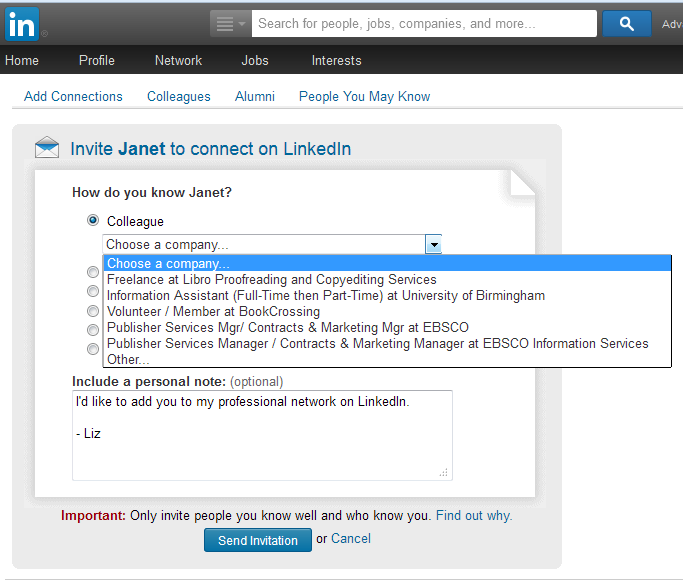
It will then ask you how you know that person: when you click on one of the radio buttons, you will be asked for more detail.

7 connect

Here, I’ve clicked Colleague, so then it will ask me which company that I’ve worked at relates to this:

8 connect

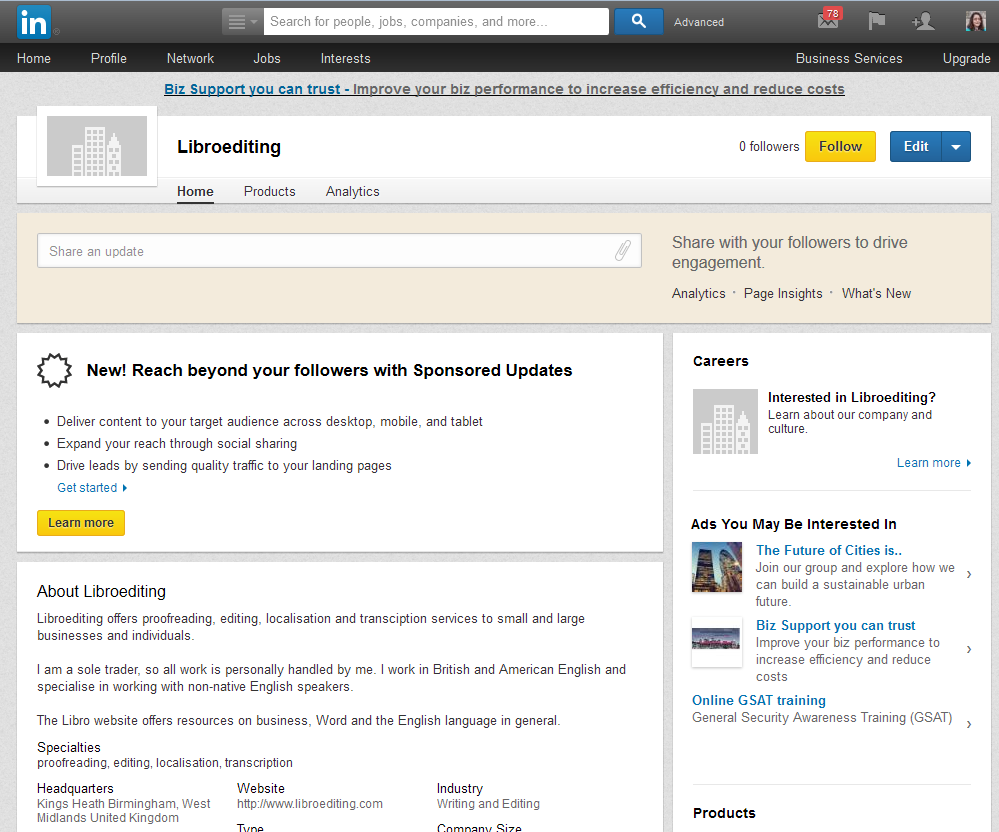
Setting up a company page

You can set up a company page on LinkedIn for your business – this will give people another way to find you and will provide another link to your website and other social media.

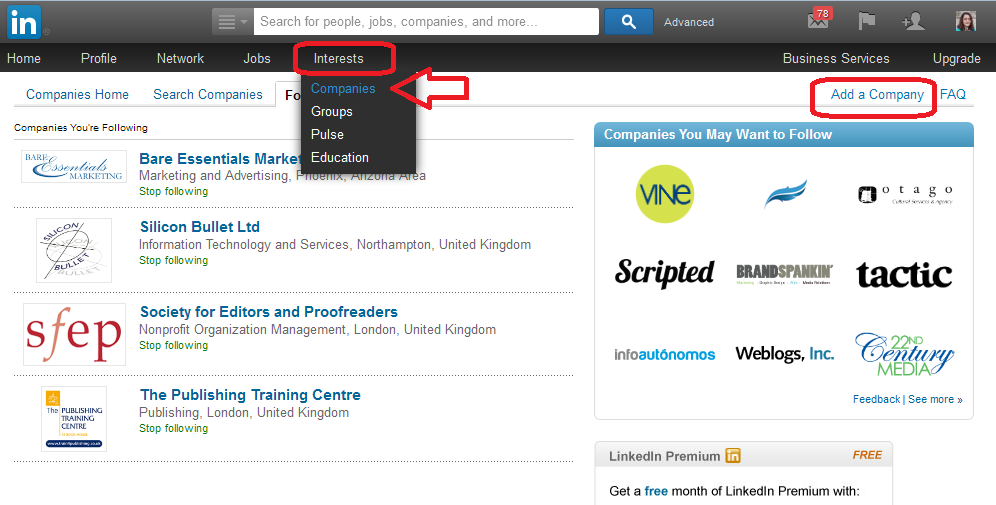
To set up a company page, click on Interests at the top, then Companies from the drop-down.

13 add a companyAt the top right of the next page you’ll find a link for Add Company.

14 add a company
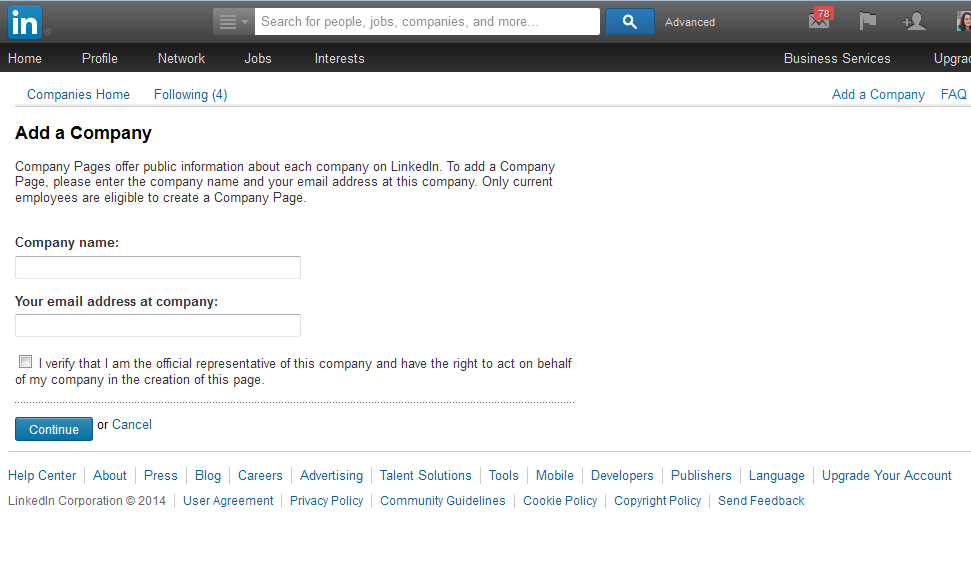
You will first need to confirm that you’re eligible to create and moderate this page, so there will be an email sent to you to confirm, and you must have a personal LinkedIn account to create a company page.

14.5 add a company

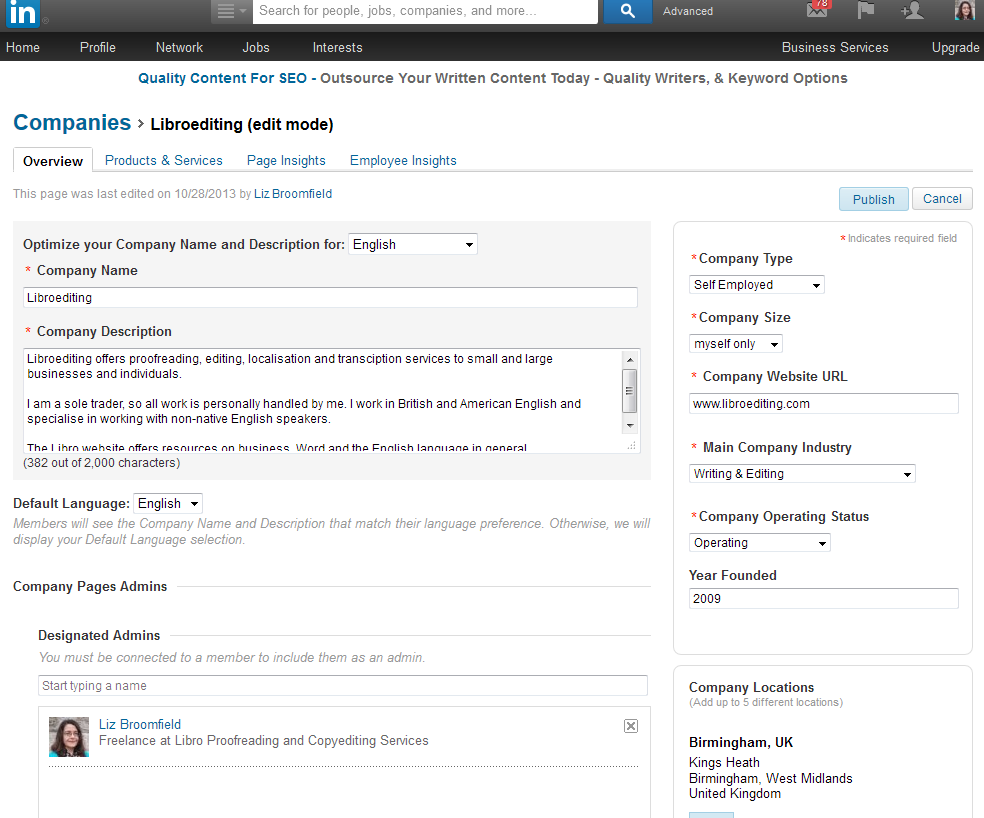
Fill in all of your company’s details and save – and there you go.

To edit your company information, go and find the company page and click on Edit.

15 add a company

Getting social

This section is about social media – so how do you get social on LinkedIn?

Updates

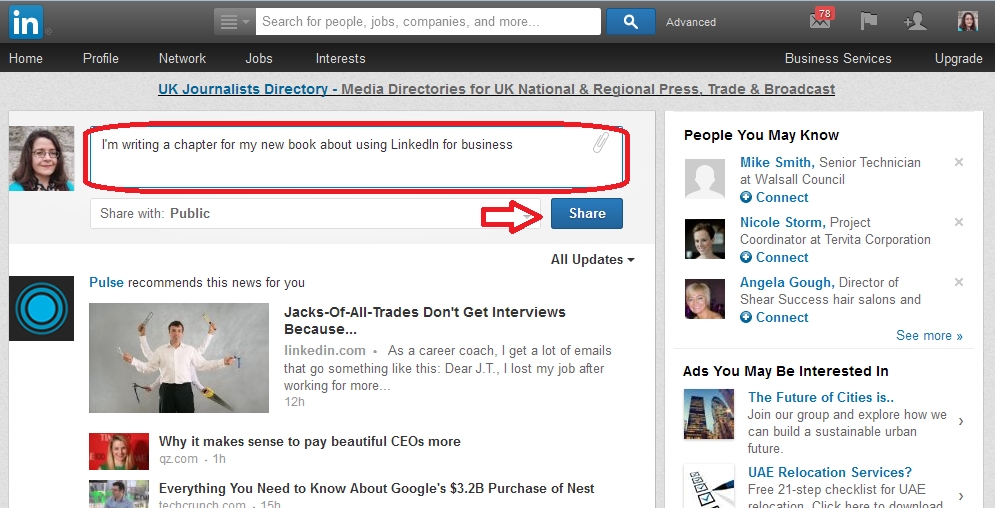
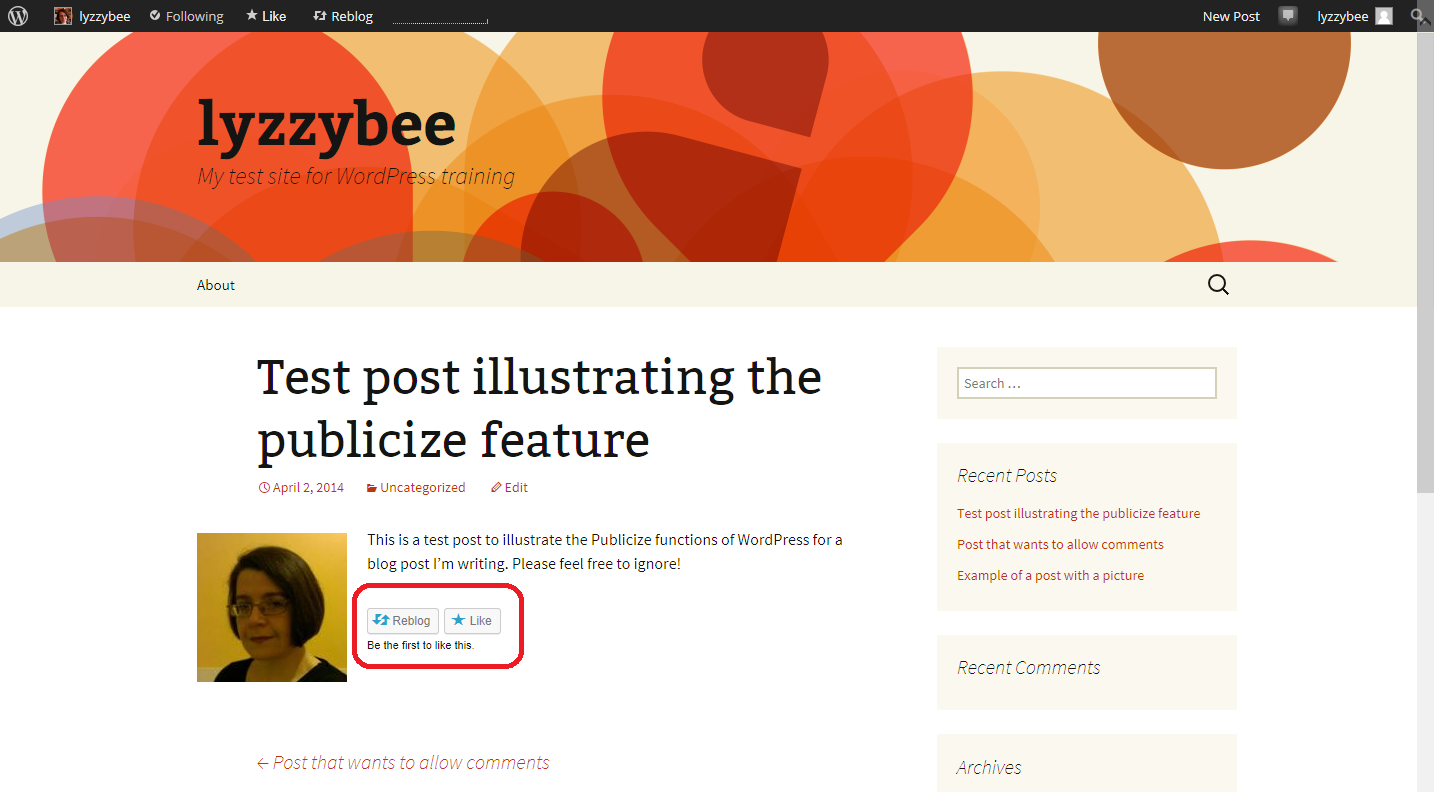
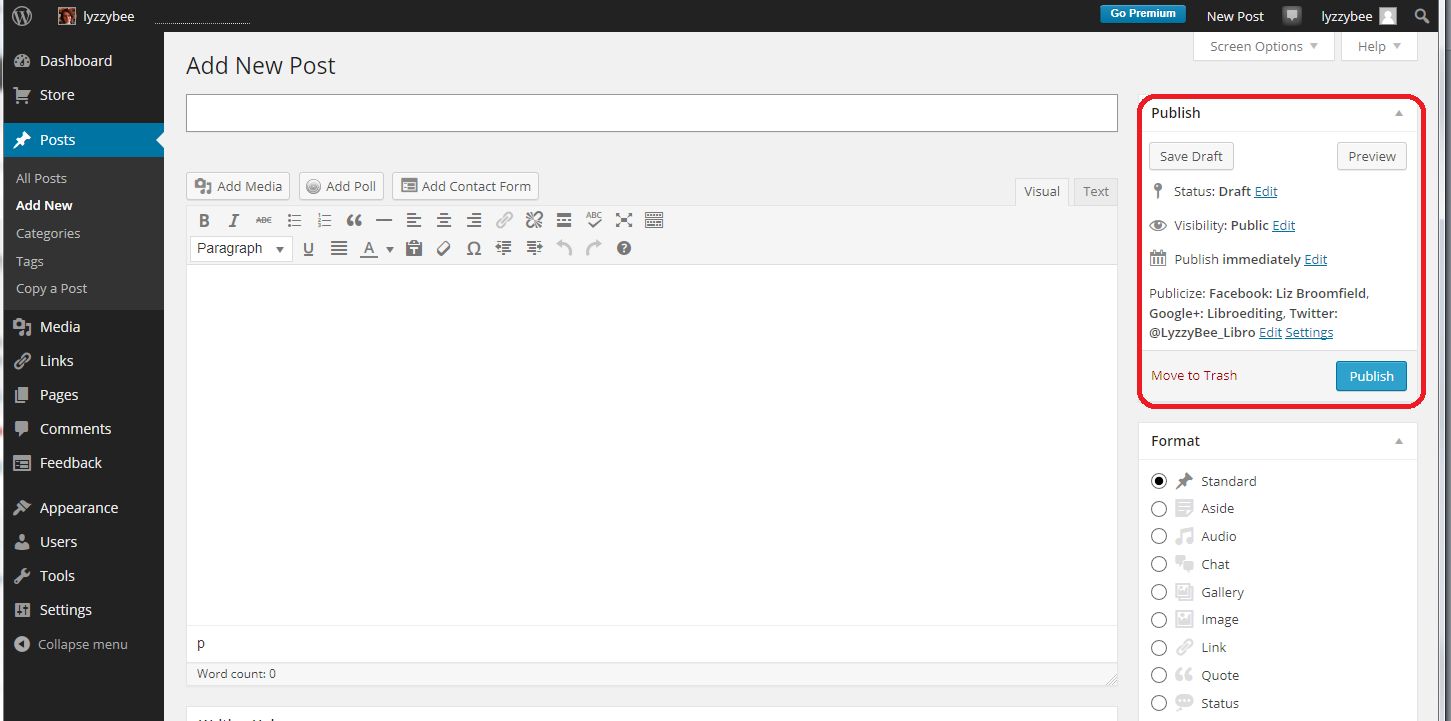
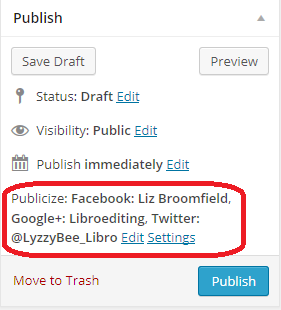
You can post updates, just like on Facebook – do this from the Home page. Your updates will appear on your connections’ home pages, just as theirs do on yours. You can like and share updates in a very similar way to Facebook.

17 updates

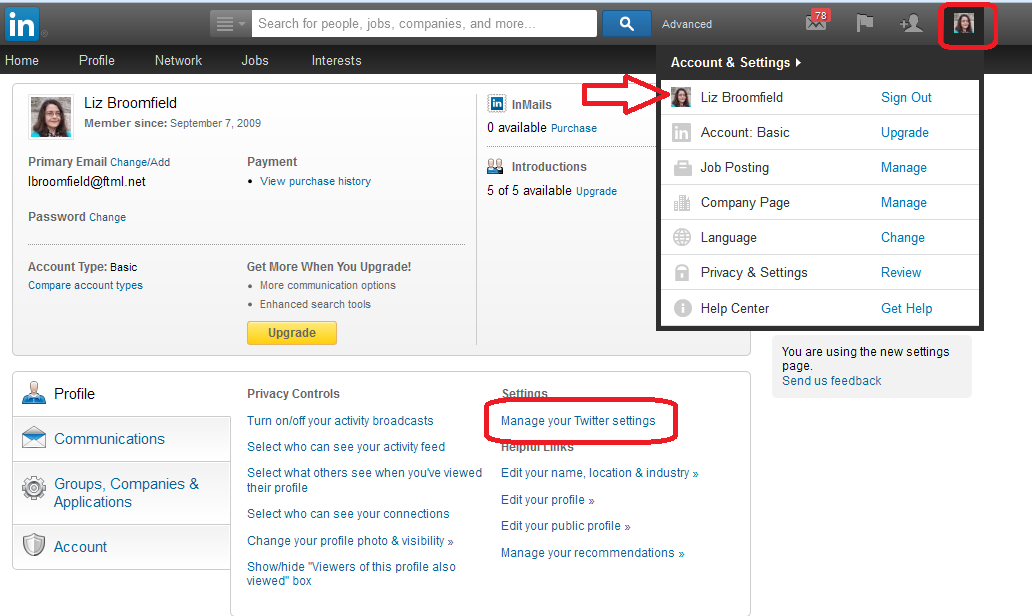
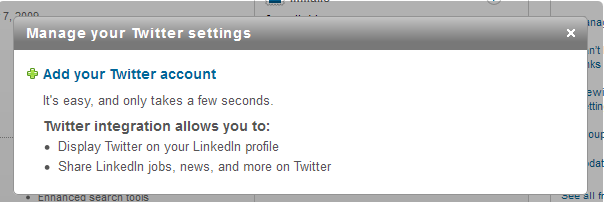
You can direct most blogging platforms to automatically post links on LinkedIn – all of my WordPress blog posts do this. You can also link your Twitter account to LinkedIn by going to your account settings (click on the small photo in the top right of the screen), clicking on your name and choosing Manage Twitter Accounts.

18 link to twitterClick on Add your Twitter account:

19 link to twitter

20 link to twitter

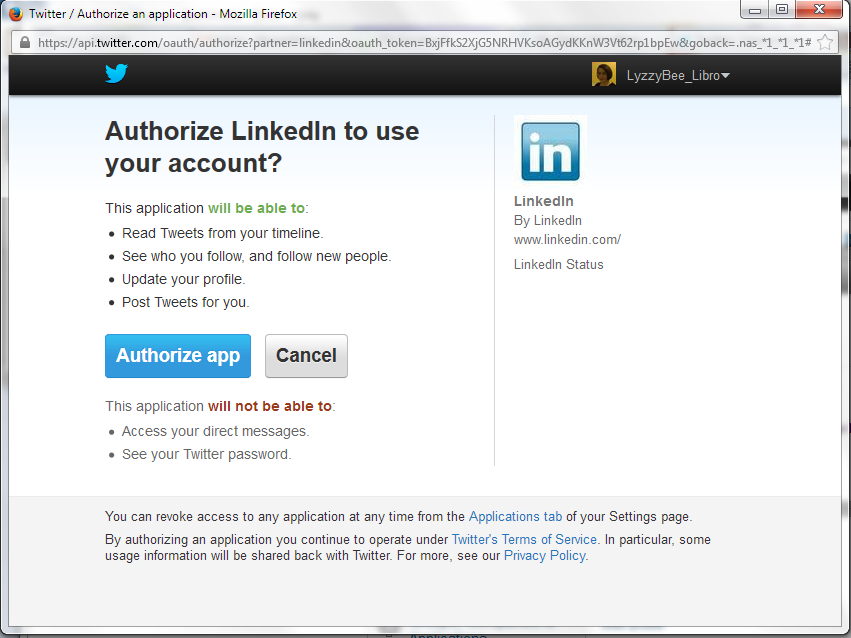
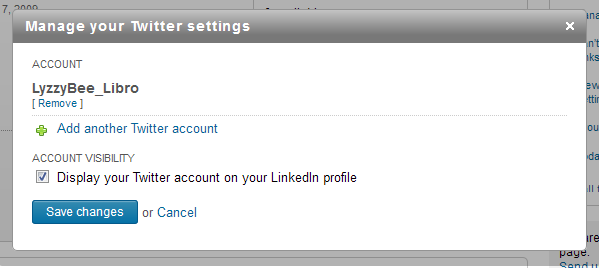
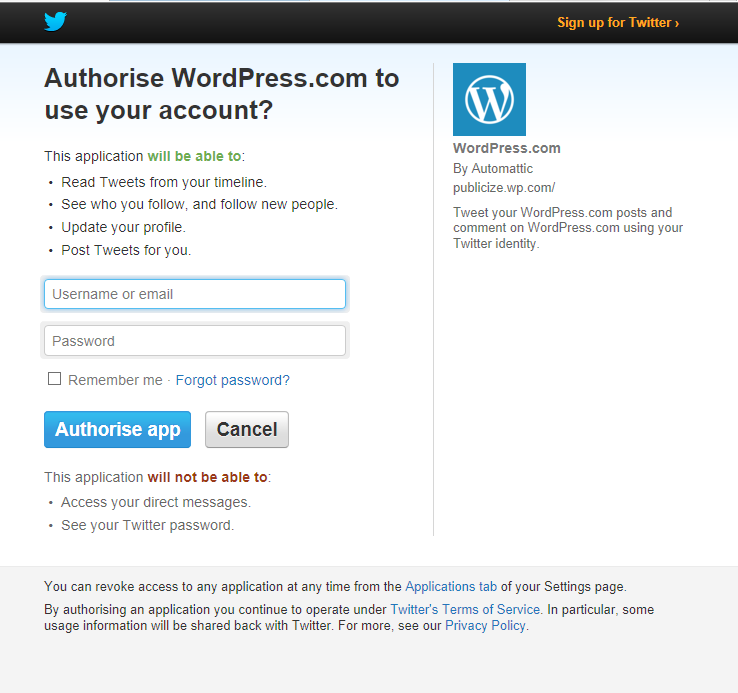
If you’re logged in to Twitter you will see this Authorize app message, if you’re not logged in, you will be asked to log in first. And there you go:
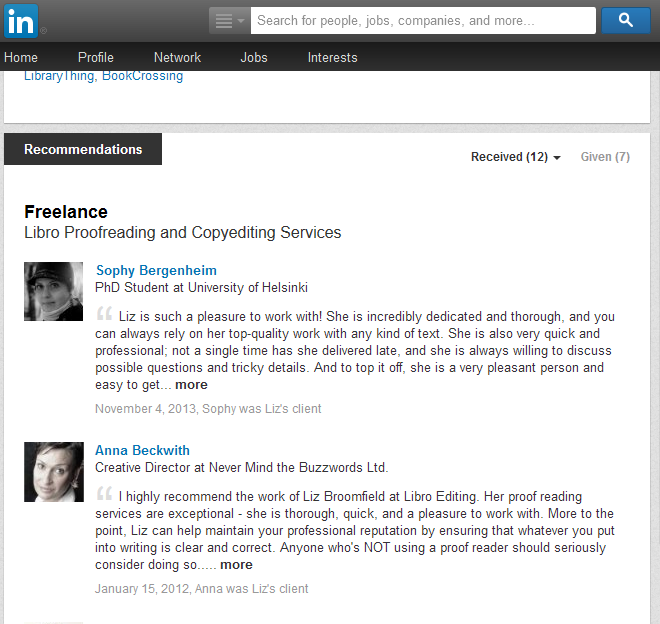
21 link to twitter

Recommendations

If someone has done a good job for you, you can click on Recommend in their profile and type in a recommendation. They will be emailed this and will have the option as to whether to publish it or not (this prevents people posting negative comments without the member knowing).

16 recommendations

Groups

There are thousands of interest groups on LinkedIn and these can be a good way to meet new people, spread the word about what you’re doing, and find out what other people are up to.

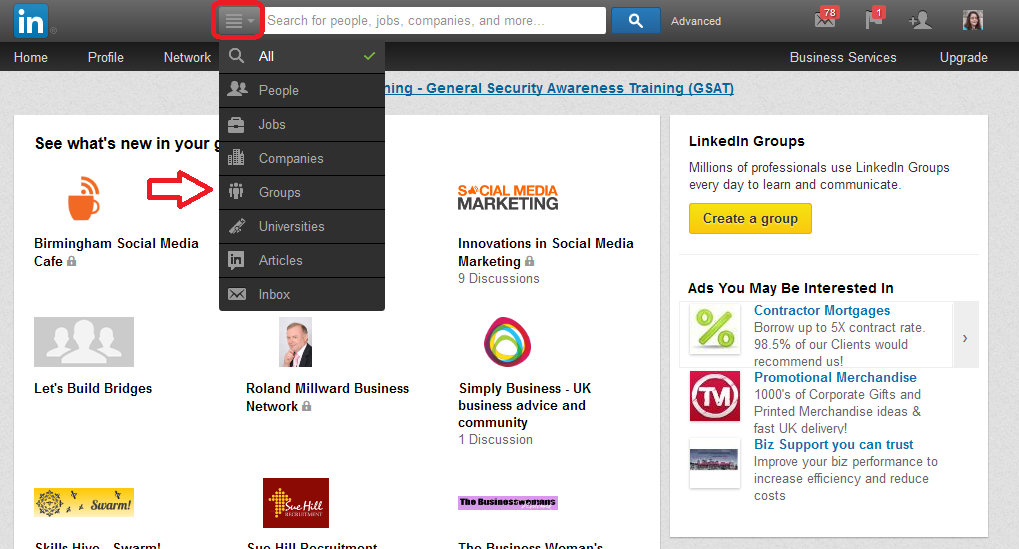
Access Groups by searching in the top search bar (you can click on the icon to the left of the search area and select only Groups to search) or by clicking on Interests then Groups. Once you’ve joined some Groups, you will find them listed on your Groups page, and then some suggestions underneath.

22 search for groups

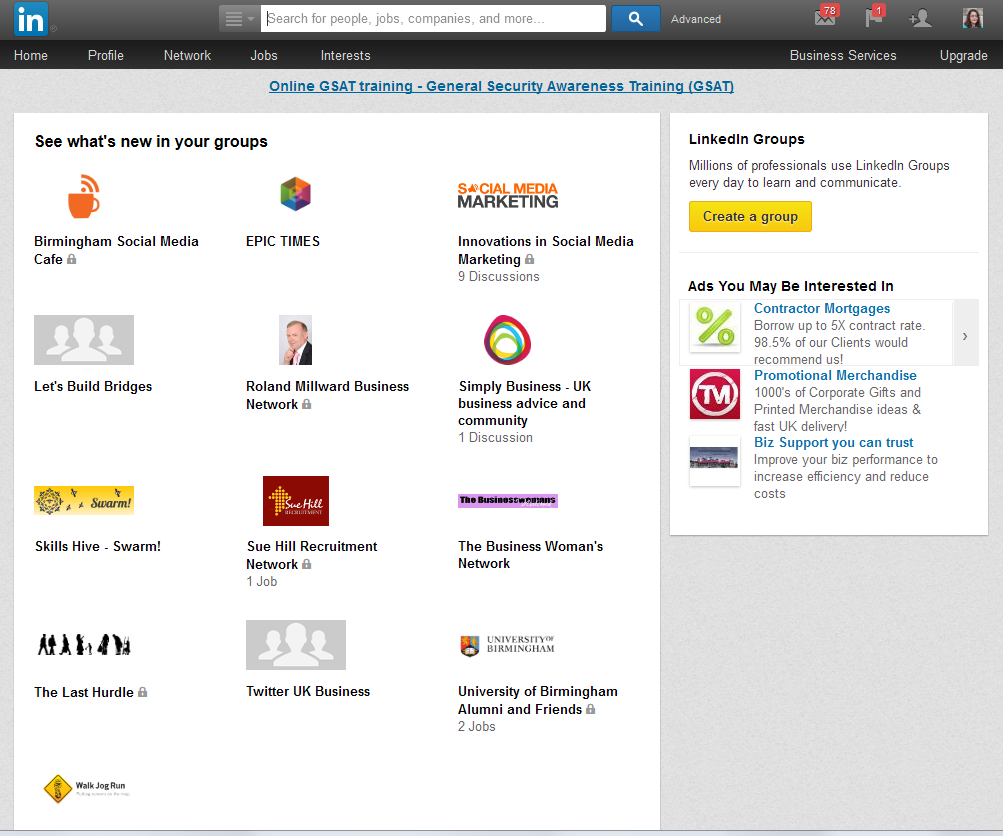
When you look at the Groups screen, you can see all of the groups you have joined, and you can also create a group if you wish to.

23 groups page

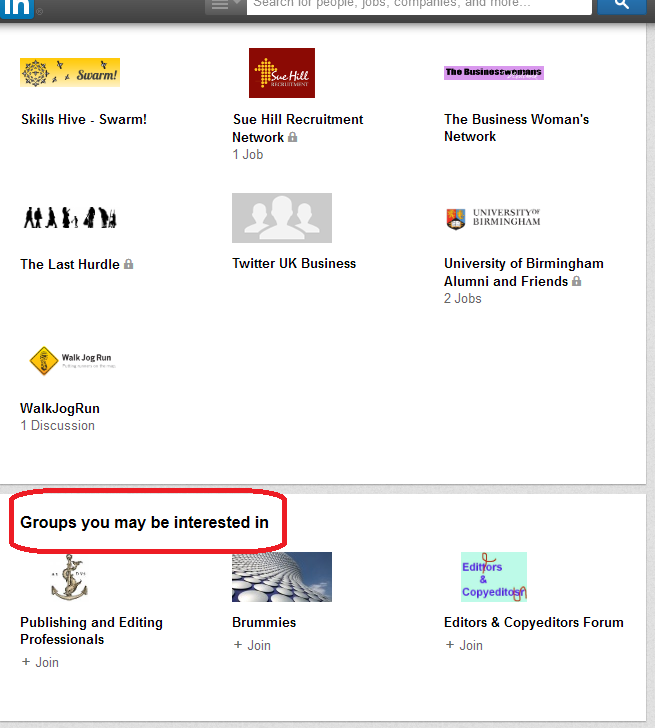
You will also find suggested groups at the bottom of the page:

24 groups page

Groups work very simply – you can post a new message or reply to another one, just like in other social media like Facebook and Google+. You can choose whether you are updated by email for all posts and replies in the group, or whether you want to just access them via the LinkedIn website.

I have found that some groups do become clogged with too many adverts and not enough discussion, but others can be really useful. The usual rules apply about reciprocity and kindness when using LinkedIn for social media communications.

Golden rules for using LinkedIn

Be professional. LinkedIn is known as a professional and careers-orientated site, although there is certainly room for the self-employed. But you do need to be extra professional and not very personal on here.

Reciprocate – if people like and share your updates and group posts, say thank you and like and share theirs.

Similarly, if people recommend you, or if they use the Endorse buttons that appear at the top of the screen when you log in to say that you’re knowledgeable about a certain topic, do try to recommend and endorse them back.

Useful related posts on this blog

Using Twitter for your business

 
2 Comments

Posted by on April 9, 2014 in Business, Social media


Tags: ,

Setting up a WordPress blog 6: Adding sharing buttons to your blog posts

Last time, we learned about using the Publicize feature to share your own WordPress blog posts on your social media platforms. Today we’re going to learn about adding sharing buttons to your posts to enable and encourage your readers to share links to your blog posts on whatever social media services they use.

Why should I add sharing buttons to my blog posts?

You write a blog in order for it to be read, otherwise, why bother. It’s human nature to want to share interesting things you’ve read with other people, whether that takes the form of lending them books, cutting out bits from the newspaper to wave at people, or sharing content on Facebook, Twitter and other social media platforms. By adding sharing buttons, you will both encourage and enable your users to share your posts, increasing their reputations as people who share good stuff, and increasing your reader base.

What do sharing buttons look like?

Here’s an example of a blog post without any sharing buttons. As standard, WordPress adds a button to “Like” a post (which just alerts you and makes a nice little line of pictures under your post, but doesn’t share anything) and a Reblog button which allows another WordPress user to share the post on their blog, with an excerpt of the content and a link to the rest of it. Other than these, there are no ways to share this blog post at present. You can even turn this off if you want to, see the Advanced Features heading below for more information.

2a no sharing

Scroll down to see what the post looks like once the sharing buttons have been added …

How do I add sharing buttons to my blog posts?

Sharing buttons are handled in the Settings – Sharing section of the Dashboard:

menu

In the lower half of the Sharing Settings screen, you will find the Sharing Buttons section:

2 sharing buttons

Choosing multiple share buttons to appear under your blog posts

All of the sharing buttons that are available to be added are shown in the upper Available Services section. You can add buttons for sharing to Twitter, Facebook, LinkedIn and other social media platforms as well as sites like Tumblr and Digg that curate information on topics onto pages, and Email and Print:

2b sharing options

Here’s an important point to note: When choosing which buttons to display under your blog posts, don’t think of what social media you use, but what social media your audience – your users – might want to use. They’re the ones who are going to be doing the sharing, after all. So don’t limit them – I’d add as many as possible if I were you!

To make a sharing button appear at the bottom of your blog posts, left-click on the button, drag it down to the Enabled Services section and let go to drop it there. It will then appear in the Enabled Services section:

2c adding buttons

Here, I’ve moved everything except for Print and Pocket down into the Enabled Services section. You can, of course, drag any buttons that you don’t want to be visible back up to the Available Services section.

2d adding buttons

What does this look like on your blog post? Compare this with the image at the top of this post:

2e buttons appear

Creating a single Share button

You might find this a bit cluttered: there is a way to just display a single Share button that displays the whole range when pressed. However, I feel that this might present a barrier to sharing, and you want all the sharing you can get, so think carefully before doing this.

To create a single Share button, drag all of your buttons into the darker grey area to the right:

2f 1 share button

Note that this can be a little fiddly: watch out for the dotted square to appear and drop your button on there:

2g little square

Also note that if you leave any buttons in the Enabled Services section, you will see both those and your Share button at the bottom of your blog post: messy! Once you’ve created your single share button, you will see on the preview what it will look like:

2h all under one button

Moving to the view of the blog post itself, you can see that now there’s just one Share button:

2i all under one buttonWhen this is clicked, the full range of buttons pops out and can be clicked:

2j all under one button

How do I change the order in which the sharing buttons appear?

If you want to change the order in which the sharing buttons appear, simply left click, hold the mouse button down and drag the button to where you want it to appear:

2k move around

Advanced options for the sharing buttons

Below the Enabled Services section you will find some more options:

2l more options

  • Button Style allows you to select icon + text / text only / icon only / official button. Note that official button doesn’t always work as services change: I prefer icon + text which is what I’ve used in all of the examples on this post.
  • Sharing label: you can change the text above your sharing buttons from “Share this” to whatever you want to say to encourage people to share.
  • Open links in offers the choice of same window and new window – most people prefer to work in the same window nowadays.
  • Show buttons on allows you to choose what people can share – search results, individual posts, etc.
  • Twitter username will appear in tweets when people share using the Twitter button. It’s useful to include your Twitter ID here so you can keep an eye on what’s being shared – if you have multiple blog administrators, you might want to use an official company or organisation Twitter ID here instead.
  • Likes can be turned on or turned on for individual posts.
  • The reblog button can be turned off.
  • Likes can be added (or not) for comments

What happens when someone clicks on a sharing button in your WordPress post?

You can click on your own sharing buttons to see what happens, and this is what I’ve done here. I’ve clicked on the Facebook sharing button. A Share on Facebook dialogue box pops up and you can select whether to share on your timeline, to a person’s timeline, to a page or to a group, and enter some status text to explain what you’re sharing and why you’re sharing it:

2m in practice

Press Share Link and the link will share on your Facebook timeline.

What does content shared using the sharing buttons look like?

Let’s have a look at what content shared from your blog might look like on a couple of social media platforms. Here’s my shared post appearing on my Facebook timeline because my friends Gill and Jeremy have shared it. Just like those shared links you see all the time on your timeline. If your friends share your link, you should see it come up in your own timeline.

2n in practice

And here’s what a Twitter share or two looks like. You can see that “via LyzzyBee_Libro” has been added to the end of the automatic tweet because that’s the Twitter ID I specified above.

2o in practice

Today we’ve learnt how to add and edit sharing buttons on a WordPress blog to enable and encourage blog readers to share our posts.

If you’ve enjoyed this post and found it useful, do please comment and/or use the sharing buttons below this post to share it with other potential readers who might find it useful. Thank you!

Related posts on this blog

How to set up a WordPress blog

How to add pages to make your WordPress blog into a website

How to add images to your WordPress blog posts and pages

How to add slideshows and galleries to your WordPress blog posts and pages

Using the Publicize feature in WordPress

WordPress 7 – adding an avatar picture

 
27 Comments

Posted by on April 7, 2014 in Blogging, WordPress


Tags: ,

Setting up a WordPress blog 5: publicising your posts and connecting WordPress to social media

Continuing my series of articles about WordPress, today we’re going to learn how to publicise posts by sharing them on the social media platforms that we use.

Why should I publicise my WordPress blog posts?

Using the Publicize feature to share your WordPress blog posts has two main advantages:

1. It shares your content and lets people other than subscribers and people who are searching on the search engines know that it’s there.

2. It adds content to your Facebook page, Twitter stream, LinkedIn profile, etc., without you making any effort at all.

If you’re going to share links to your blog posts on social media, you might as well automate it and save yourself the bother of posting about it all over the place, right?

How do I link my WordPress blog to my social media platforms?

Today we’re going to be spending time in the Settings – Sharing area of the Dashboard:

menu

When you click on Sharing, you will come to this Sharing Settings page. There are two sections: Publicize and Sharing Buttons. We’re going to be talking about Publicize today, and Sharing Buttons next time (watch this space – I will add a link when that one’s live):

1 publicize

Looking at the Publicize section, we can see buttons for connecting various social media platforms to your WordPress blog. What this will do in effect is auto-post a link to any blog post that you publish it, at the time that you publish it, without any effort on your part.

1a publicize options

How do I link Facebook to WordPress?

Note that all of the linking is done from WordPress rather than from the individual social media platforms. For example, to link Facebook so that an announcement of every blog post appears in your timeline, click the Connect button next to Facebook. You will be presented with a Facebook login screen. Add your normal Facebook login details and press the Log In button:

1b Facebook

If you enter the correct details, your connection will be confirmed:

1c Facebook

There are two things to note here. One, you can only link one Facebook account at a time, whereas you can add more than one login to most other social media types. Libro Proofreading … is my business page – for this blog, I have linked posts to that account, and then I pop in and share them onto my personal timeline.

The other thing to note is “Make this connection available to all users of this blog?” This is for a situation where you have more than one person with admin rights over the blog: you can choose, for example, your company or organisation’s Facebook page to auto-post to, and make that option available to everyone who posts on your blog.

Once you’ve chosen the account to connect to and pressed OK, you will return to the Sharing Settings screen, and you can see here that my Facebook page has been added to the page:

1d Facebook

You can go on now to connect, for example, your Google+ and Twitter accounts. For Google+, you will be asked to log in then confirm who you want G+ to share posts with:

1f Google+ permissions

When connecting Twitter, again, you’ll be asked to log in and then authorise the app. This is all quite standard and doesn’t mean WordPress will do anything odd to your social media – all it will do is post on your behalf when you publish a blog post (we’ll have a look at what that looks like in a moment):

1g Twitter permissions

When you return to the Sharing Settings screen, you will see all of the social media accounts that you’ve connected to, confirming which accounts they are:

1h all connected

How do I disconnect my WordPress blog from a social media platform?

If you wish to disconnect any of your social media platforms across all new blog posts, click on the x next to the “Connected as [your name]” message. It will ask you if you’re sure: if you click on OK, the link will be severed.

1e Facebook

To reconnect, go through the same process as above. WordPress may remember some of the steps when you do this, such as your username.

How do I manage Publicize in my blog posts?

Let’s have a look at what Publicize looks like in your blog posts.

When you select Posts – Add New and enter the Edit screen, you will see the Publicize section in the Publish area:

1i when you post

Let’s look at that in close-up. You can see that all of the social media sites you’ve linked to are showing here:

1j close-up when you post

Note that sometimes WordPress will become disconnected from one of them for apparently no reason. A message asking you to relink will appear in this area. Click through, provide the details it asks for and the two will be reconnected.

When in this individual post view, you can click on Edit and choose not to promote a link to your blog post to a particular site by clicking on the cross and making the square blank. You can also change the standard text that goes out with the link in Custom Message:

1k edit publicize

Clicking on Settings just takes you back to the original Sharing Settings screen we were looking at above.

When you’ve written your blog post, click Publish as normal:

1l in action

 What gets posted to my social media when I’m connected to WordPress?

I’m just going to share two examples here, but you’ll get the idea.

When WordPress is connected to Facebook, an entry will appear in your timeline, with any picture that you included in the post (very large in the current incarnation of Facebook!) and a bit of the text, and there will be a link, arrowed here, which will take the reader to the blog post itself.

1m in action

In Twitter, WordPress posts a shortened version of the full URL as a link and the automatic text taken from your blog heading:

1n in action

Today we’ve learnt how to use the Publicize feature of WordPress to link it to your social media platforms such as LinkedIn, Twitter and WordPress. Next time, we’ll be looking at how you can enable your readers to share your blog posts through the use of sharing buttons.

If you’ve enjoyed this post and found it useful, do please comment and/or use the sharing buttons below this post to share it with other potential readers who might find it useful. Thank you!

Related posts on this blog

How to set up a WordPress blog

How to add pages to make your WordPress blog into a website

How to add images to your WordPress blog posts and pages

How to add slideshows and galleries to your WordPress blog posts and pages

WordPress 6 – sharing buttons

WordPress 7 – adding an avatar picture

 
19 Comments

Posted by on April 3, 2014 in Blogging, WordPress


Tags: , ,