In this series, we’ve already learned how to set up a WordPress blog, and how to add pages to make it into a WordPress website. Last time, we talked about adding images to your blog posts and pages. This time we’re learning how to create galleries and slideshows and add your image to your user profile in WordPress.
Why would I want to add a gallery or slideshow to my blog post or page?
If you have a lot of images to accompany a blog post or web page, perhaps of artworks or craft items that you have created, and especially if you don’t have much text to accompany those images, so it’s going to be hard to format them on the page, consider adding a gallery (a grid of images) or a slideshow (one image shown at a time, with navigation buttons for the user).
Adding images to a WordPress blog post
When you’re in the blog editor, you can use the Add Media button, with your cursor is in the position where you want your image to appear, to select and add the images of your choice.

You can download multiple images at a time, and they will then appear on your Insert Media page. Viewing your Insert Media page, if you’ve already downloaded images and want to use or re-use them, these will appear in your Media Library tab.
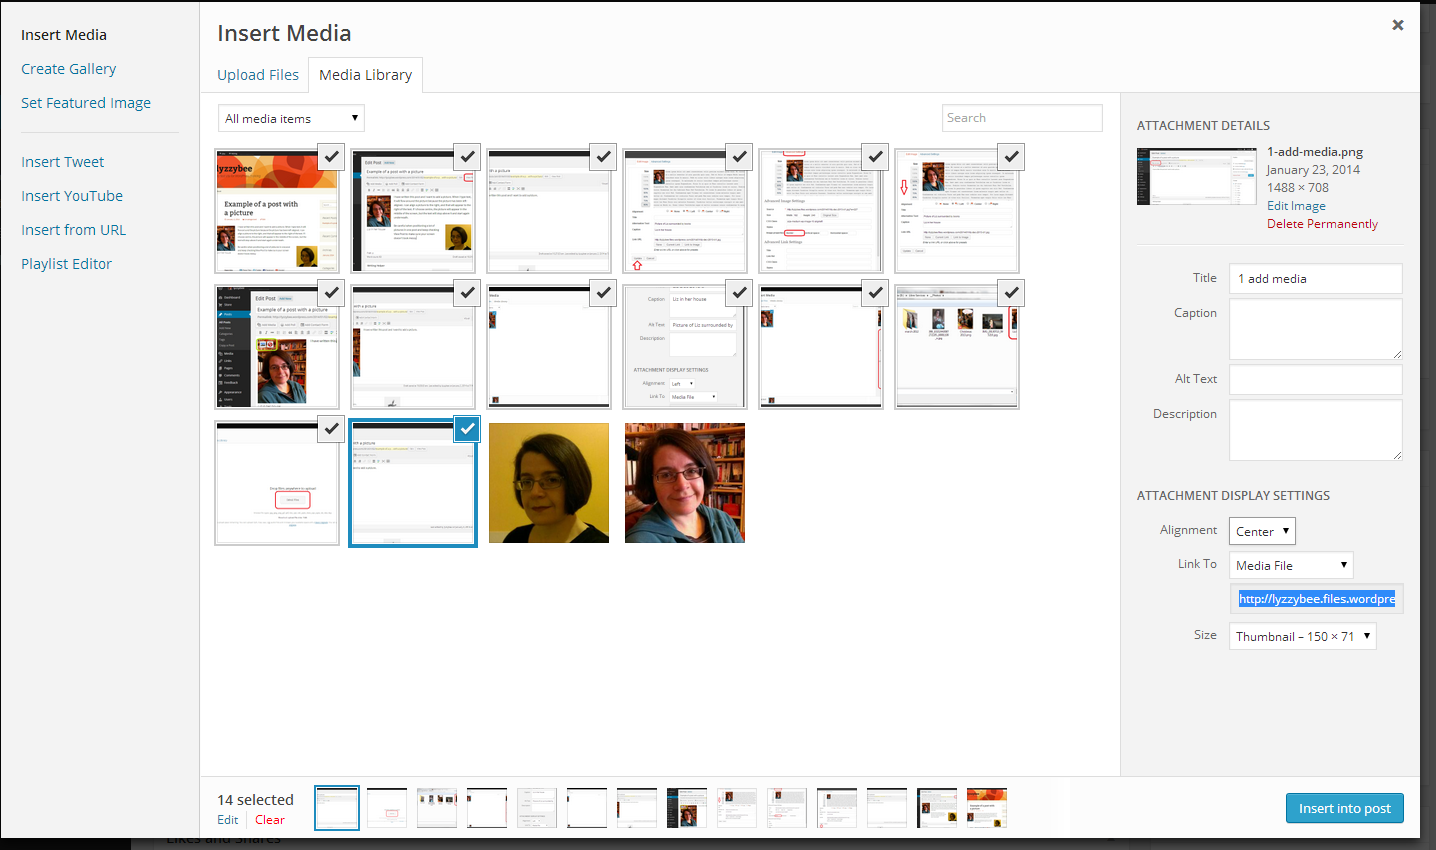
How do I insert multiple images into a blog post or web page?
If you want to insert multiple images, the most simple way would be to tick all of the images that you want to use (see screenshot above) and press Insert into post. However, this will typically give you a jumble of images that looks really messy:
Here’s how to do it properly and neatly.
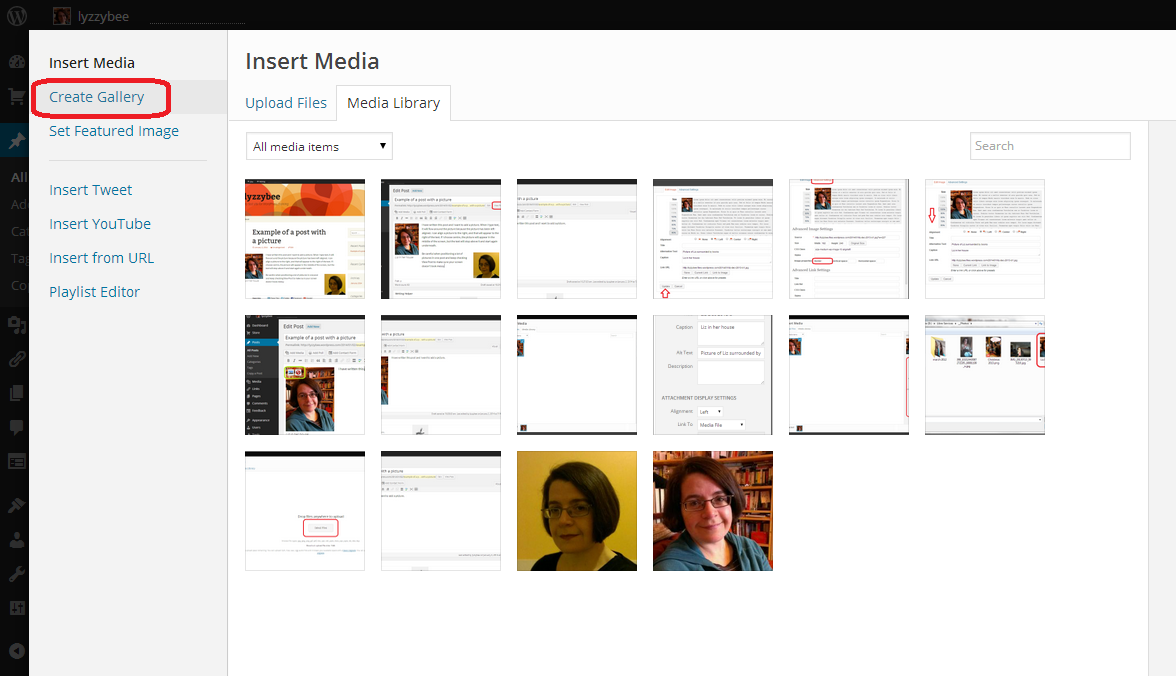
How do I add a gallery of thumbnail images to a blog post or web page?
In the Insert Media page, click on Create Gallery in the left-hand menu bar:
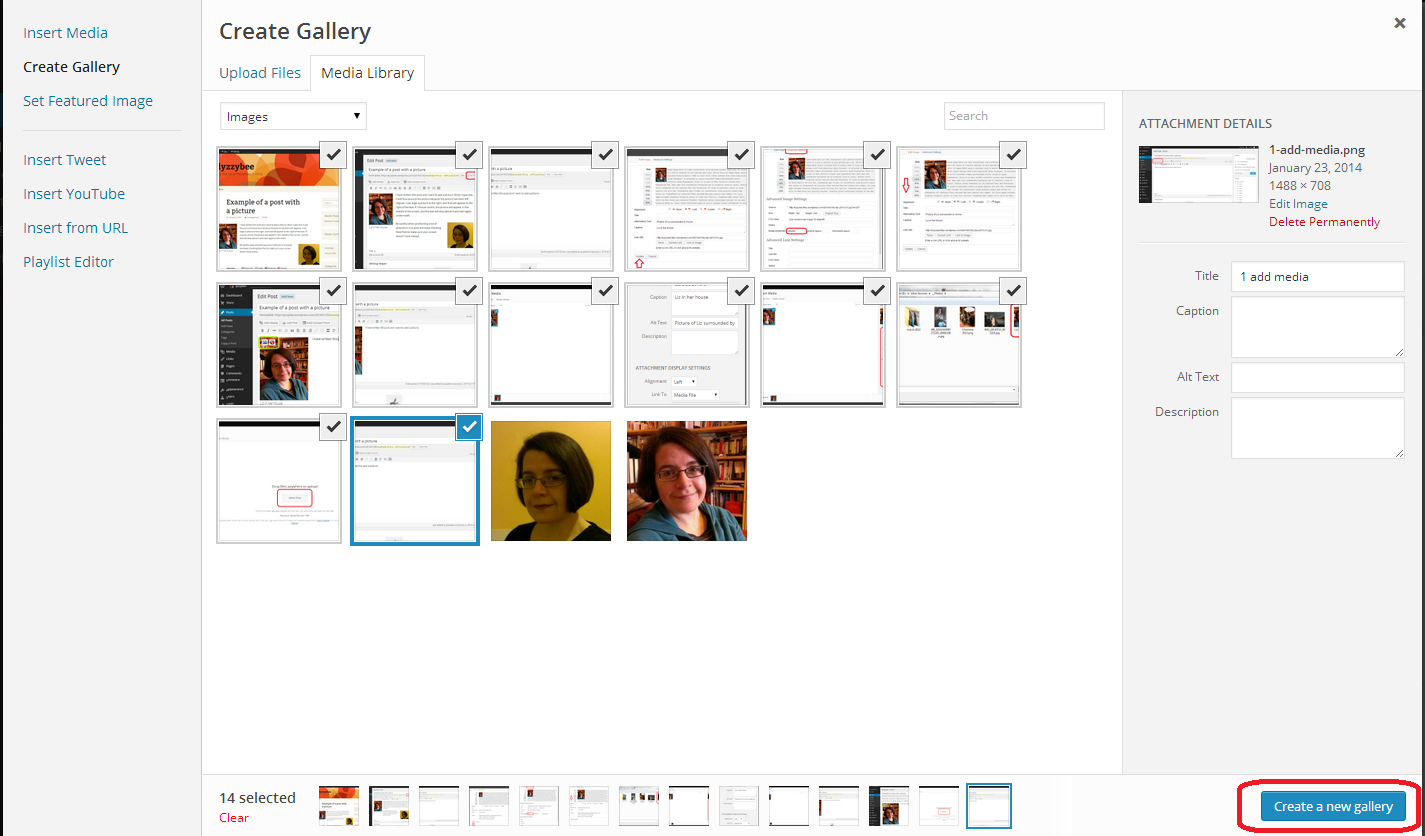
Select the images that you want to add to your gallery by clicking in the box at the top right of each image until it shows a tick, and click on Create New Gallery at the bottom of the screen:
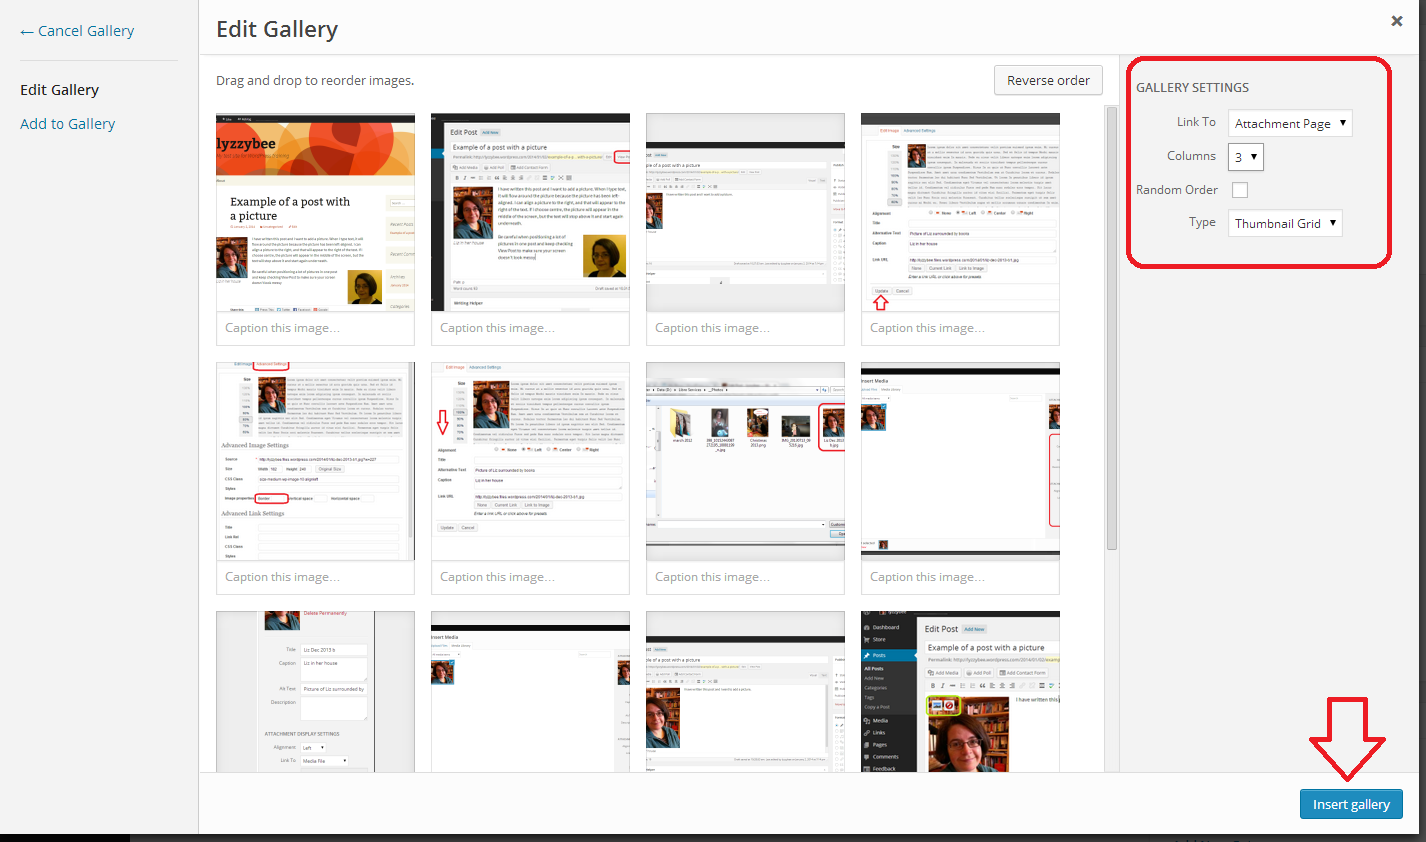
This will take you to the Edit Gallery screen. Here you can select how many columns your pictures display in and what format – here “Thumbnail Grid”, and then click to Insert Gallery:
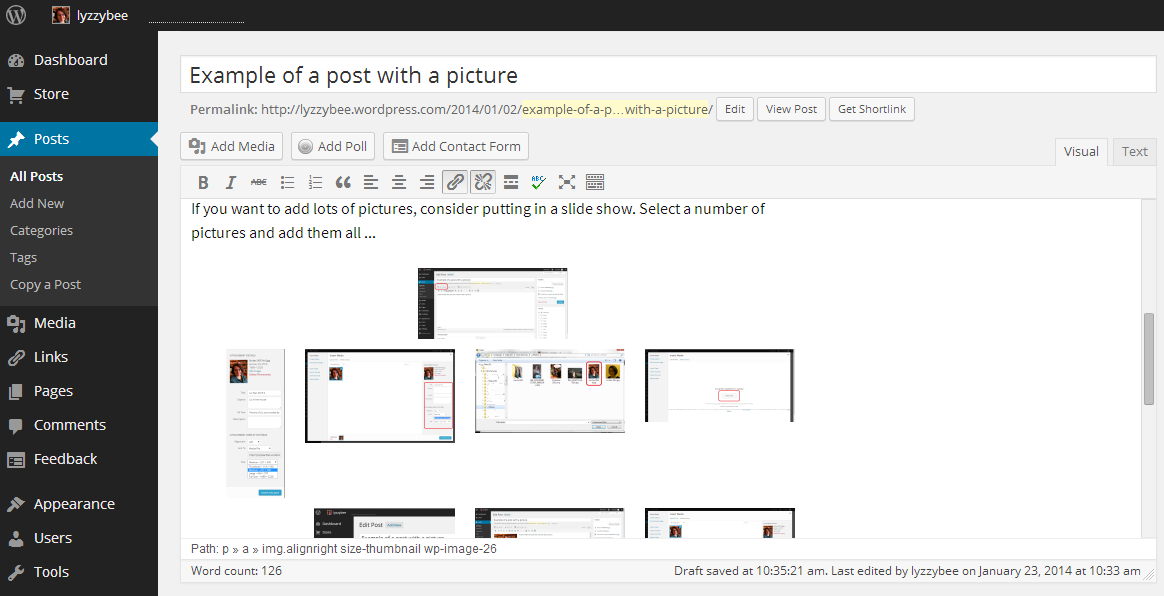
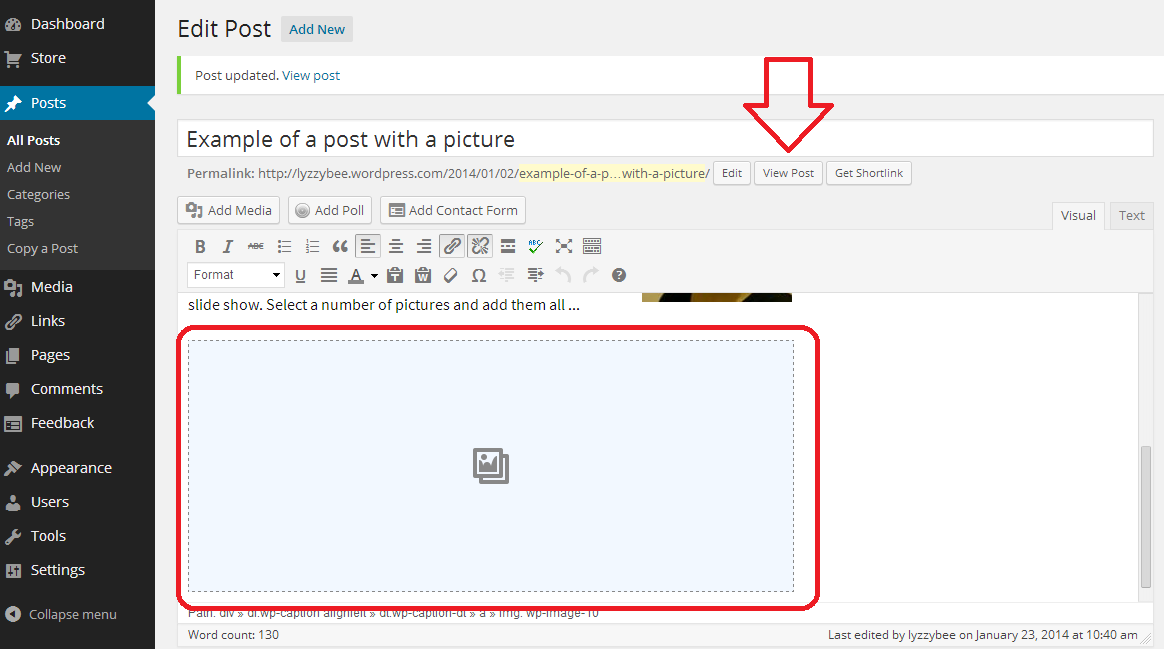
This will bring you back to your Edit post (or page) screen. The gallery doesn’t display in the edit screen, as it will pull the pictures from your gallery when the post is live. Click on View Post (or Page) to check how it’s looking …
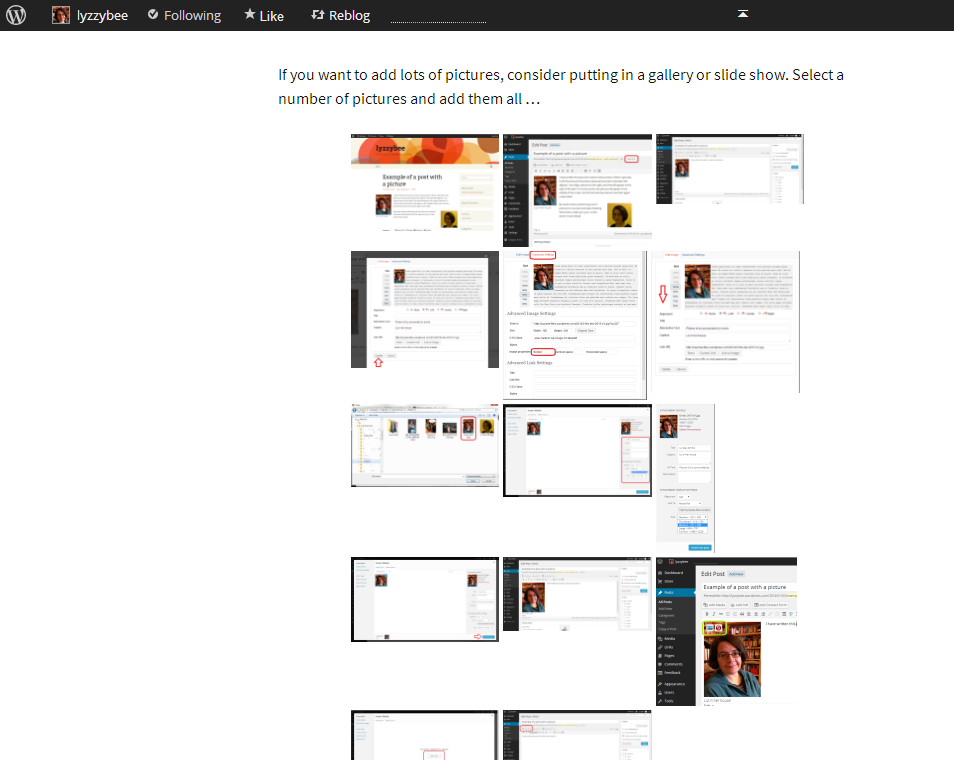
When you View post, you can see the grid of images. In this case, because I’ve used screen shots as the images and they’re not all the same size and shape, the grid is a bit odd, but you can see the idea. It’s all much neater, which is the main thing:
How do I add a slideshow to a WordPress blog post or page?
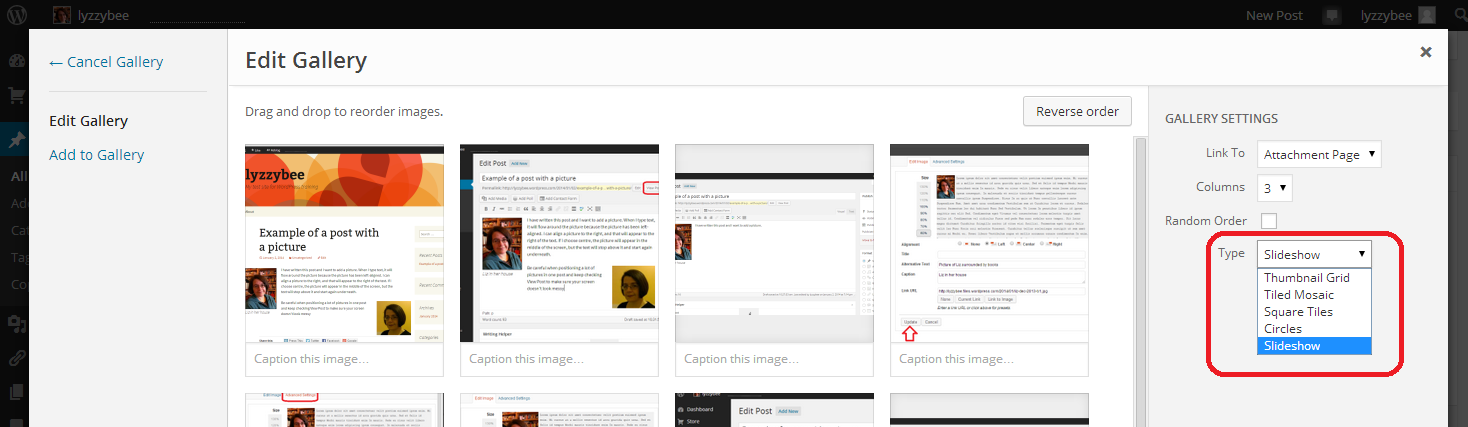
if you want a slideshow rather than a gallery, back in the Edit Gallery screen, click on the dropdown arrow by Type to view the different options. Choose the bottom one, Slideshow:
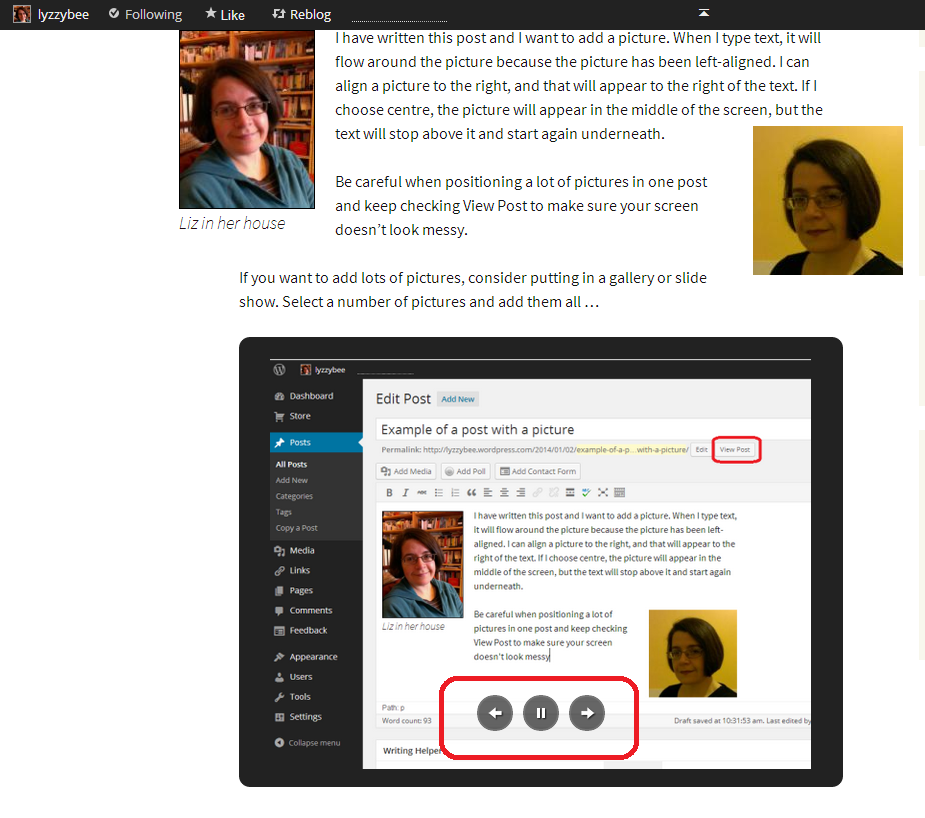
When you’ve inserted your gallery and chosen View Post, you can see a single image at a time, with navigation buttons for forward, back and pause visible when the mouse hovers over the screen: a slideshow:
Today we have found out how to add multiple pictures to your blog post or web page using a gallery or slideshow.
I hope that you’ve enjoyed this article and have found it useful. If so, please take a moment to share and comment – it helps to make other people aware of the help that they can find here. For more posts on blogging, social media, WordPress, Word, business and more, please have a look at the Resource Guide, or explore the categories to your right.
Related posts on this blog
How to set up a WordPress blog
How to add pages to make your WordPress blog into a website
How to add images to your WordPress blog posts and pages
Linking your blog to your social media
WordPress 7 – adding an avatar picture


8 responses to “Setting up a WordPress blog 4 – Adding slideshows and galleries to blog posts and pages”