This is the first in a series of articles about Tables in Word. It covers Word 2007 and Word 2010, and will include Word 2013 in time. The following articles will cover all of the different types of table and option in detail, as well as useful features such as how to retain your table heading line on every page of your document.
Why use tables in Word?
Tables can be a very useful way to show information in an easy-to-read form, and are essential if you have a lot of data – in words or numbers – to share with your readers. There are many different ways to construct tables in Word, so this post will show you the basics, then further posts will elaborate on each method.
How do I insert tables in Word?
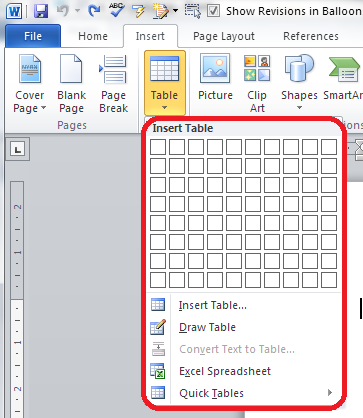
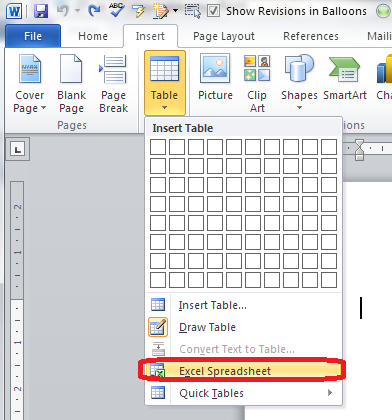
To put a table into a Word document, you need to choose the Insert tab and then look for the (very small) Tables section. There you will find a Tables button …

Press the Tables button and you’ll be shown a grid followed by a list of other options:
We will now take a quick look at all of these options in turn.
Insert table
The first option gives you a grid which you can highlight to create the table you want. The squares represent the number of rows and columns you want, although on the page, the columns will fit to the width of your page and the rows will be one line deep.
Move your mouse over the grid and the table will appear on the document behind the menu:
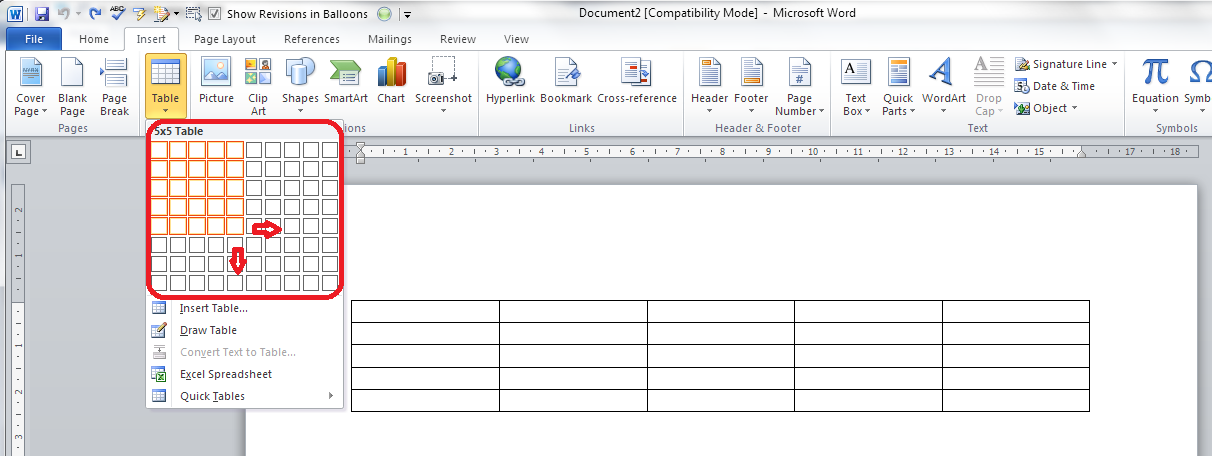
Let go, and there’s your table (we’ll learn about adding and deleting rows and columns in another post).
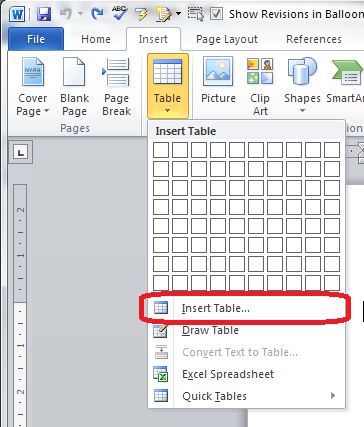
Insert table (2)
The first text option on the list below the grid is, rather confusingly, also called Insert table. But if you choose this option, you’ll find a rather more familiar and in some ways simpler menu.
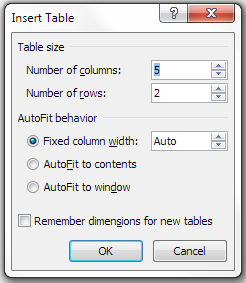
The Insert Table menu allows you to choose the number of columns and rows by moving the up and down arrows for each. We’ll look at the other options later. For now, these choices will give you a table five columns across and two rows down when you click OK:
Draw table
The Draw table option allows you to hand draw the cells of your new table.
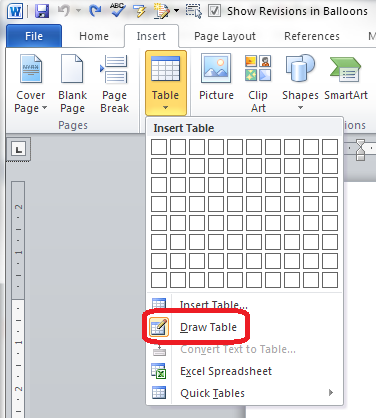
The Table tab will open up and Draw Table will be highlighted. You get a cursor that looks like a pencil and you have to draw each cell with that (there’s an eraser next to the draw button).

I personally find this really fiddly to use: you do have to play with it a bit to work out what to do with it. But I suppose it must be useful!
Convert text to table
This is particularly useful if you’ve imported text or figures from another program. Highlight your text and choose this option …

… and you can specify whether you want the columns to separate at each comma, full stop or other character. Apparently, Mr Libro always uses this option when he creates a table, creating the text first and then the table!
Insert Excel spreadsheet
This option allows you to have a mini Excel spreadsheet, with all its normal functionality, inside your Word document:
Note: this inserts a blank, empty spreadsheet into your document:
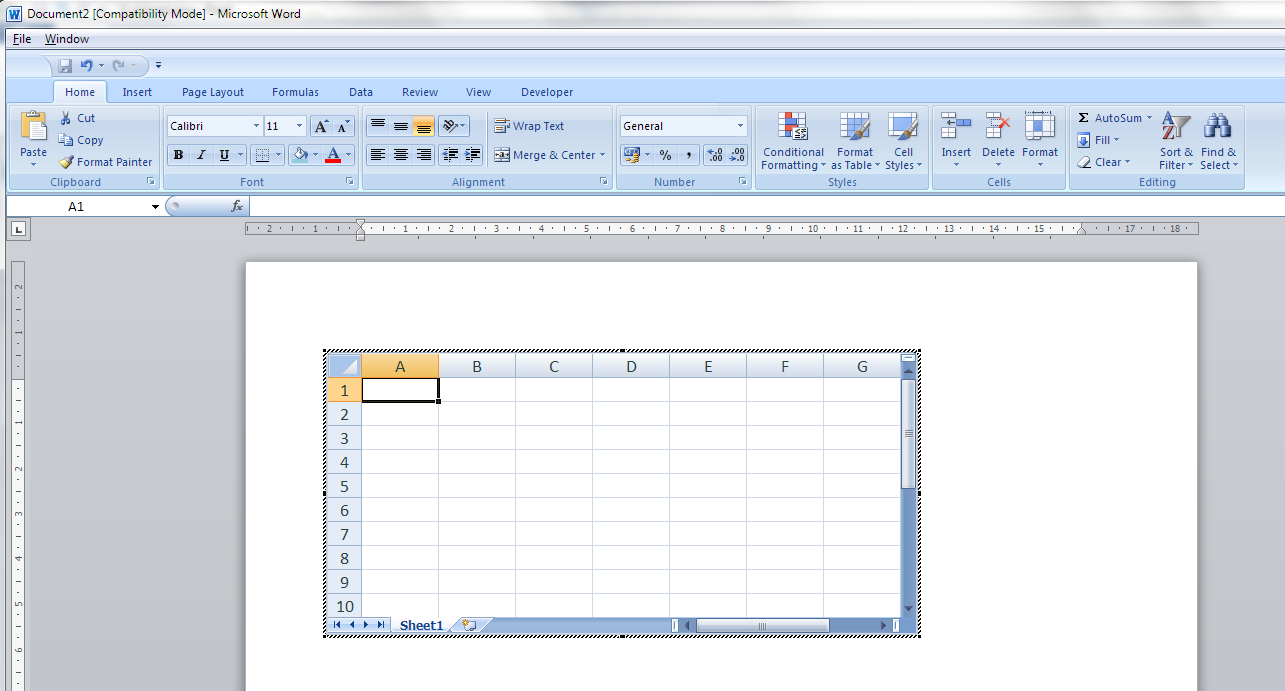
Once you’ve created your data and clicked away from the spreadsheet, you will have a table made out of your spreadsheet (click on it to amend):
If you want to insert an Excel spreadsheet that you’ve already created into your Word document, you need to choose Object from the far right-hand side of the Insert tab …
Insert Quick Tables
The last option in the list will allow you to choose from a ready-made set of sample tables …
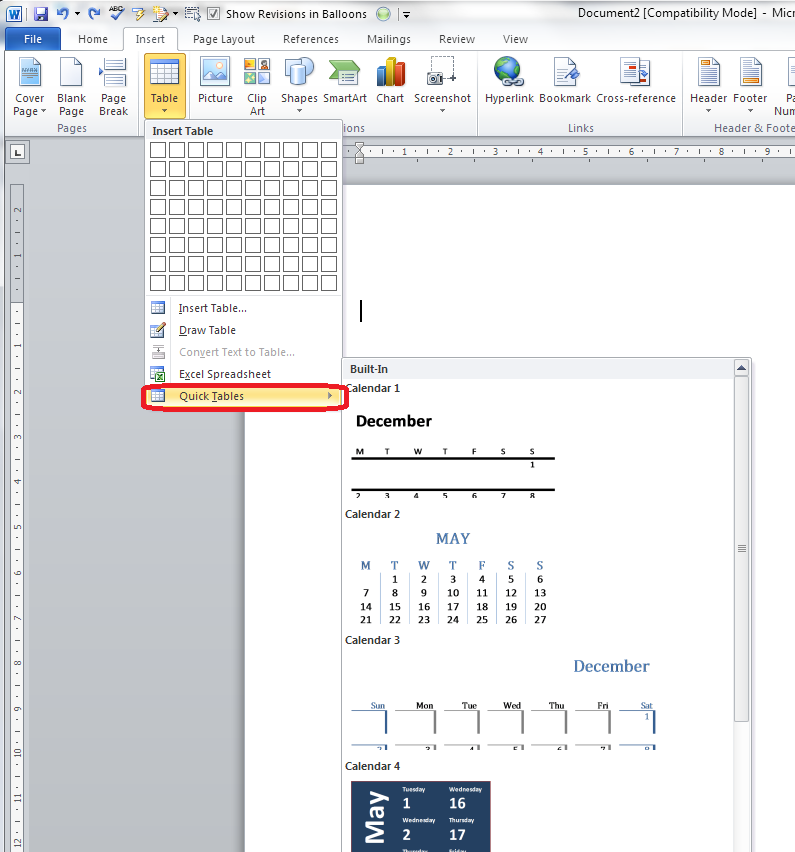
As you can see, this is particularly useful if you want to print out or insert a calendar!
——————–
This post has gone through the Table menu and the options it offers for inserting tables. In other posts, I will go into more detail about how to edit tables, add and delete rows and columns, etc. If you want to know more, subscribe to this blog (see links at the top left or add to your RSS reader) or keep your eye on the resource guide.
If you have enjoyed this post, please share the link!
Please note, these hints work with versions of Microsoft Word currently in use – Word 2007 and Word 2010, for PC. Mac compatible versions of Word should have similar options. Always save a copy of your document before manipulating it. I bear no responsibility for any pickles you might get yourself into!
Find all the short cuts here …


One response to “Using tables in Word 1 – Menus and options”