RSS

Category Archives: Social media

How do I get freelance work?

This article shares some ways that I’ve found successful in getting proofreading, editing, localising and transcribing work. It’s applicable to all forms of freelance work but doesn’t look at getting a full-time employed job in publishing or for another large organisation.

It’s also worth noting here, in response to some of the early comments on here, that this is a suite of options and you wouldn’t expect to do them all at the same time. Once you’ve built up 1 and 2, you can pick and choose depending on what your career path is – and it’s important to indulge in some planning from the start. Thank you to my commenters for helping this to be a better and more useful post!

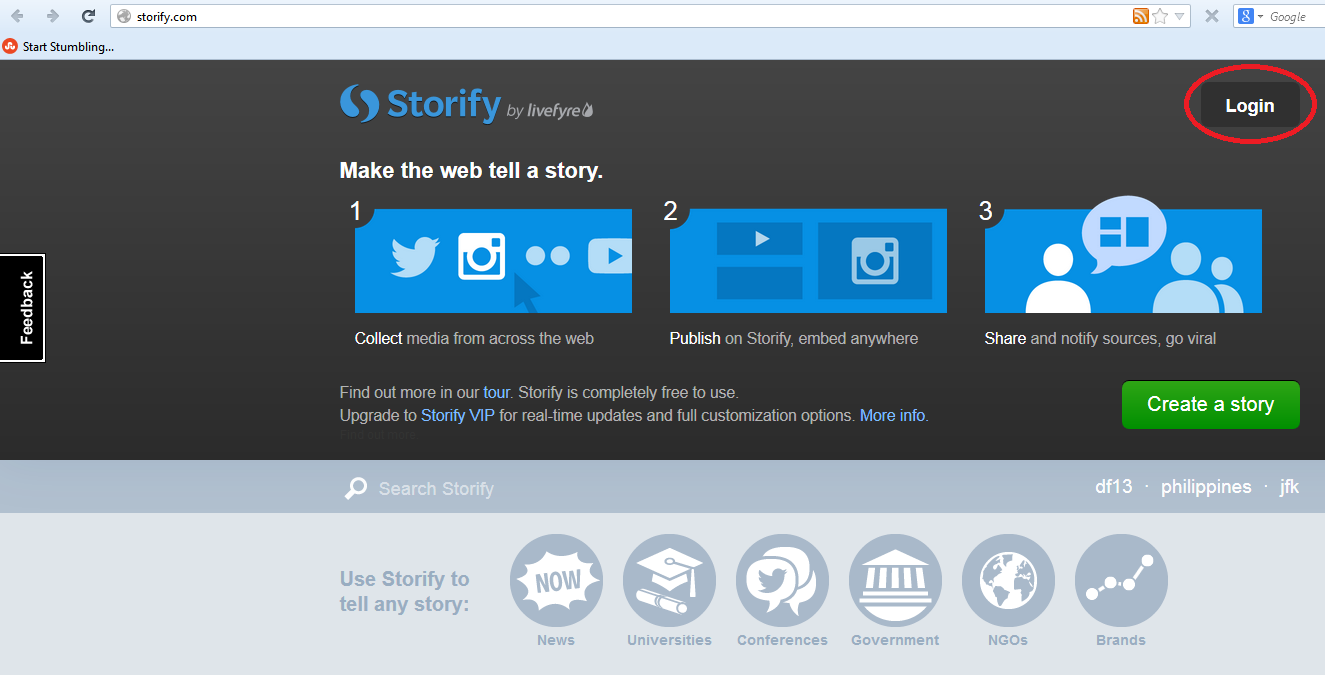
1. Make sure that you say what you do on your website

Many of your clients will come to you after doing a Google search. Remember: people will take the easy option. Why bother to search on lists and in directories if you can just stick a search in Google.

So it’s worth making sure that your website …

  • Includes a clear list of all of the services you offer
  • Includes a blog which is updated regularly – this really helps your position on the search results
  • Is Search Engine Optimised in general (there is an art to this, but make sure you include your keywords regularly, write lots of natural reading text and include keywords in page / post titles and headings)
  • Includes a picture of you and ways to contact you – a contact form is always good for this

Oh yes – do make sure that you HAVE a website. Even if it’s just one page, I really do think that in all industries, from carpentry to computer programming, people expect you to have some kind of web presence, and may well give up the search there and then if you don’t, even if you’ve been recommended by name by someone. I know that I do that when I’m looking for services …

2. Make sure that people know what you do

An awful lot of my early clients came through friends of friends and social networks. Obviously, don’t bombard your friends by begging them to refer you, but make sure the following are covered:

  • If you have a company Facebook page, include a list of your services
  • Include your services on your Twitter profile
  • Mention what you do on social networks every now and again (a good way to do this is to mention what you’ve BEEN doing “This month I’ve edited this, transcribed that and localised the other”.
  • Make sure peers in one area know you cover other areas, too (if you do), e.g. I make sure that my editing chums know that I transcribe as well
  • Consider setting up a newsletter and making sure you mention all of your services
  • Update your clients with any new services you’re offering

3. Join industry groups and publicise yourself through their directories

I gained early clients through being in a member directory associated with a copyeditors’ email list. Friends do well by being listed on the Society for Editors and Proofreaders’ website. My roofers are listed on a government-accredited tradespeople’s website. All of these are places where people will look for accredited and proved suppliers.

4. Advertise on general directories and websites

A hint: don’t bother with paid ones when there are so many free directories and websites!

Ask around your peers as to what they find useful. I am on Freeindex and get a few enquiries a month. Join as many as you want, but do make sure to update your profile if you change your services, fees, etc.

If you’re in a trade like roofing or plumbing, it’s worth looking at council and government approved listings and the paid directories, as people do search these first, but beware putting too much money in at first.

Again, for trades, local print directories and especially business association directories can be good. I have a free listing in our local business association one, which has never brought me any work, but I always try to find local tradespeople who are members, and other people will do this, too.

5. Use industry-specific freelancer sites

I’ve had a look at general websites like freelancer.com, elance.com and oDesk and personally, I don’t think they’re worth it. A lot of people on those will undercut and take any job at the lowest price possible. Many of the sites have “tests” which are actually a test of your understanding of the site itself, not your ability as a writer, editor or whatever.

*Edited to add: while I don’t find these useful, a couple of people have mentioned Elance to me as a good one to try that has got them decent jobs, so it’s worth looking at that.

However, there are industry-specific freelancer sites which are worth it. Again, ask your peers for recommendations. The one that’s got me the most work is proz.com, which is a site for translators where you can put up a profile and, if you pay for membership, that profile will be sent to people looking for freelancers, and they will contact you direct. This has paid back the membership fee for me tens of times over, because I work with translators into English, and offer localisation, which is related to translation.

You can also look for people looking for particular skills and freelancers and then pitch to them.

Take note, though: with anything you pay for, do assess each year whether you’ve got that fee back, and more. Only continue paying if you’re getting a good return on your investment!

6. Advertise (selectively)

I’m not a big fan of paying out for adverts. Most of the other methods I talk about here are free. But there might be specific advertising channels that will work for you.

When I was starting out, working as a proofreader on theses and dissertations, I put up some posters around the university where I worked, recruiting colleagues who were also students to put them up in common rooms, etc. (free, except for printing costs and a few coffees!) and I advertised in the university staff newsletter, which went to tutors and supervisors. The costs were low, even to non-staff, and I did get the money back.

As with using websites that you pay for, do check your return on investment and keep an eye on the outgoings.

7. Use social media proactively

This one particularly applies to Twitter, although LinkedIn can be used in this way, too. Search for people looking for your services on Twitter. Reach out to potential clients directly. I have got paid work using this method and, even better (see below), I’ve got clients who have gone on to be big recommenders this way, too.

No one minds one, polite Tweet if they’ve asked for recommendations for a good plasterer or translator and you fit the bill. Don’t hassle people and don’t blanket-tweet; do tailor your response to the person you’re contacting.

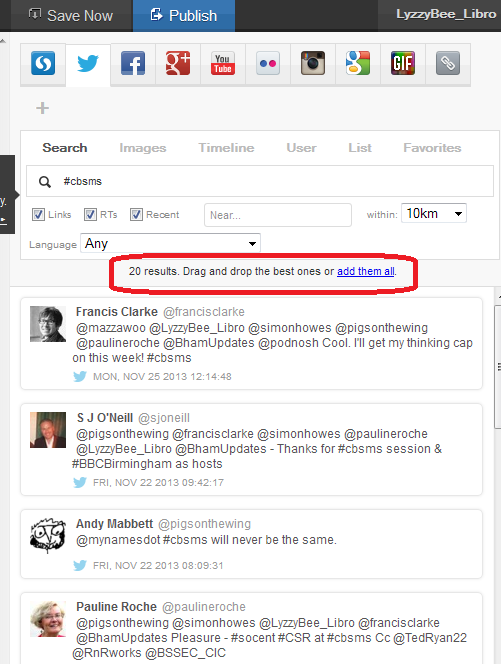
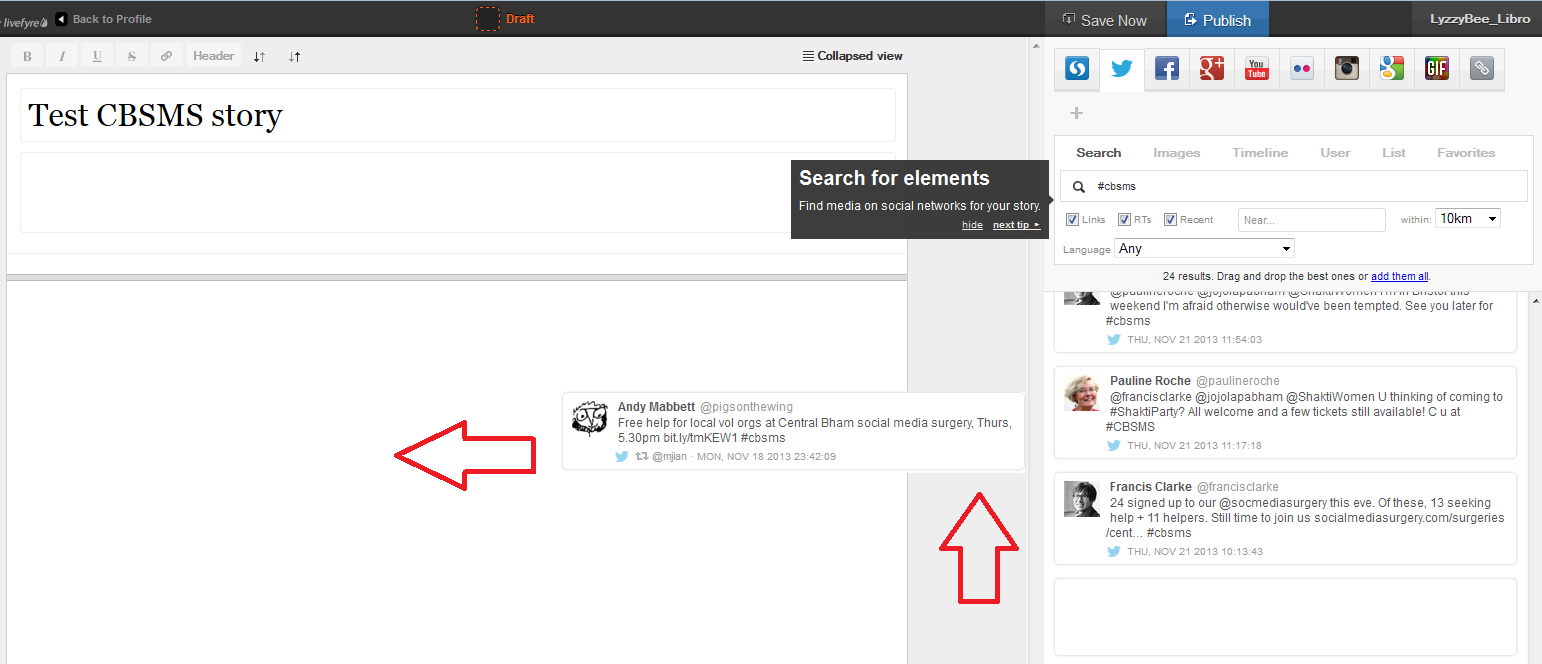
I’ve written a separate article on searching for freelance jobs on Twitter, with a worked example.

8. Seek recommendations and referrals from clients

The best way to get new clients is through word of mouth. The two main advantages?

  • It’s free!
  • If person A recommends you to person B, and person B gets in touch with you, they are far more likely to convert into a paying customer than someone who’s randomly got in touch with you through an ad or Google search.

You do need to be a bit proactive about this, though …

  • Make sure that your clients know you’re looking for more clients just like them
  • Say thank you whenever you find out someone’s recommended you
  • Ask clients for references to put on a reference page on your website (this makes enquirers more likely to use you as you come recommended by lots of people)

I have several clients who act as “nodes” for me, recommending me either individually or via blog posts and pages on their websites.

9. Seek recommendations from your peers

Your peers fall into two groups:

  • People who freelance or run small businesses like you, who you might meet in online groups or at networking events
  • People in the same industry as you, who you might meet in the same ways

It’s important not to see people in the same industry as you as competitors – you’re much better off considering one another as colleagues. When I was starting out, I was passed what turned out to be a major client by a proofreader friend who wanted to stop working at weekends and in the evenings. So I did evening and weekend cover for them. Now I’m established, I much prefer to be able to recommend potential clients who I can’t take on to another qualified person who I know will do a good job.

When you’re starting out, it’s worth forging (genuine) relationships with people in your industry who are more established. They may well have the odd customer they want to pass on, or have too much business and be looking for people to recommend on to. Nowadays, I pass quite a few people who I can’t accommodate on to a core set of five or so recommended proofreaders, writers and transcribers. I also keep a note of people in allied industries such as book design, graphic design in general and indexing, so I can pass people to them with a relevant recommendation, rather than just leaving them hanging.

You can also profit from either teaming up with peers in different industries – for example, I’ve worked with web designers on projects where they’ve written the website and I’ve provided the content, and I’ve done proofreading work for virtual assistants who don’t offer that service themselves.

I haven’t got many clients directly through networking, but I met an author at an event who went on to recommend my transcription services to a fellow author, who now uses me for transcription and editing, AND recommends me on her website!

10. Go cold calling and door-knocking

Some people do cold calling and door-knocking, where they literally call people on the phone or walk up their front paths and ask them for work. For a start, I don’t think that works in the service industry. I know some editors cold call publishing companies, and I’d love to know how that works out for them.

Personally, I feel this takes a LOT of investment. Cold calling requires a list, which takes time and research or money to get, and taking time out to walk up a lot of paths is a fairly hefty investment, too. It might be more worth looking at trade directories or local directories before you take this path – but do share your stories if you’ve had other experiences!

Edited to add: as people have kindly shared their experiences, I’m adding a note here to say that cold calling can be useful if you’re targeting a specific and maybe narrow group of clients. Fellow editors, for example, have gained work for publishing houses or journal publishers by taking this route. As my client base is more individuals and other small businesses and freelancers, this approach wouldn’t work for me. But if there’s a group of companies that you can identify as a good fit, by all means approach them with a call or letter, cold, as it were.

———————

How do you get freelance clients? Can you recommend any other ways, or do you use any of these? Do let me know whether you try any of these successfully as a result of reading this article!

Related posts of interest on this blog:

Thinking of going freelance (1) – some initial points to think about

Thinking of going freelance (2) – how to organise yourself once you’ve got going

How do I decide to who work with? – choosing companies to associate yourself with

How to turn a new customer into a regular customer

What’s the best mix of customers to have?

How to make more money in your freelance business

Searching for jobs on Twitter

When should I say no?

 
17 Comments

Posted by on December 16, 2013 in Business, Jobs, Organisation, Social media


Tags: , , ,

What is Storify and how do I use it?

Storify logoIn response to a request for information*, today I’m going to be talking about Storify: what is it, why would you use it, and how do you use it? I wasn’t already a user, so this post takes you through the stages of logging in and creating your first story through screenshots created as I did it for the first time myself!

What is Storify?

Storify is a social media tool that lets you create stories or timelines from a variety of social media resources like Facebook and Twitter, as well as other web resources. You can use it to pull together information on whatever you want, and can customise it how you want, then share your story on the site with your friends on those social media sites.

Why use Storify?

I’ve mainly come into contact with Storify in relation to events. For example, Karen Strunks pulls together a Storify after every Social Media Cafe in Birmingham. She gathers any Tweets and Facebook posts which have used the hashtag #bsms and creates a storyline showing the event through its before, during and after stages, and what people were saying about it. Here’s an example of one of her Storify stories.

So you can see that it’s a great way to pull together information and images and make a story that you can share with others. It’s useful for events, news on particular topics, or fundraising and awareness raising campaigns. You don’t have to base it around hashtags (a hashtag is a short code with a # in front of it that creates a searchable link in Twitter and Facebook, etc., which allows you to find all of the tweets on a particular topic. For example, even if you’re not a member of Twitter, searching for the hashtag #amwriting, used by authors, will give you these results, all containing the hashtag (example)).

How do I join Storify?

If you’re not already a member, you need to go to www.storify.com and sign up. If you don’t already have an account, you need to click the Login button at the top right:

Storify home page

You will be given the option to log in using Twitter or Facebook. Actually, you will still need to create a password and account with Storify: what this does is associate your Storify account with your social media account. You can also just create a username and password.

2 login

I chose to sign up using my Twitter account, as that’s what I use most for business and sharing. As it says, it only connects to your Twitter account and uses its authentication, it doesn’t see your password etc. And when it says it will Tweet for you, that’s only when you create a story, not randomly!

3 Twitter login

So I told it my Twitter username then added my email address and a password:

4 sign up

And that was it, I was ready to create my first story!

How do you create a Storify story?

Once you’ve created your account, you’re ready to create a story. There’s a big green button on the top row of the website, Create Story. Click that …

5 create

… and you’re taken to a slightly alarming page – alarming because it manages to look both blank and complicated! But look: little tips come up the first time you use it which guide you through what to do!

Basically you’ve got an area where you create your story on the left and a place to search for content on the right.

The first thing to do is create a name for your story. You can also press the Save Now button at this stage, which will prompt it to autosave as you go along.

6 create

I’ve given my story the edifying title “Test CBSMS story” and now I’m ready to add content, or Search for elements, as Storify calls it:

7 create

There’s a row of tabs along the top – I clicked on Twitter and then searched for #cbsms [Central Birmingham Social Media Surgery], because I knew that that was the hashtag used around the event. But you can search for anything here:

8 search

You can see that a set of Twitter results has come up, and all of them contain the hashtag. Storify now handily told me what to do: drag and drop the tweets I wanted into the story area:

9 choose

This means that you can pick up particular results but not all of them – useful if some of them are repeated or just ‘chatter’ that you don’t want to include. It also means that you can put them into whatever order you want, rather than the order imposed by the standard Twitter view (I made this one like Twitter, with the newest tweets at the top, but if you look again at Karen’s example, she switched it round to read from top to bottom).

Click on the tweet you want to include and drag it across into your story area:

10 choose

Once I’d popped a couple of items in, I was told that I could add text:

11 comment

You click on the space between your items and type whatever text you want to add:

12 comment

So I added a note explaining the last two entries in the story, where I checked it was OK to use the hashtag to create this worked example.

I then hit the Save Now button – which I mentioned earlier and should have done at the point at which I mentioned it! Just in case!

13 save

Adding more sources to your Storify

You’re not limited to creating a Storify from only one source. Along the top of the search area you can see loads of different options, including Facebook, Google+, YouTube, Google, and your own photos and links.

Note that if you choose Facebook, you will need to log in and link it to your own Facebook account (again, this won’t do anything nasty, it just appears to need to use your own Facebook timeline. Of course, you can search for anything on Facebook once you’re logged in). You don’t seem to need to do that with Google+, though.

14 connect other accounts

This time, I didn’t bother with any Facebook items, but I did pop into Google search and picked up some explanatory information about the Social Media Surgery to add to my story:

15 connect other accounts

How do I publish my Storify story?

The first step is to hit the Publish button at the top right:

15.5 publish

Just in case I had pressed it too soon, I was shown a confirmation box:

16 publish

I was ready to publish, so I clicked on Publish story.

The next step was Share & notify. Sharing creates an automated Tweet with a link to your story. I imagine that if you’ve signed in to Facebook, etc., you will also be given the option to post an automated status update.

Notify lets you autotweet anyone who’s a friend on Twitter and is mentioned in your story to tell them that their tweet has been included in your story. I really like receiving these notifications, so I left these ticked, but you can untick them if you don’t want to do this.

17 share and notify

This process creates my story in Storify. At this point, the story gets assigned a URL that I can quote in emails or add to my blog. In the case of this story, it’s http://storify.com/LyzzyBee_Libro/test-cbsms-story, and this stays with the story on my profile for ever more.

18 live

What does my Storify look like on my Twitter account?

Finally, I popped over to my Twitter account to see what my story looked like on there. The top tweet is the automatic tweet with the link to my story, and the ones underneath are those ones that automatically tell people that they’ve been included. Exactly what it said it would do.

19 live on Twitter

What else can I do with Storify?

When you’re searching, you can refine your search to exclude retweets, etc.

You can get a paid account which is useful for large businesses or organisations. This seems to allow a lot more customisation and also real-time updates – however, I like the editable nature of the free version and I’m not sure if that would get lost if real-time updates were running. Maybe someone who has a paid account will come along to share the uses of that. But I think most people will be OK with the free version.

* I was helping the Chinese Community Centre in Birmingham at the November 2013 Social Media Surgery and they wanted to use Storify to pull together stories from their Oral History Project. We ended up talking about their blog rather than Storify, but I promised to put together some instructions for them. This one’s for you! Note: This is not a sponsored post, but an exploration of a potentially useful tool.

———————

This post has taught you – through my own learning process – about using Storify. You can find more posts about using social media in the relevant part of my resource guide.

If you would like more detail about how to use Storify for your content marketing, have a look at this article by Fiona Cullinan.

If you’ve found this article useful and/or interesting, please do post a comment and share using the buttons below! Thank you!

 
26 Comments

Posted by on November 27, 2013 in Blogging, New skills, Social media


Tags: , , , ,

Guest posts 2: How to be the perfect guest

handshake

Getting guest posts published on other people’s blogs is generally considered to be A Good Thing. It can bring you new clicks, followers and even customers. But even if you’re being commissioned to write a blog post for someone else, there are some fairly unwritten rules that will help you to make it a success on both sides.

In this article, I share what makes a good guest blogger, from initial contact to thank yous and shares in ten top tips for being the perfect guest blog poster. I talk about being a good host here, by the way).

1. Do your homework

You’ve got a post you want to share and you think it’s a good guest post. Before you even contact the host to ask them to post it, do your homework. Check whether they have a guest post policy (I have one, and you can find a link to it on my main blog and in more detail on the Libro Full Time blog). Many busy bloggers will not even reply to you if you haven’t looked and noted any guidelines. I will give people a second chance if I have time – but not always!

Presumably you know the blog because you’ve been reading it already. Have a think about who the audience is. What sort of posts does this person publish? How does your prospective guest post fit in with them?

2. Pick your hosts wisely

Have a think about whether this person welcomes guest posts. Are they on your topic or are they specific interviews or on other subjects? Is this someone you’ve engaged with on a long-term basis? Have you liked, shared, commented on their posts for a few months already? If they know your name and where your expertise lies, they are more likely to welcome your guest post.

Note that common advice is to only guest post on blogs that are more popular than your own. You can look at their Alexa score and yours, for example, to see which is more popular. BUT, because part of my mission is to help other small businesses and colleagues, I’m happy to guest on smaller, newer blogs, like I did here and here, to help to promote them as well as myself.

3. Show that you’ve done your homework

When pitching to place a blog post cold, or when replying to a commission, make sure that the host knows that you’ve had a look at their blog, that you’re familiar with their style and content, that you have an idea who their readers are. Nothing annoys a blogger more than having a random person contact them saying “I have read your blog [on football] and I think this post [on nuclear physics] would fit really well, please post it and all my links as soon as possible”. Even super-polite old me doesn’t always reply to those ones!

4. Follow the guidelines

If a blog has guidelines for guest posts, like The Creative Penn does, for example, then do follow them! (These ones are very detailed because it’s a very popular blog with lots of guest posts, but as I said above, most people have them). In fact, if you can’t find any published guidelines, ask the blogger if they have any specifications as to the ideal length, angle, etc. Make your piece match these as closely as possible.

5. Don’t duplicate content

Google and other search engines do not like duplicated content. So make sure that any blog post you tout around is fresh, new content, not something that has appeared elsewhere or been pitched elsewhere. It’s fine to pitch the same post to several potential hosts as long as you do it in series not in parallel, i.e. you wait for the first rejection, then try the next blogger. Also see section 9 to avoid doing this on your own blog.

6. Help the host with the formatting

As we learnt in the last post on hosting guest posts, formatting text sent in by someone else can be a nightmare. If you really want to help your host, by all means write your post in Word so you can spell check it, etc., but then “save as” a plain text file with a .txt file (drop down the “save as” box when you’re saving and choose “plain text .txt”). Your host can then open the file in a text editor and paste it into their blog editor.

You can always send a Word version as well, so they can see any bold or italics or special formatting.

It goes without saying that you’ll spell check your post and – if necessary – have it checked by your proofreader first, doesn’t it?

7. Provide an author bio and links

To make it easy for your host, do provide a short author bio about yourself, and links to whatever it is you want to promote. I usually put together a few sentences on what I do and what I care about (this guest post by me has a good example which the host has altered slightly to fit her style and context) and then give the full URLs for the links, with an explanation of what they’re linking to. Some hosts will put the links under the text, some will put them next to the text, all should make them live.

8. Accept feedback and give feedback

Many bloggers who accept guest posts will want to tweak your article a little to make sure it fits their guidelines, style and readership. Please do accept this graciously – you’re playing round someone else’s house, so you do need to play by their rules.

I submitted one piece to a blog as a guest post, but it wasn’t what they were looking for. They came back to me with ideas for tweaks, but in the end I thought it was better to abandon that idea and do a whole new post for the other blogger. That was accepted immediately and proved popular with their readers. Not being one to waste some good text (and proving that it was fine as a blog post, just not as a guest post on that particular blog, I tweaked it to remove references to the original blogger and published it on my own blog!).

Once the piece has been published, have a look at it, and if there are any errors, do let the host know. Typical things to look for include spelling your name incorrectly and not putting live links on. If you spot anything like this, let them know right away and give them an opportunity to put it right. No one’s perfect, and I would certainly prefer my guests to let me know if there was a problem.

Related to this, though: don’t push. If you’ve submitted a request to guest and haven’t heard back, by all means drop one reminder or question a week or so later, but that’s it. For many bloggers, blogging isn’t their only job. Sometimes my blog has to come second to my paid work (I pre-write and auto-post, so even if it looks like I’m spending time on the blog every few days, I might not be!) and I’m sure other people are in that situation, too. Hassling will probably lead to a refusal!

9. Promote and share

Your guest post will build hits for and interest in both your host’s blog and products/services and yours. So get promoting and sharing on their behalf, since a hit on your guest post is likely to generate a click-through to your blog or other resource. I get a lot more hits on those posts that both my guests and I promote – AND because there are more hits, the click-throughs go up, too (this is particularly noticeable on my small business chats, when it can make a big difference). So you have a vested interest in promoting the blog on which you’re guesting.

One important point: don’t paste the whole of your guest post into your own blog. By all means write about it and link back to the original (this is a good example by one of my guests) but duplicating content over two different blog posts will make your content disappear down the search engine rankings very fast, as the search engines are suspicious of anything that looks like automated activity and will ignore two blocks of identical text.

10. Say thank you

It’s always nice to say thank you. So email the blogger who has hosted you and also put a public thank you out there on the social media. I’ve got a page on my blog where I list my own guest post requirements but also list all the guest posts I’ve placed – and that sends a few people over to my hosts every day.

———–

This post has talked about how to be a good guest blogger. If you enjoyed this post, please click some of the share buttons below or post a comment yourself – all are welcome! And if you have an idea for a guest post for this blog … do get in touch!

Related posts:

Guest posts 1: How to be the host(ess) with the most(est)

10 reasons to start a blog

10 reasons NOT to write a blog

Reciprocity and Social Media

Top 10 blogging sins

Scheduling blog posts and keeping going

 
9 Comments

Posted by on September 16, 2013 in Blogging, Business, Social media, Writing


Tags: , , , , ,

Guest posts 1: How to be the host(ess) with the most(est)

handshake

We know that placing your guest posts on other people’s blogs and hosting other people’s guest posts on your blog is A Good Thing. It increases traffic to both of your websites, gains you social capital, and gives you new, fresh and different content for your blog.

But how do you make sure that you do it right – for both you and your guest? Here are ten top tips to help you get the most out of hosting guest blog posts. If you only read and apply two of these, please make them numbers 7 and 8!

1. Know what you want

It’s all very well deciding to welcome guest posts onto your blog, but what do you want to achieve? Do you want to show different angles on your line of business? Allow so-called competitors space to talk? Give your clients some publicity? Help other people in your geographical area? Start to formulate a policy rather than having a scattershot and random approach. This will help your readers to understand why you’re hosting guest blog posts, and will help potential guests match their posts to your blog.

I accept guest posts on writing, especially on editors as writers and writers as editors. The more random ones I’ve posted up in the early days didn’t get many hits, because they didn’t really mesh with what I write about. The most popular – ones that chime with my experiences, and the odd Troublesome Pair or Be Careful post that someone has written from the heart.

2. Know what you don’t want

Once your blog has a certain reach, you’ll find that people get in touch regularly wanting to place guest posts. Many of these seem almost completely random, with almost no (or absolutely no) relevance to my blog. I might give these people a second chance, but not often. I realised early on that there wasn’t room on my blogs for random links to unconnected companies, or links to companies doing things that I didn’t quite approve of – I get a lot of requests for “guest posts” which are just ways for a company to place their client’s URLs in popular places and build their SEO, and a good number for links to student proofreading companies that I wasn’t entirely sure about.

3. Be clear on what you will and will not accept

Once you know what you want and don’t want, you can narrow this down to what you will and will not accept. Most of the guest blog posts you publish will probably be suggested to you rather than commissioned, and it’s up to you to say yes or no to these ideas. Personally, I will accept trial copies of relevant software or hardware but I’ll say if that means my review is effectively a sponsored post, but I won’t accept requests to place blatant ads. I might in future accept ads for products that I have reviewed, found good and am happy to recommend. I have got a few links that earn me an affiliate fee on my Links page, but I make it clear that I earn a fee from purchases coming from those clicks. Some people won’t take any ads, some will take anything that pays. I don’t mind what you do but it’s best to be clear about it.

So, once you know what will and won’t accept, get clear about it. I have a Guest Post Guidelines page on my other blog (linked to from this one) – I put it there because it linked in with my policy on reviewing books I’m sent. I refer enquirers there when they want to place a guest post with me.

4. Commission guest posts

I get a lot of requests for guest posts, but I’ve also commissioned them (and been commissioned to write them too – I was asked to write this one after chatting about exercise with a fellow attendee at a networking event). Commissioning doesn’t mean paying: it means asking someone if they’d like to contribute.

I have done this recently with a fellow editor who is less far along her business path than I am. She’s got a specialism in which I’m interested, and fits with what I do, but isn’t something I do, personally. So I’ve asked her to contribute a guest post on it, which will be interesting for my readers and get a link to her website on mine, too.

Another aspect of this is reciprocal posting. I did this recently with Tammy Salyer. I asked her to write a post on being an editor/writer, and she then commissioned me to write about 10 top tips for fiction writing. I’ve noticed a good flow of hits and referrals between the two posts – win-win for the two of us!

5. Don’t be afraid to give feedback

Once the post has been written and sent to you, rather than just publishing it as is or rejecting it wholesale, if there are aspects that I think could be changed, or I think the post needs major work, I will feed that information back to the poster. If there are minor spelling and grammar errors in Small Business Chats, I tend to change them silently (my initial instructions should make it clear that I’m likely to do that), but if there’s a more major content change, I will send a note to the poster before I publish (or reject)

6. Help people out

I try not to use guest posts just to give me me me more content, more hits, more interest. If I can give someone an opportunity to promote their book, service or specialism, AND it fits in with my blog and its readers, I’ll offer them a guest post or accept their proposal. I do care about hits, but I also care about helping people and promoting things that are of value. That’s why I’ve turned my own posts over to topics like Kiva and the Soberistas, and am happy to work in guest posts on topics that I feel are valuable.

7. Format the post

Most people will send their guest post to you in one of two ways: text in an email, or a Word document attached to that email.

Probably, like me, you usually write your own blog posts straight into the blogging interface you use – you hit “new post” and start typing. Fine, that’s all new text and it should format OK. If you copy text straight from an email or Word document and dump it into your blog interface in a “new post”, you are likely to end up with a mess.

This is because most emailing programs and definitely Word documents contain all sorts of invisible formatting commands that will carry over into your blog post and run paragraphs together, put it all in unfeasibly tiny print, and all sorts of other sins.

It’s easy to avoid this. Copy the text that will form your blog post and paste it into a text-only editor – most PCs will have Notepad installed as standard, for example. Paste it in there and then copy it and paste into your blog editor. Job done. You may have to reformat any links that the guest blogger has given you, but see the next point for how to work that one out.

8. Include links and an author biography

In my opinion, this is the most important one of the lot – and something that sadly I see going wrong quite a lot of the time.

If someone is decent enough to provide you with a guest blog post for your blog, be decent enough to tell your readers about them, and put links to their product / service / book / cat pictures / whatever they want to promote – and that’s LIVE LINKS, not just URLs that you can’t click through with – on the post.

This is a good example (I won’t share a bad one to save people’s blushes, but I’ve come up against this with my own blog posts). It includes an author bio with proper links that make sense and are in a different colour, so readers can find me and the book I wanted to promote easily.

It’s great to reciprocate, but the effort someone has put in to writing a guest post for you will be simply thrown away if you don’t provide links so that people can click through to them and their websites.

So make sure you ask your guest blogger for a quick biography and links to the things they want to promote (don’t assume!), and then place the links in the article.

If you don’t know how to create live links in your blog posts, read this article. Now.

9. Share and promote

Once you’ve published your guest post, make sure that you share and promote it just like you do your own ones. It’s nice to include the author’s name and link in any posting you do on Facebook, Twitter, LinkedIn and Google+ etc.

This extends to telling the author that you’ve published the article and where they can find it – send them a link to the URL. And ask them to promote it, too. That way, you can leverage the social capital of both of you – or in simple terms, get more people to look and click. And that’s really what guest posts are about!

10. Say thank you and feed back again

Once someone has been kind enough to provide you with a guest post, do say thank you publicly and privately. It’s also nice to let them know how many hits the post has had – say in the first week. You look at your stats for your posts, right? You can also let them know how many click-throughs they got to their website or other resource. Also let them know if there are comments on the post that you think they should see or even reply to – not every guest will bookmark it and check obsessively for comments. But don’t leave them to do all the responding – take part yourself, too. Again, this one is a good example – look at the comments, where both I and the guest poster respond to them in turn.

———–

This post has talked about how to be a good host to guest bloggers. Next week I’ll look at how to be a good guest. In the meantime, if you enjoyed this post, please click some of the share buttons below or post a comment yourself – all are welcome!

Related posts:

Guest posts 2 – how to be the perfect guest

10 reasons to start a blog

10 reasons NOT to write a blog

Reciprocity and Social Media

Top 10 blogging sins

Scheduling blog posts and keeping going

 
8 Comments

Posted by on September 9, 2013 in Blogging, Business, Social media, Writing


Tags: , , , , ,

How to maintain a good online reputation

a man's hands typingYou are your brand. I know that that sounds a bit marketing-speaky, but it’s true. If you run a business, people are going to look for you online as well as your business name. I can vouch for that, because I get loads of searches coming through to this blog for the people I feature in my Small Business Chat. Far more of them are looking for the person’s name than for their business name (if it’s different). Today I’m going to talk about my personal methods for maintaining a good and positive online image, with some tips which should be useful for you, too.

These tips mostly relate to social media, but you can extend them to anywhere where people see you, and your business, in operation, such as networking events, trade fairs, etc.

What do you mean by “You are your brand”?

This is particularly important if you run a small business or are a sole trader. However, even if you look at a  multinational, the person at the head of the company and the reputation they personally have has an effect on the perception of the company.

Think about Richard Branson. What about Theo Paphitis and Duncan Bannatyne? Remember Gerald Ratner and how he ruined his business with one sentence?

In the same way, when you go out networking, or you do stuff online, and you run a business (or even if you don’t), people are getting an impression of you which extends to the perception they have of your business.

My personal dos and don’ts

This is of course a personal list. Maybe you disagree? I know that I’m ultra-careful about my brand and company reputation, but I’d rather be ultra-careful than too relaxed. Reputations can be destroyed in an instant!

This is not about manipulating your image to sell more of your product or service; it’s about making sure that you’re representing your company in a positive light and making sure you match in your behaviour the message that you want your business to get across.

DO be yourself

It’s no good trying to hide who you are. Yes, if you’re shy, you can project more of an image of self-assurance, but also kindness, respect and care often come with shyness, and they’re good things for your clients to see. Personally, I’m very open and honest, and I try to give something back through charity donations and helping people. Therefore I have made small business loans to celebrate Libro’s anniversary and help out other small businesses with my weekly features, etc. I also keep my blog posts linked to what I do and my own practices – someone mentioned to me just the other day that my posts are very personal and friendly – which is how I hope my business comes across, too.

DO stay true to your morals and ideals

As an addition to this, I try to make sure that what I do with Libro mirrors my own personal morals and ideas. This is why I won’t put ads on my blogs unless it’s a testimonial for someone’s work that I know is good, and why I am very careful about the guest blog posts I publish (I recently turned down a fair amount of money offered to me to mention a blog hosting company on a blog post, because I was asked not to disclose that it was a sponsored post. Not my thing). I have also turned down work through my personal ideals.

DO be human

If you have a personal presence on social media, and even if you only have a business presence, make sure that the person behind the business shows through. This applies especially if you’re sharing your business posts on your personal account. I have a Libro Facebook page (where I make sure you can see photos of me and ask for feedback as well as sharing my blog posts) and a personal page, and I try to make sure I post more personal than business stuff on the personal page. People want to know the person behind the business, and they particularly don’t want the friend they’ve followed to turn into a corporate mouthpiece all of a sudden.

DON’T bombard friends with your business message

It’s very tempting to repost all of your business blog postings, etc. on to your personal Facebook and Twitter streams. It’s even more tempting to shoehorn a mention of your business into every comment you make to your friends. We all know at least one person who does this (I’ve been accused of it myself by one person, but I do try hard to keep the balance), and what does it do? It puts you off buying their goods or service. Sorry, but it does. Do share your business stuff with your friends, but not at the expense of the normal friend stuff!

DON’T moan about your customers

This one is oh-so-tempting, too. Especially if you work alone, sometimes you have to MOAN. Here’s the thing: moan, but don’t do it in public. Really, don’t. If you only follow one of these tips, follow this one. If you moan about a customer, even “just” on your personal Facebook timeline, how many of your friends might have been going to recommend your services to a friend, and might now not be inclined to. It’s unprofessional.

Of course, we do all need to moan, but this is what you do: do it in private. I set up a local homeworkers’ support group and an “Editors’ Rah and Argh” group on Facebook – as private, invitation-only groups. If we want to roar, sob or moan, we do it there, or in an email to a friend, or in a cafe, not in public!

DON’T talk about your customers at all, actually

Not only the moaning, but be careful what you say about your clients in public. I have Non-Disclosure Agreements with some of mine, which means no talking, ever, but even with the others, I do not identify them by name, when talking in public or writing about them in my book. I don’t Tweet to my music journalist clients, outing myself as their transcriber, unless they specifically mention it in public first. I don’t put their comments on my references page and CV before asking first. It’s just good practice.

DON’T let people see the frantic paddling, just the serene swan

Cash flow problems or upset by something? I might mention in the most general terms that I’m feeling a bit stressed, but I usually won’t. Although it’s good to talk things out, if you run a business, you don’t know who is watching. If you would be worried if a customer or prospect saw what you were writing, do it privately – create a filter or a private group on Facebook. If in doubt, don’t talk about it in public.

DO be appropriate

If you manage rock bands and hang out at heavy metal festivals, by all means swear a bit on your public tweets. If you earn your living editing, try not to have spelling mistakes and typos all over your blog (this is really hard to do – I know. Collect a group of friendly people who will let you know privately if such a thing occurs). I lead a pretty quiet life, but I do try not to swear or have inappropriate pictures of me all over social media. Obviously that’s easier the older you are and the less of your adult life has been lived in the full glare of social media, but you can always politely ask people to untag you from that hen party pic or horrendous shot from your younger days. If you explain politely that your business is linked to your name, and you’re worried about affecting it, most people will surely comply with that! You can also untag yourself from Facebook posts and pictures and set up your profile so that you have to approve all tags, if you’re at all worried (thanks to Linda for that tip!)

My golden rule for maintaining a good online reputation

This is my golden rule. I’ve stuck by it ever since I started having an online presence:

Never say anything in public online that you wouldn’t be happy shouting out loud in the middle of Birmingham.

What if your reputation is already less than stellar? I think that’s a post for another day, don’t you?

Related posts:

10 reasons to start a blog

10 reasons NOT to write a blog

Reciprocity and Social Media

Top 10 blogging sins

Scheduling blog posts and keeping going

 
22 Comments

Posted by on September 2, 2013 in Blogging, Business, Social media, Writing


Tags: , , , , ,

Scheduling blog posts, scheduling writing, and keeping going

Things to doAs part of my series on blogging, in this article I’m going to talk about how frequently to blog, keeping going, and how to get down to writing those posts. This is primarily aimed at people who are blogging for their business, but this advice applies to anyone who wants to build the audience for their blog and needs help getting down to writing posts and sticking to blogging.

So that’s everyone, right?

How often should I blog?

How often should you publish a blog post? Well, that’s up to you to a certain extent. But if you’re looking to appear high up in the search engine results and keep your readers happy, you should keep it regular.

Most advice that I’ve read suggests posting at least twice a week. This will keep your readers engaged, keep your content updated enough for the search engines to promote it up their lists, and get enough keywords and content out there to keep your statistics nice and busy.

Varying your blog posts

Even a book review blog could do with a bit of livening up every now and again. A good example is my friend Ali – she mainly posts long-format book reviews, but she also takes up general topics or talks about book-buying trips – which varies things for her readers and gives them something new every now and again.

I choose to vary things and give myself a structure by running series in different topics every week. I tend to publish a short Troublesome Pairs post about a pair of easily confused words or at present an article on blogging on a Monday, a Word tip or business post on a Wednesday, and I always run a Saturday Business Chat or Chat Update each Saturday. I don’t stick to this slavishly – this post is coming out on a Tuesday to avoid the bank holiday, but it helps me to structure things and means that there’s something for everyone every week (I hope).

You don’t have to just publish text pieces, either. I’m sticking to text for the moment, but you can include video and audio pieces as well.

This article by Joanna Penn of The Creative Penn has really good advice about when she schedules her text, audio and video content. Her blog is really popular, with loads of comments and great search engine optimisation, and if you’re planning on using different media, this would be a good plan to follow.

Including guest posts on your blog

I’ve talked about this a bit already in my article on Reciprocity in Social Media, but hosting guest posts (and having them on other people’s blogs, too) is a great way to spark up interest in your readers and get reciprocal links and readers. I’m going to write more about the etiquette of guest blogging soon. But again, it varies things a bit. I wouldn’t personally have a guest post more than once every couple of weeks.

How do I remember my ideas for blog posts?

If you’re anything like me, you’ll have ideas and inspirations for blog posts at the oddest moments. If I’m anywhere near my desk and PC, I pop into my WordPress platform and create a Draft blog post, sometimes with just a title, sometimes with a few jotted notes. If I’m learning something new (like turning footnotes into endnotes, just today), I’ll take screenshots as I go along, and save them ready to insert into a post on the subject. If I spot a picture I want to take or have a document with a feature I want to use, I take a photo and email it to myself or save the document in the relative folder.

If I’m out and about, I use the note app on my phone to make a quite note of what I want to write about, or, if I’m feeling brave, I go into the WordPress app and create a draft from there!

How do I organise my images for my blog posts?

Because many of my blog posts are very screen shot based, and I always include some kind of image in my posts (looks good when sharing, attracts readers, etc.), I have a folder in my Windows Explorer called Blog posts. This has sub-folders for all of the blog posts I write, or plan on writing, so I can pop screen prints and pics into the appropriate folder and know they’ll be there for later. I have a set of generic pictures in the Blog posts folder, too, that I can use as images at the top of posts. I prefer to use my own images to avoid copyright issues.

How do I get down to writing my blog?

Here’s my secret: blogging SESSIONS.

You do not have to write your blog posts on the day you publish them! You can write them in advance, save them up, and publish in advance!

I’ve always got some draft posts on the go – either because I’ve had ideas (see above) and not yet written them up, or I’m part way through a series and I’ve planned the whole thing out. So when I can see at least a 90 minute slot in my schedule, I’ll schedule in time to write blog posts.

I’ll then bash through as many as I can, using my draft posts for inspiration and possibly already having pictures ready to go, either saved or inserted into the posts. Then I just need to write the text. In a good session I can get at least a week’s worth of posts ready in one go.

I’m used to having to write because that’s some of what I do in my job. If you have to wait for inspiration to strike before you write posts … just make sure that inspiration has plenty of room to keep going! Anyway, it’s surprising what you can produce when you sit down and tell yourself that you have 90 minutes to generate a load of blog posts!

Scheduling publication of blog posts

schedulingI would imagine that all blogging platforms have a scheduling feature. Here in WordPress, I can edit the Publish Immediately field to the right of my writing pane, and choose a date and time to publish the post (I also automatically post a link to Twitter, Facebook and LinkedIn. This means I can schedule a post to publish when I’m going to be away from my desk and the post will still be publicised).

If you don’t know how to schedule blog posts on the platform you’re using, Google your platform name plus something like “schedule blog posts” and you should be able to find instructions.

So, when I do a big writing session, I write the posts I want to write, then schedule them all in for the appropriate days. I can view just the posts I’ve scheduled to make sure there aren’t any clashes, then I can get on with work or even go on holiday, knowing that my blog will be publishing when I’m away.

How do I make myself keep on blogging?

If you get stuck and don’t post for a while, or don’t feel like posting, don’t panic! Here are some things you can consider doing:

  • Have a think about why you’re blogging and whether you do actually want to continue (try reading my article on 10 reasons not to blog or the one on 10 reasons to write a blog!)
  • Have a little brainstorm and think of some ideas for blog posts – just jot them down and write them up later
  • Get into a writing routine that suits you – whether that’s posting once a day or having a weekly blogging afternoon
  • Sign up for one of the various schemes that suggests something to post, or ask your friends or readers to make suggestions about what to write about
  • Consider creating some themes – it’s easier to come up with an idea for a Word tips post than an idea for “a post”
  • Don’t beat yourself up. Look at other people’s posts for inspiration. Ask for some guest bloggers. Review something you use in your work life. Write about something personal

————–

This article has talked about how often to blog, how to organise your blogging, how to schedule posts and what to do if you get stuck. I’d love to hear your thoughts on these topics – do post a comment, and if you’ve enjoyed this post, please share it using the buttons below.

Related posts:

10 reasons to start a blog – why you should do it now!

10 reasons NOT to write a blog – and why you should stop and think, at least!

Reciprocity and Social Media – how to negotiate social media kindly and politely

Top 10 blogging sins – avoid these if you can!

 
20 Comments

Posted by on August 27, 2013 in Blogging, Business, PowerPoint, Social media, Writing


Tags: , , , , ,

Reciprocity and social media

handshakeHere’s a guide to how to be polite and maintain reciprocity on social media, including Twitter, Facebook, LinkedIn and your blog, so as to “leverage your social capital”, which actually just means make social media work for you and use sharing and friendliness to help yourself and others.

It’s all about reciprocity. What does that mean?

What is reciprocity?

The dictionary definition of reciprocity – is gaining mutual benefit from exchanging things with other people.

In the case of social media, in which I include blogging, as done well it should be a two-way and mutual activity, this means building strands of connection which can, over time, turn into powerful networks that can help you start, grow or develop your business or other endeavour.

By responding to comments and forging links, sharing and re-tweeting, you make yourself more prominent in other people’s eyes, for the right reasons.

If you are unfailingly polite, share people’s content, always say thank you, share people’s details with other people and act as an ambassador and connector for other people’s personal brands as well as your own, that will come back to you in bucketfuls.

Whether you’re just starting out, embracing a new form of social media, or need a gentle reminder (I know that writing this reminded me to return to sharing more on Twitter), I hope you find these tips useful.

Reciprocity on Twitter

  • Always respond to @ comments that require a reply (i.e. they ask you a question or tell you about something).
  • Always respond to RTs, Follow Friday mentions, etc., with a thank you Tweet.
  • If someone recommends you to someone else, always a) thank the original person, b) make contact with the prospect – don’t wait for them to come to you.
  • Take part in peer-group events like #watercoolermoment etc. to encourage the people who run them and engage with your peers – you are likely to find new, interesting people to follow and talk to.
  • Retweet other people’s content if interesting to you / your followers. People often talk about the 80/20 rule – 8 retweets or shares of other people’s content via the social media sharing buttons on their blog posts to 2 promoting your own words or interests.

Note: Twitter works fast. Many people don’t see their whole stream, just snapshots through the day. If someone has seen your content and contacted you / shared, etc., try to thank them within 12 hours or less.

Use Twitter to forge links, have short conversations, support and encourage others and share content with your followers. People who you retweet will be more likely to retweet your posts. People who you recommend to others will remember the favour.

* not sure what I’m on about with all this talk of @ and RTs and followers and # signs? I’ll be putting together at Twitter 101 post to clear all that up soon!

Reciprocity on Facebook

This applies mainly to people using Facebook for their business, however it helps keep the wheels of general social interaction running smoothly, too!

  • If someone asks a question on your business page or a business-related question on your own timeline, always respond. My business page doesn’t always alert me when I have a new comment – so keep checking yours to make sure you’re not ignoring someone!
  • if someone sends you a Facebook message, always respond if it’s appropriate and meant for you, not spam.
  • Check your “other” messages for messages from people who are not “friends” with you but are making genuine contact, and respond appropriately.
  • If people comment on your status updates, “like” their comments and engage with them.
  • If people share your status updates, “like” the share and say thank you publicly or privately.
  • If people recommend you via Facebook, thank the recommender and contact the prospect as soon as you can
  • Share other people’s content.
  • Like business pages as yourself and as your business (click on cog next to message).
  • If you join groups of peers, people in the same business, people who are also self-employed, etc., join in with the group once you’re there, help other people and don’t either relentlessly self-promote or stay silent.

Facebook works on friendship and commonality. Share your peers’ posts and you’ll build up a network of people who will recommend, help and support you.

Reciprocity on blogs

I’m including blogs in social media because the best blogs that work well for businesses and people who want a “successful” blog are those that engage in two-way conversation, share content and link people together. Sounds like social media to me!

  • On your own blog, mention and link to people who have helped, advised or inspired you.
  • ALWAYS reply to comments. If you don’t have time to reply to each individually, at least put up a thank you and a mention to the most important ones.
  • Keep an eye on your search statistics and respond to what your readers are looking for (e.g. I noticed people were searching for “comment boxes too large” so added new blog post about that).
  • If people like and comment on your blog, pop over to their blog and scatter a few comments and likes if you find their content interesting.
  • Use those social media buttons on other people’s blogs to share their content – and make sure you enable the ones on your blog to allow and encourage people to share.
  • Engage with other bloggers especially in your industry sector or area of interest – comment, share, etc.
  • Offer guest post spots on your blog for other people to contribute content.
  • If you give someone a guest blog spot, make sure that you include all their links as well as a little biography about them. Make it easy for people to find them.
  • If you place a guest post on someone else’s blog, make sure that you give them all of your links to include, and talk about it as much as possible on your other social media channels.

Blogs can be a powerful way to meet people, link with people, learn from people and get your content shared around the world.

Reciprocity on LinkedIn

  • When you link to someone, change the standard message to a personal one, maybe reminding them where you met or making another tailored comment. Some people get quite annoyed with the standard messages and might even ignore then on principle, so it’s worth making that extra effort.
  • Introduce people who you think would be useful to each other.
  • Press that endorse button and give your contact some more stats.
  • Use the recommend feature if you’ve worked with someone to place some feedback on their profile, LinkedIn displays how many recommendations you’ve made, and everyone wants to work with someone who’s generous with feedback and honest praise.
  • If someone endorses or recommends you, or introduces you to a third party, send them a message to say thank you.
  • Join groups and share content kindly and generously.
  • When you join a group, get to know people and comment on other posts and questions before you start self-promoting.
  • if a group seems to be full of spam and self-promotion and no discussion and mutual encouragement, leave it alone – you won’t be able to change it and it’ll just annoy you. But learn what not to do from that!

LinkedIn can be a very powerful tool for IT and other business people, with most recruiters looking for a LinkedIn profile these days. Make sure that your full CV is on there, and a good photo.

Reciprocity on Google+

Google+ works much like Facebook, in that you can +1 posts, make comments etc. The major point about Google+ is that if you share your content and others’ on there, Google will pick up on it that little bit quicker to add it to its search engine. So it’s worth engaging on there even if it isn’t as busy or active as the other networks (or maybe it is in your field?)

Reciprocity on Pinterest, Tumblr, etc.

I’ve talked here about points regarding social media networks that I use. I don’t know much about Pinterest, Tumblr, etc. If you have points like the above to share on these, please pop them in the comments or send them to me via my Contact Form, and I’ll include them in this post (with an attribution of course!).

This article should help you to grasp the conventions of reciprocity in social media. If you’ve enjoyed it or found it useful, and think that other people will, too, please take a moment to share it using the buttons below or by sharing any alert you might see on Twitter, Facebook, LinkedIn or Google+. Thank you!

Related topics

10 top reasons to write a blog

10 top reasons NOT to write a blog

Top 10 blogging sins

Scheduling blog posts and keeping going


Tags: , , ,