This article will help you to set up a standard, free, WordPress.com blog for the first time. It talks you through step by step, including setting up your account, choosing your blog name and setting up the features that I find essential when setting up a new blog.
Further posts cover more advanced topics like sharing your posts, inserting pictures and galleries, setting up web pages associated with the blog, etc. By the end of this session, you will know how to …
- Set up a WordPress.com blog
- Choose and apply a theme (background / colours / layout)
- Set up comment moderation to keep you safe from spammers
- Remove ads which will put off your readers
- Write and publish a blog post
Why would I want to start a blog?
I’ve covered this in detail elsewhere, so do have a look at this index or pop to the bottom of this article to see a list of related posts on this blog.
Getting started with a WordPress.com blog
Please note that this all applies to a standard WordPress blog hosted on WordPress’ own servers. Some of this will look different if you’re setting up a self-hosted WordPress site. Don’t worry about that bit if you just want to set up a blog!
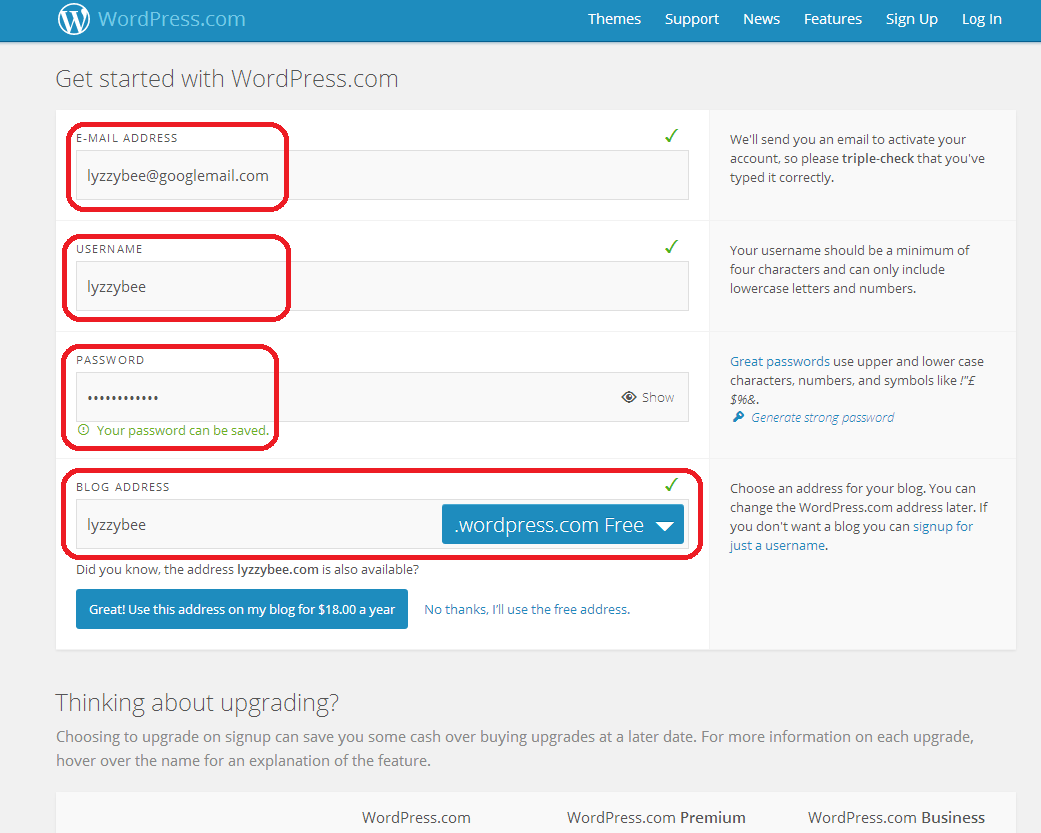
So, to set up your blog, first go to http://www.wordpress.com, where you will meet a sign-up page:
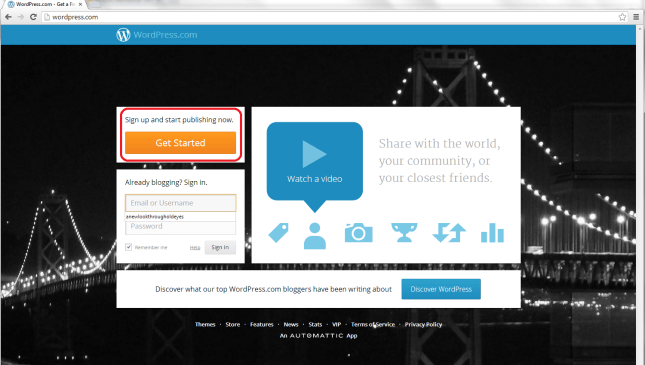
Click on the Get Started button to set up your account:

Fill in your email address, a username, and choose a password, then choose the web address for your blog.
Note: although you can change the name that your blog displays, this web address should always stay the same. If people link to it, or you link to your own posts on it, or people add it to their blog reader, they use the web address. If this changes, then the links will be lost. I suggest choosing something as bland and general as you can, so that if you change the name of your blog or the way you write it over the years, the web address and the name won’t be too different.
I’m choosing Lyzzybee here – WordPress has suggested that but you can change it. Watch out for the little green tick, which means the address is available. That means that you can choose it for your blog.
Underneath the web address box, WordPress lets you know that you could buy the domain name (in this case lyzzybee.com) for $18 per year. There’s a lot of discussion about this, with people claiming that seeing WordPress (or blogspot or any other blogging software name) will put people off if you’re writing a business blog or setting up business pages. I’m not sure that it does these days, but there is an option to buy the name if you want to, if it’s available:

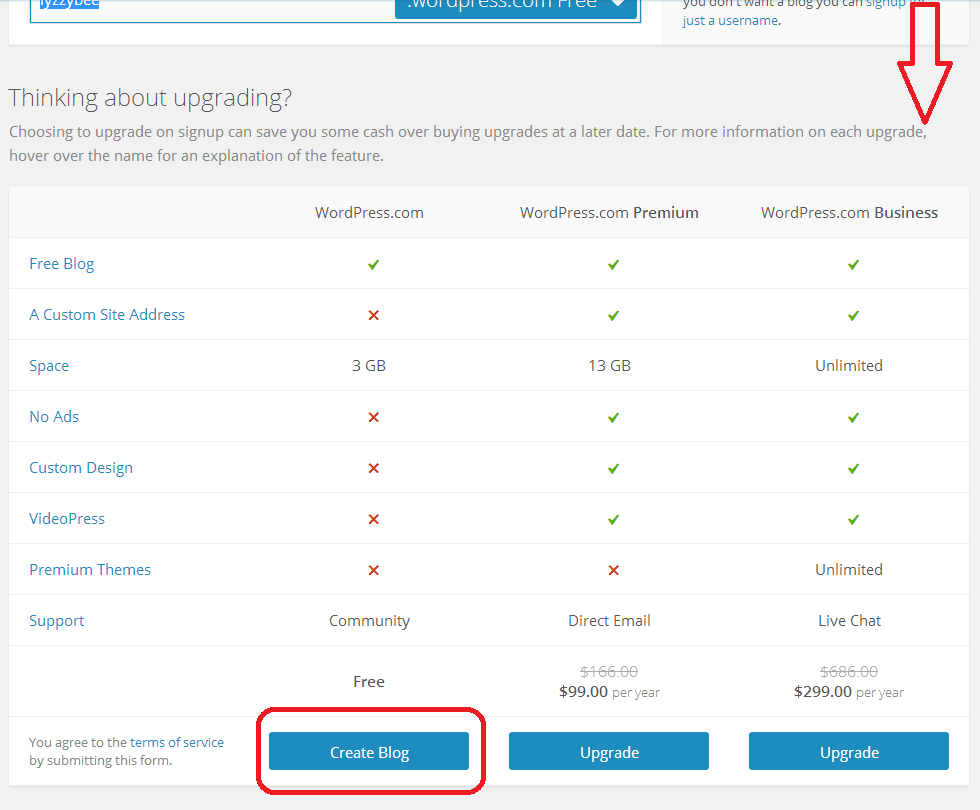
If you scroll down, you’ll see some options for upgrading, too. These look very enticing and seem to offer you a lot, but upgrades cost money and you will only really need a free blog for most purposes apart from the most content-heavy and customisable blog. For our purposes, a free one will do, so click on Create Blog at the bottom of the free column.
(Note: ad free is something we will be looking at later as I feel it’s important to remove intrusive ads from your blog, so it’s not EXACTLY free. Ad removal is currently $30 per year (about £20), it is an option but I think it’s important).

Confirming your email address
Before you go any further, you will need to confirm your email address in order to allow you to write posts and use your blog. This is a security measure, to make sure that no one’s setting up a blog under your email address illegitimately.
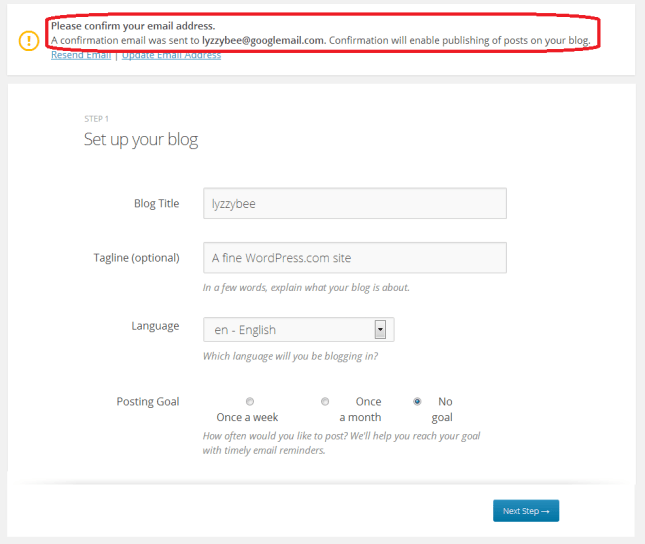
You will see a message about confirming your email address once you’ve hit that Create Blog button. You have options to change the email address or re-send the email if it doesn’t appear:
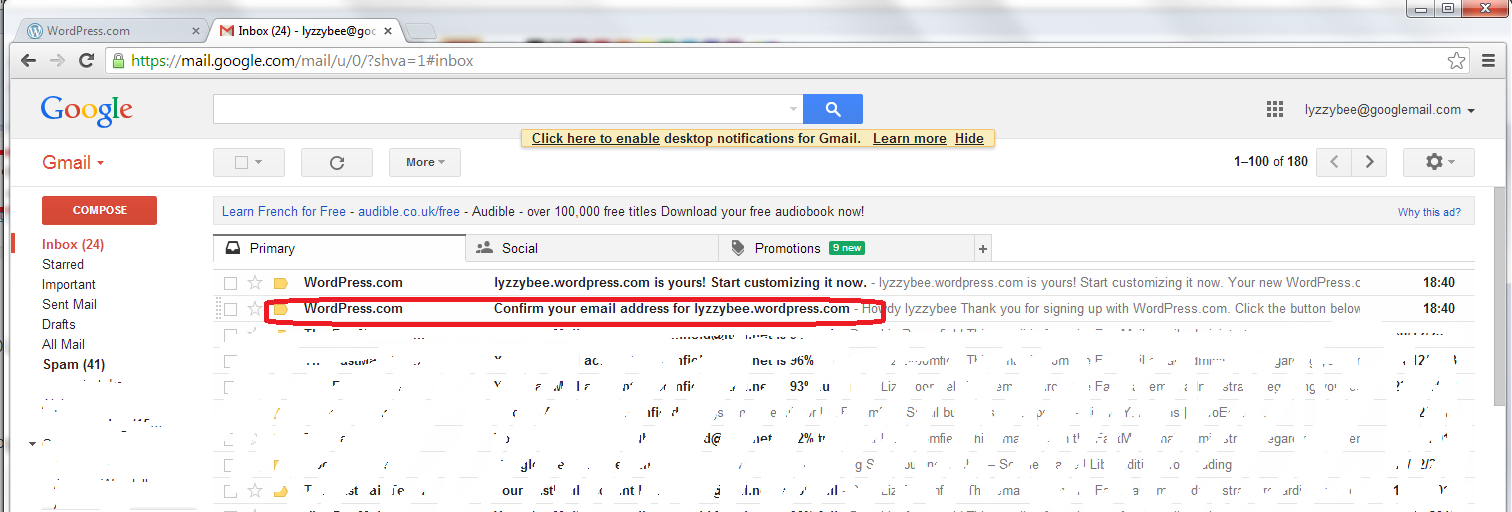
But, all being well, you should find an email from WordPress in your email inbox, with the subject “Confirm your email address for [your blog address]” – it might be the second one from WordPress, as here:
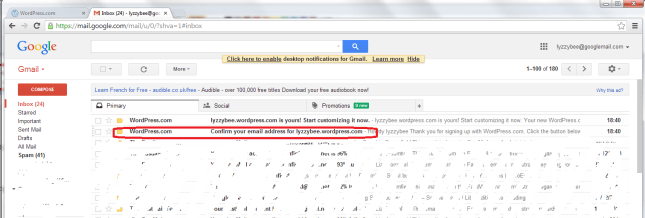
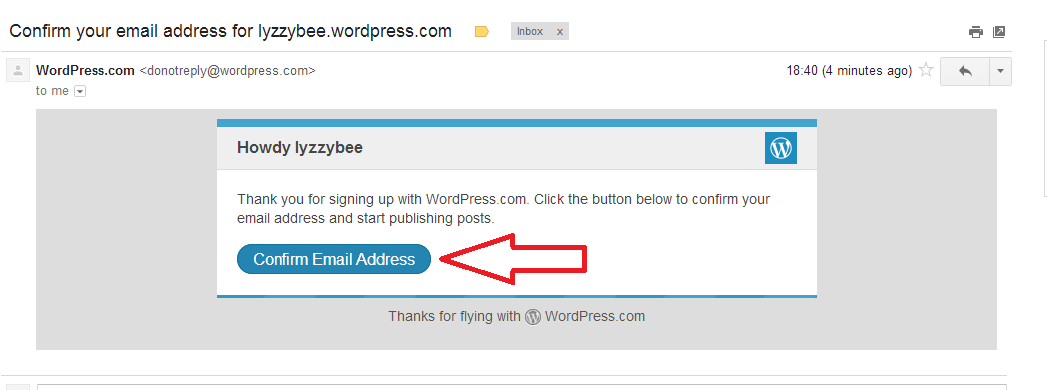
Open the email and you’ll find a Confirm Email Address button to press. Press that button …

… and you’ll be back in WordPress (in a new window) with the email address confirmed and able to do what you want with your blog!
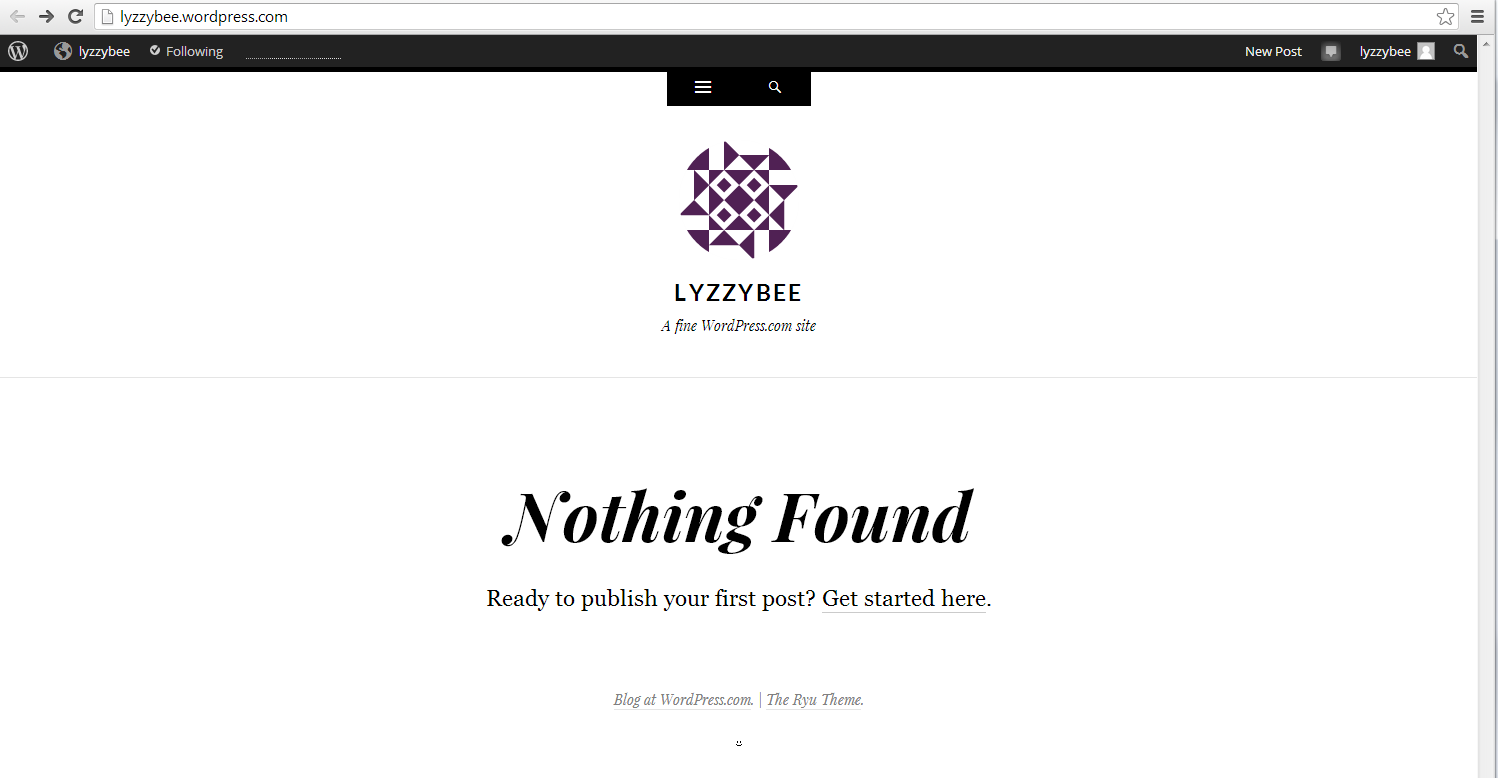
Click on the blog name to go and look at your blog …

… and you will find the very bare bones of a completely blank and empty blog! But it’s your completely blank and empty blog!

How do I access the dashboard on WordPress, aka how do I actually do stuff?
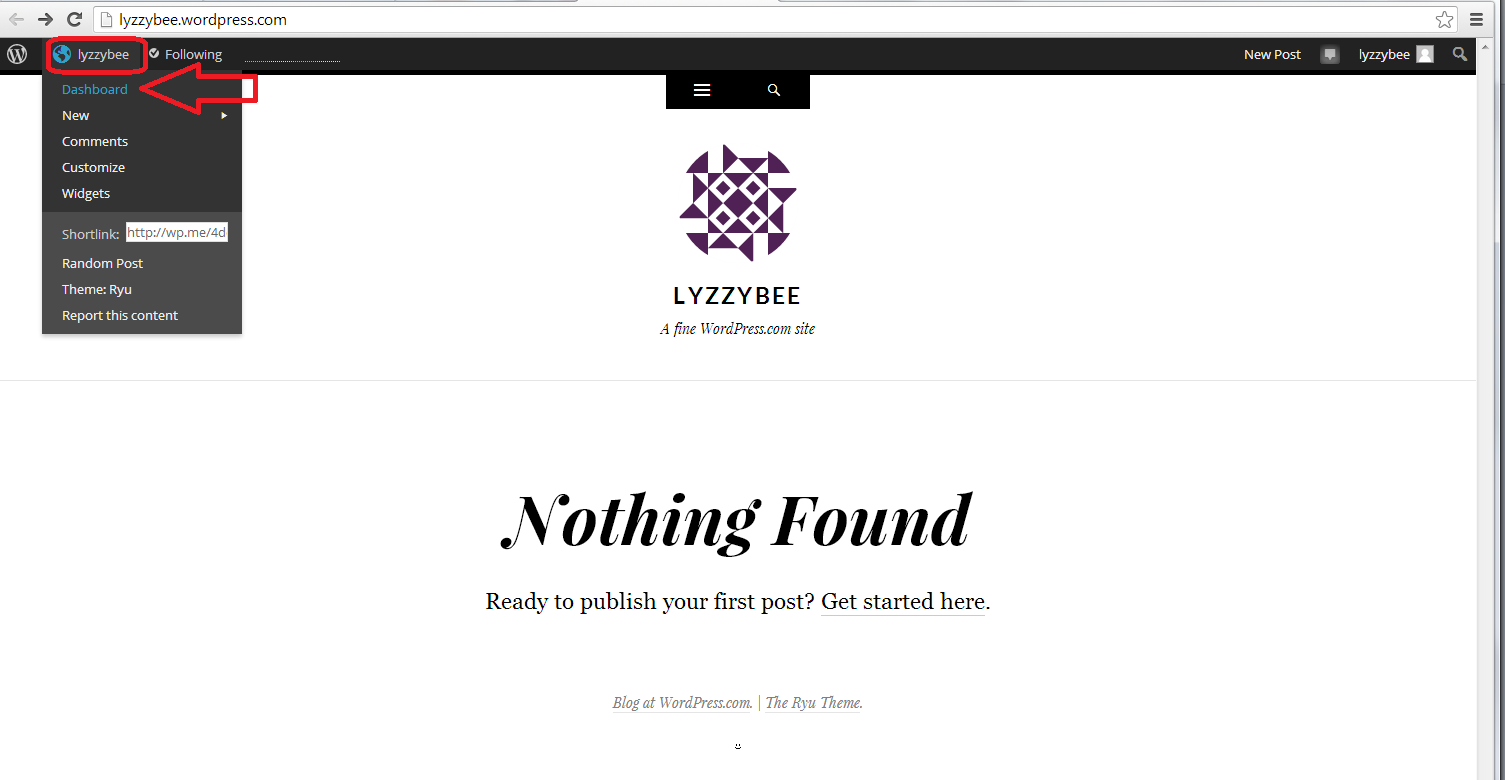
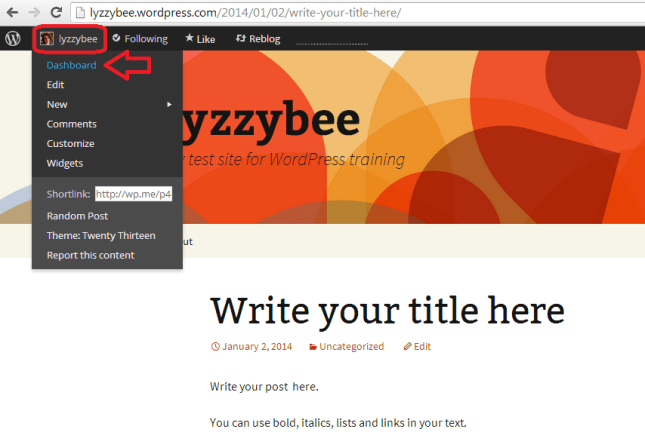
Whenever you’re logged in to WordPress and want to do something with your blog, whether you want to alter the settings, write a post, check your comments … you can access the Dashboard (which allows you to do all of this) by clicking on your username at the top and then clicking Dashboard:

Now, the Dashboard looks like a pretty scary place at first glance: there’s lots of text, lots of options … lots of STUFF!
But I can tell you that you will usually only need to use a handful of areas on this Dashboard, and a few options in each one.
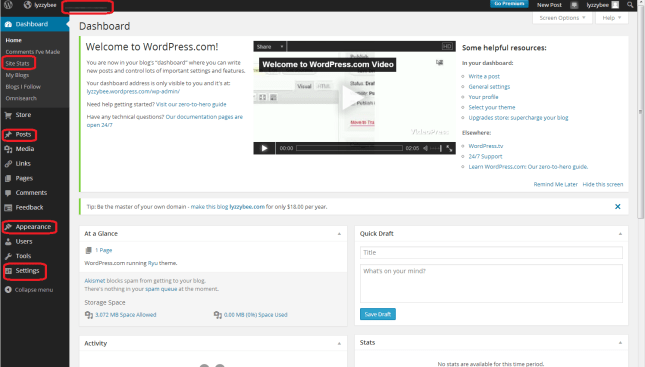
The ones that I find most useful and use most of the time are:
- Site stats – accessible from the top part of the Dashboard or the dotted line on the very top line (which starts to look like a bar graph as soon as you get some people looking at your blog)
- Posts – where you write posts, copy posts, edit them and review your drafts
- Appearance – where you change the theme of your blog
- Settings – where you change your blog’s name, subtitle and spam filtering options
I’ve highlighted them all here: not so scary after all?
How to change your blog’s name and subtitle
Remember what I said above about not being able to change your blog’s web address, but being able to change its name and subtitle? I’m going to show you how to do that first, mainly because WordPress adds its own subtitle to your blog, and we want to customise it for ourselves.
Whizz up a couple of pictures to that blank white screen that says “Nothing Found” in the middle of the screen. Notice how underneath the blog name “Lyzzybee”, it says “A fine WordPress site”. Well, that’s all well and good, but this is where you can describe what the blog’s all about. This blog that you’re reading now has the subtitle “Proofreading, editing, writing, transcription and localisation”, and this field is searchable by search engines, so it makes sense to get your keywords in there and tell people what it’s all about (another of mine can be found here).
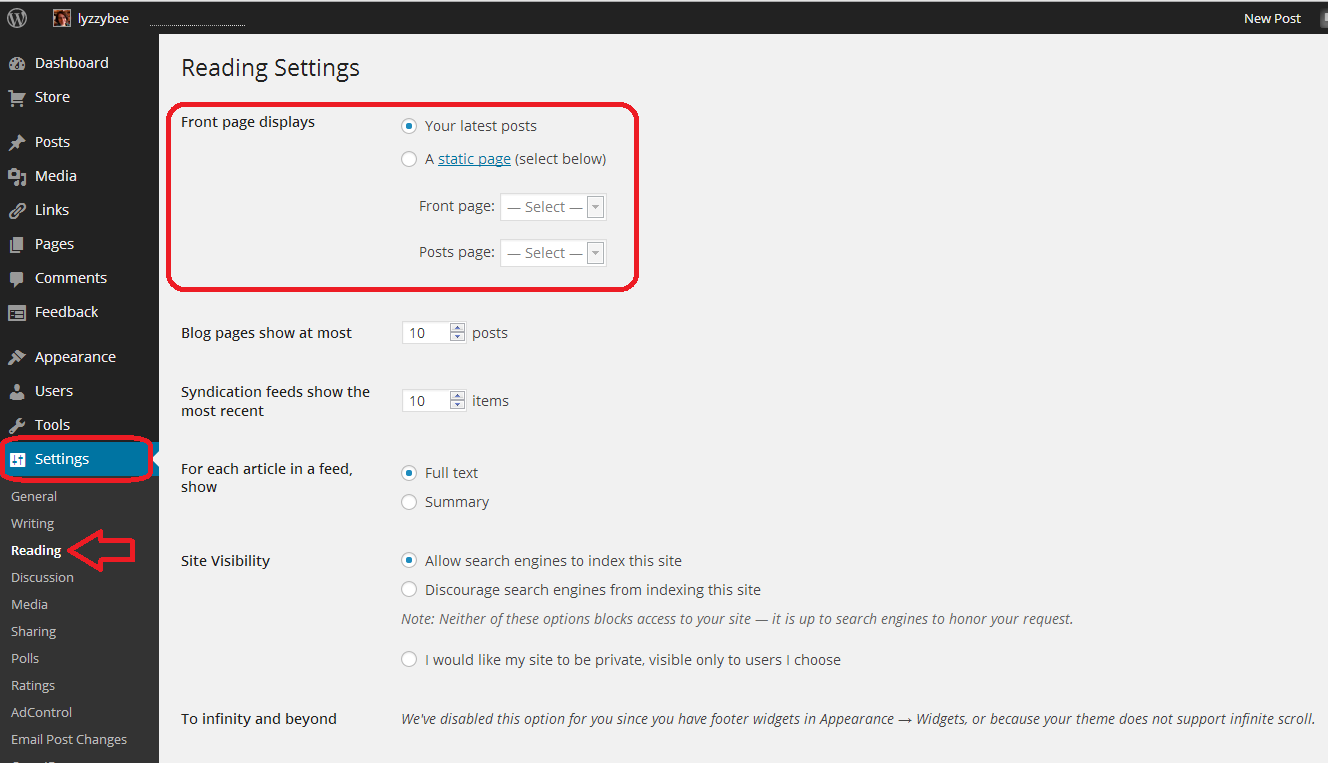
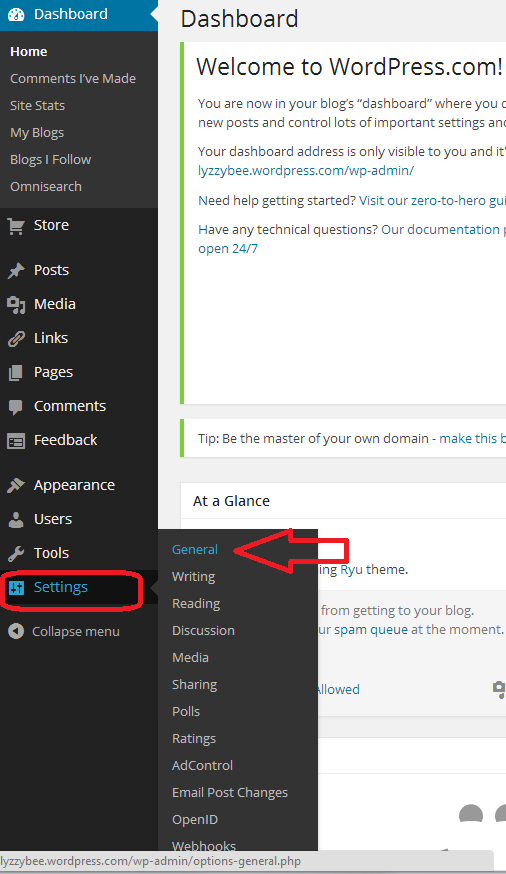
To change this, go down to the bottom of the Dashboard and click on Settings. You’ll get a sub-menu, and you now choose General:

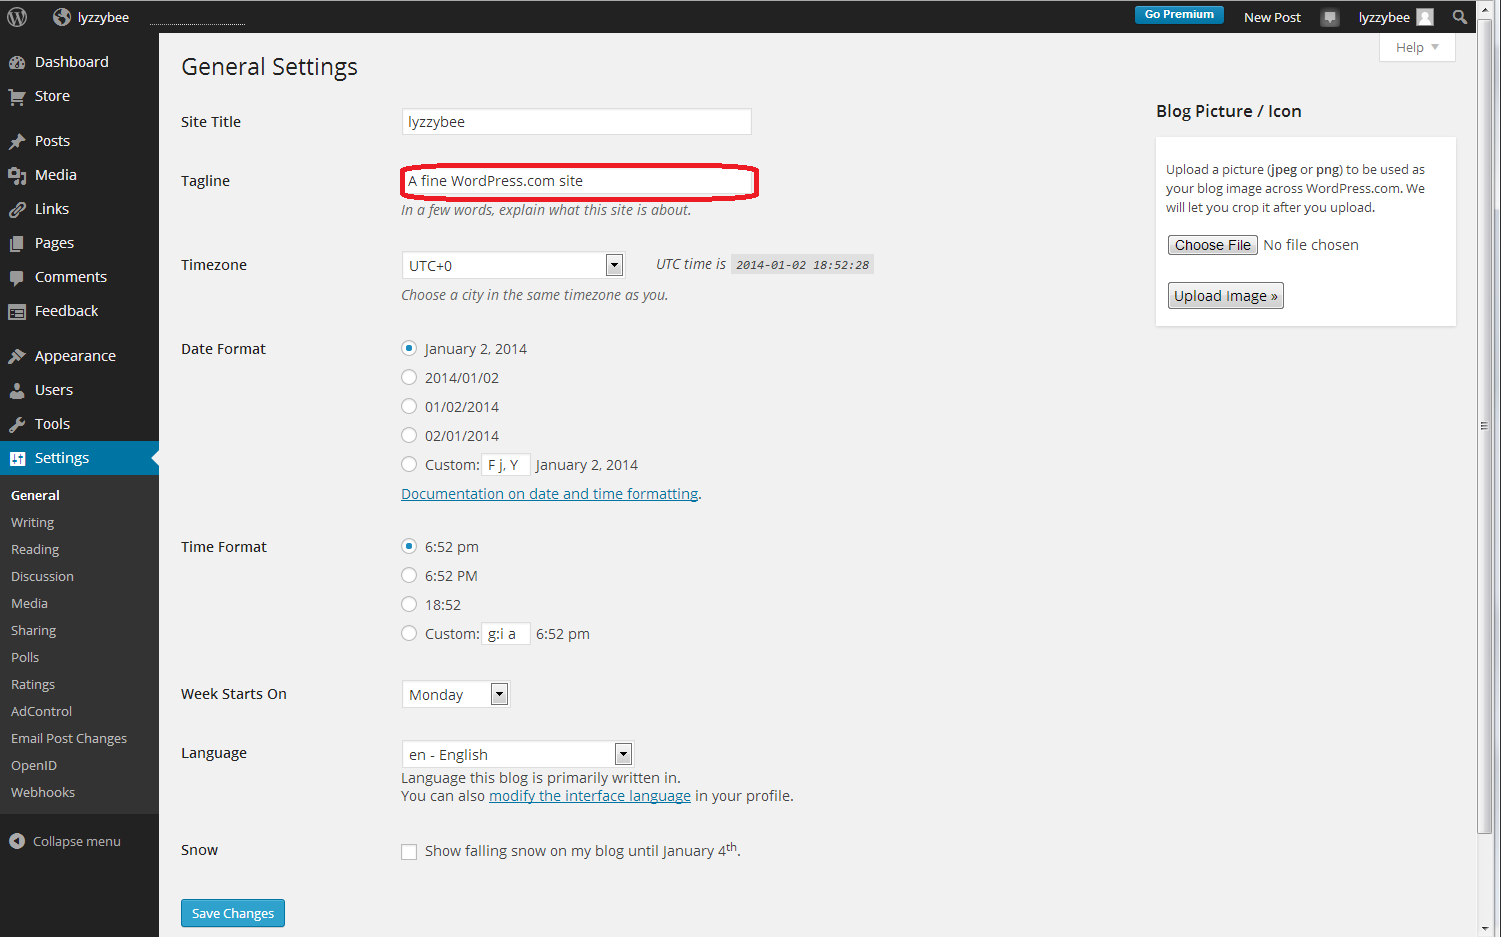
After clicking General, you’ll get a page where you can change the very general details of your blog. I’m not going to go into much detail about this page now, but you can see at the top the SIte Title (which you can change if you want to; I’m not going to for now), and Tagline (the subtitle). There’s the text that WordPress has automatically inserted for you, and here’s your chance to start customising your blog and telling people what you’re all about:
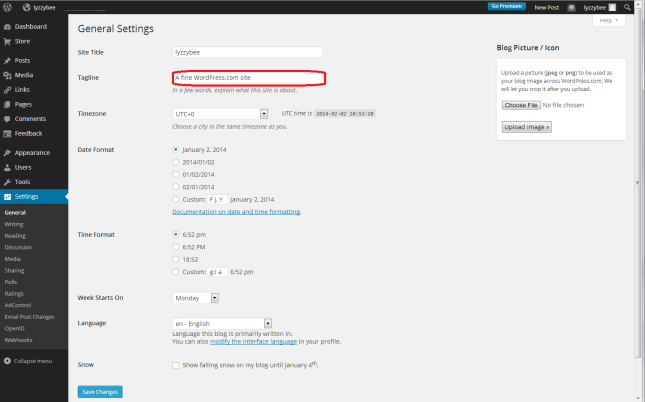
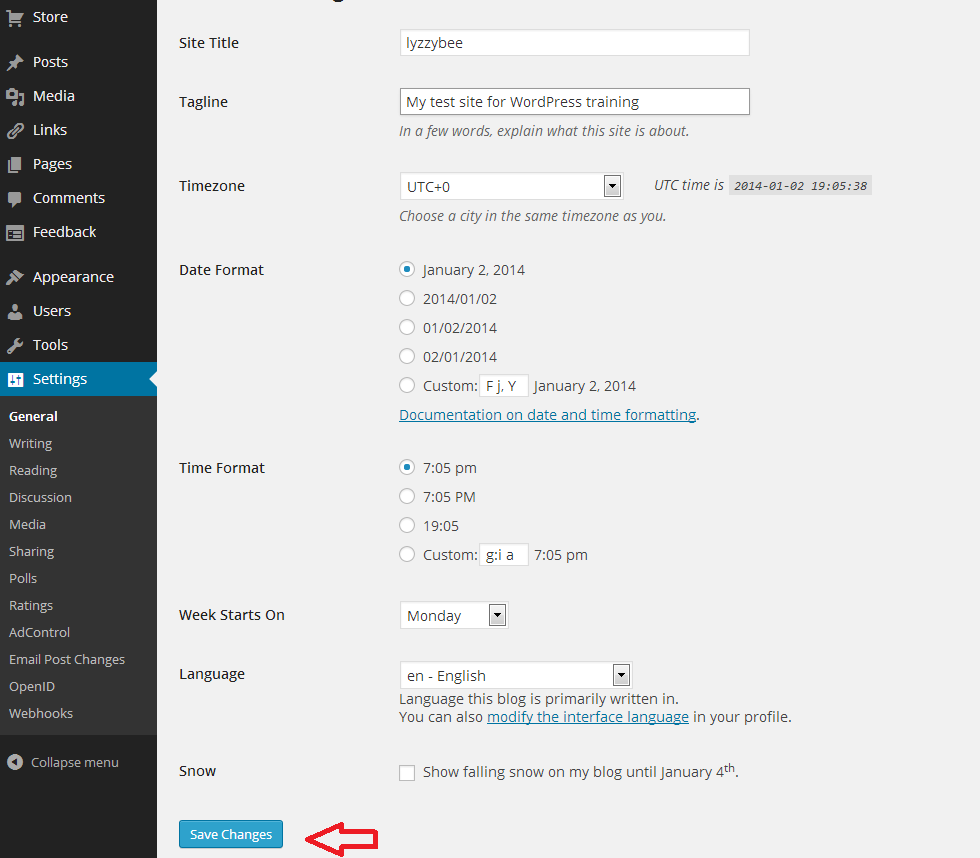
So I type in “My test site for WordPress training”, because that’s what it is, and then press the Save Changes button at the bottom of the screen to save that. There are lots of other things you can change on this page; do have a play with them if you’re feeling confident, but it’s not strictly necessary at this stage. Everything can be accessed and changed later on.

Changing the comment settings to prevent spam
Yes, yes, I know you want to change what your blog looks like and get writing, but this bit’s really important.
Once you get up and running, lots of people who are your friends, old and new, real and virtual, will hopefully want to post comments on your blog posts. Lovely! But other people will try to post fake comments, in an attempt to either place their web address on as many other web pages as possible (this gets them up the search engine results pages, not wanting to go into too much detail) and/or want your readers to click on dodgy links in order to sell them fake ugg boots or even install viruses on their computers. People will also tend to trust your blog less if you let spam get through with its dodgy links enticing your readers to click through. You need to stop this, and although WordPress does have really good spam filters, the odd one still gets through.
By making sure that you moderate the first comment that anybody makes on your blog, you will cut out almost all of the spam. The only way that someone can spam comment is if they post a normal comment first, then a spam one. Most people won’t bother. So, make sure you catch them out and prevent them from commenting by setting up your Discussion setups in your favour, not theirs.
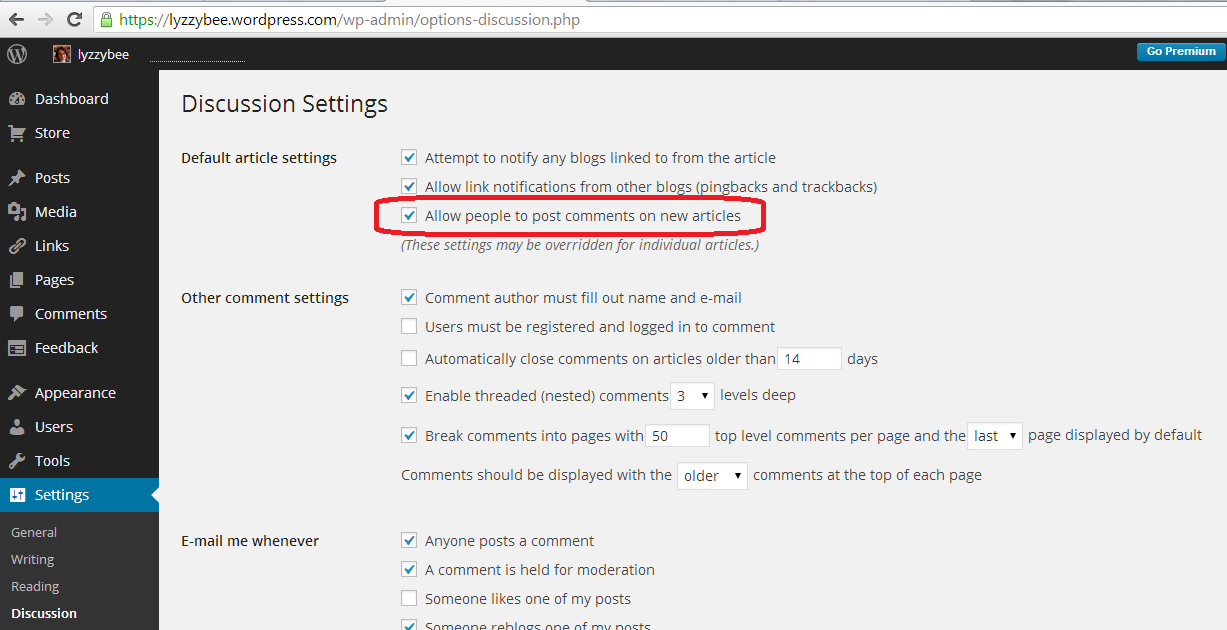
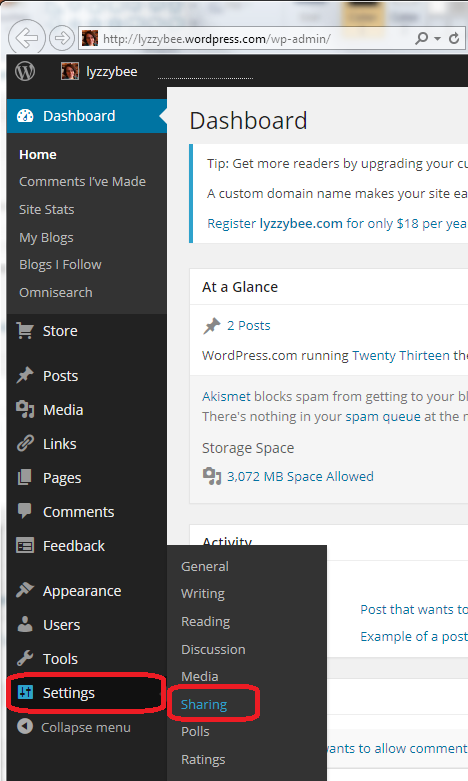
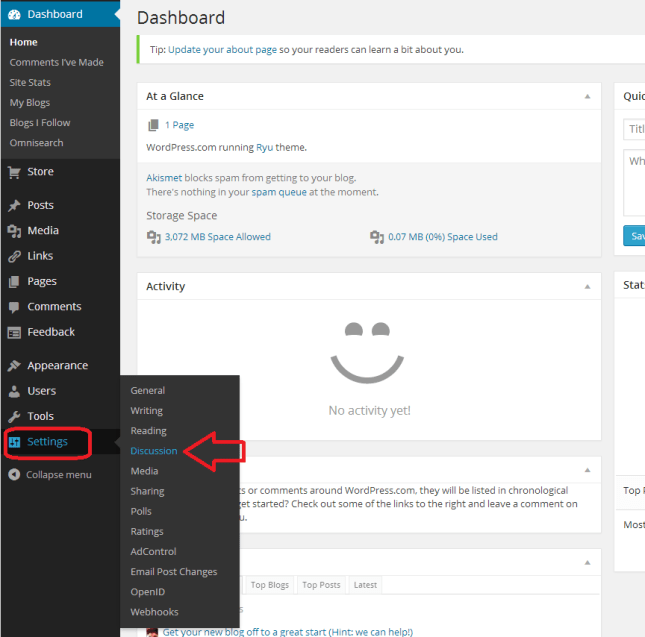
You access this area by choosing Settings from the Dashboard again, then Discussion:
Now you have a range of options. Handily, the ones that are already ticked are the ones that you want. But the most important to be ticked are circled in red below:
- Other comment settings – Comment author must fill out name and email (this means they can’t just post anonymously)
- Before a comment appears – Comment author must have a previously approved comment (don’t tick manually approve every comment unless you get bombarded with spam and need to check every single comment and pass it manually – just approving the first comment will do)
It’s also worth keeping as many email alerts as you can, so you can add to these vital ones:
- Email me whenever – Someone posts a comment (you will always be told whenever you get a comment. If you spot a spammy comment, you can follow the link and delete it)

Setting up your Discussion section like this means that:
- Every time someone comments on one of your blog posts, they will have to enter their email address and name
- Every time someone comments on one of your blog posts, you will receive an email.
- When it’s their first comment on your blog ever, you will receive an email asking you to approve their comment. Once you’ve done that, they will be allowed to comment whenever they like, as long as you’ve approved the first one.
- Because you receive an email every time someone comments, you can reply back to their comment, making them feel like it’s a two-way process and you care about your readers (see more on this in my article on reciprocity and social media)
Choosing your blog theme
At last she’s letting us make our blog look nice! I know – but it’s important to set up the security aspects first, right?
At the moment, your blog is quite plain. You can choose from loads and loads of attractive themes to brighten it up. And you can change your theme any time you want (although be aware that some of them have the menus in different places and might not offer certain functions).
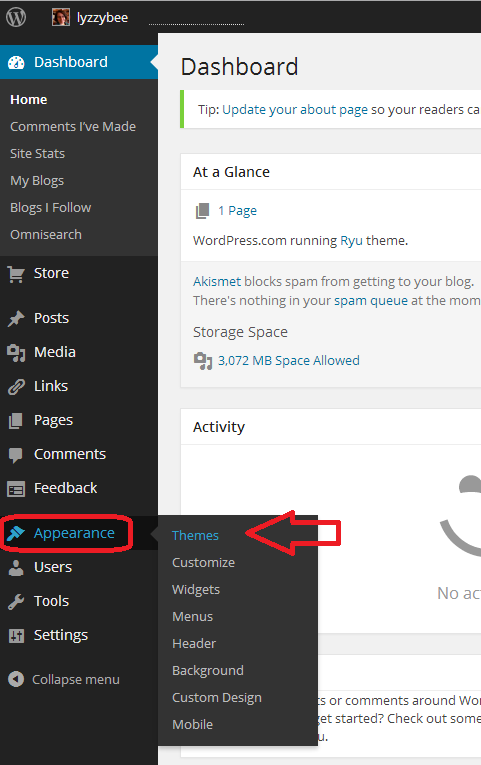
To set up your new theme (or change your theme once you’re up and running), click Appearance on the Dashboard, and then Themes:

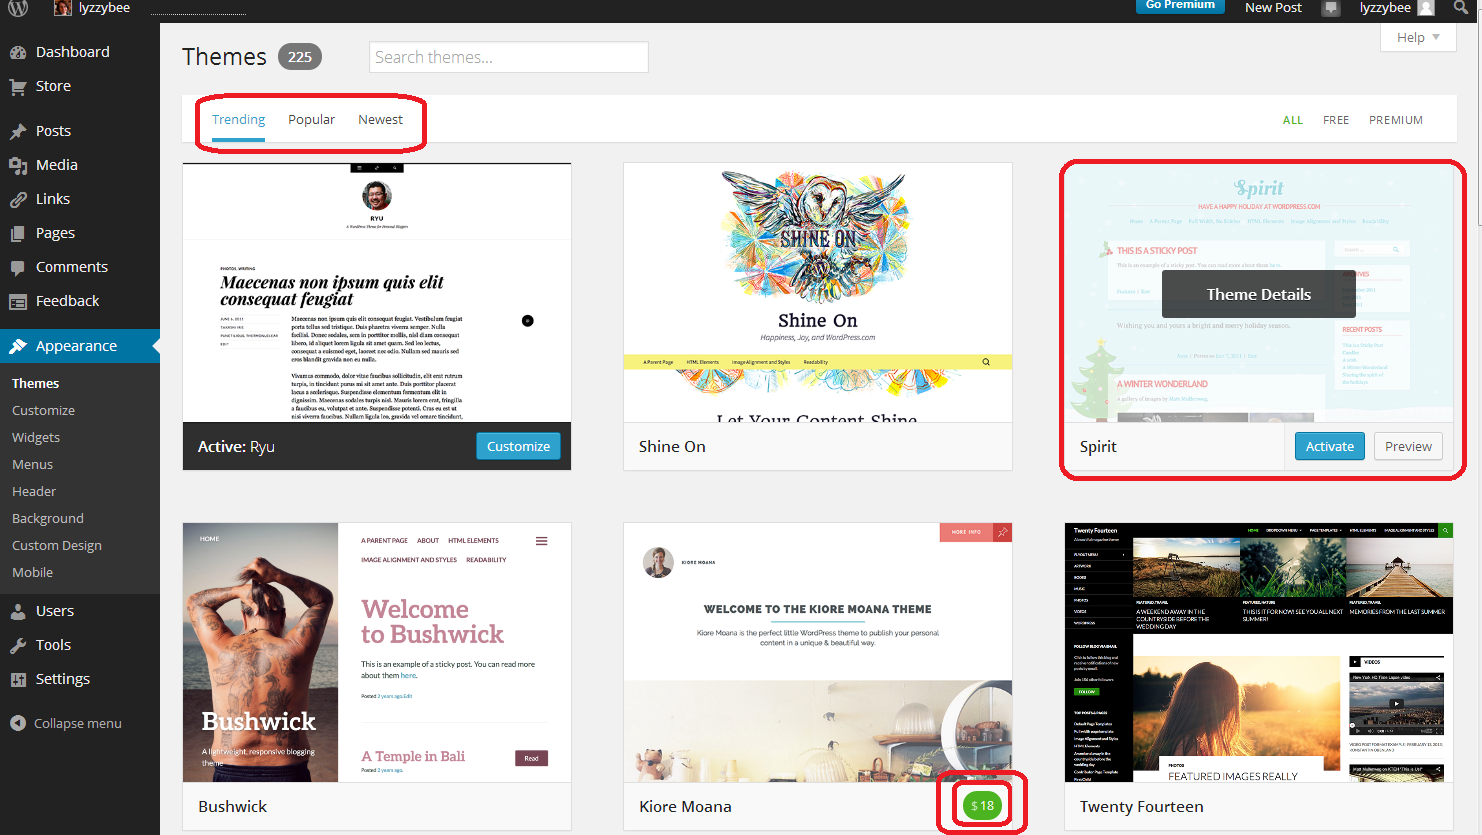
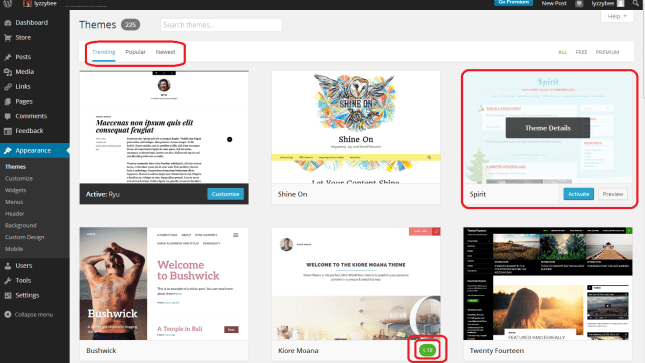
You will now see a page of lots of different designs for your blog.
Note three things here:
- At the top, you can search for themes (flowers, etc.), choose from Trending, Popular and New themes (and on the right, choose to see only free ones)
- When you hover over a theme, you will get the opportunity to Preview or Activate (see below)
- You have to pay for some themes (see the double circle at the bottom). There are LOADS of free ones so certainly don’t bother to do that at the start.
If you click on that Preview button, you’ll be shown what your blog looks like in that theme. Note that the blog name and Tagline / subtitle are there, as are any posts you’ve made.
Return to your list of themes using the back button at top left

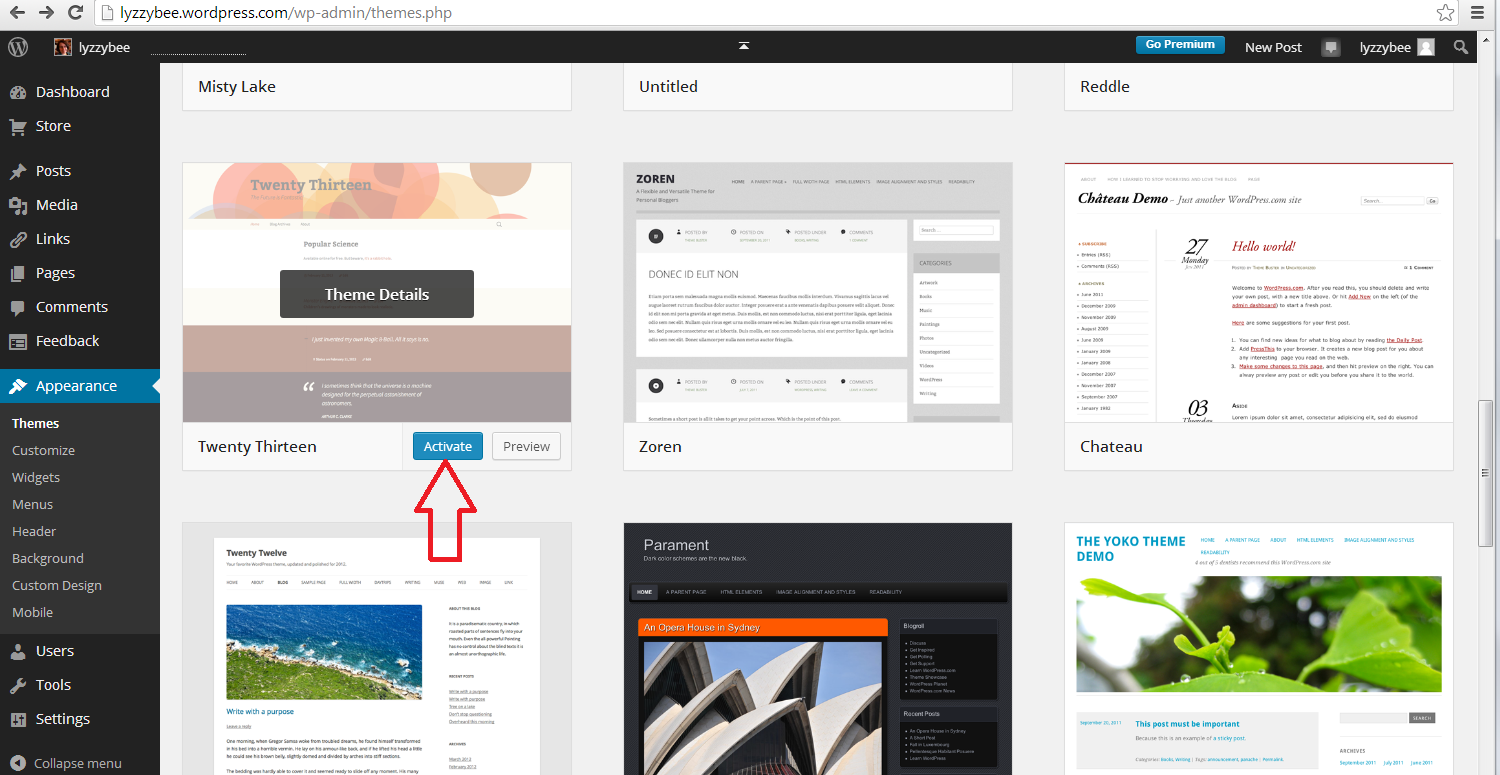
Once you’ve chosen your theme, press the Activate button …

You will get a confirmation that you’ve activated that theme (but you can always change it later!)

How do I write a blog post in my WordPress blog?
Hooray – it’s time to actually write something!
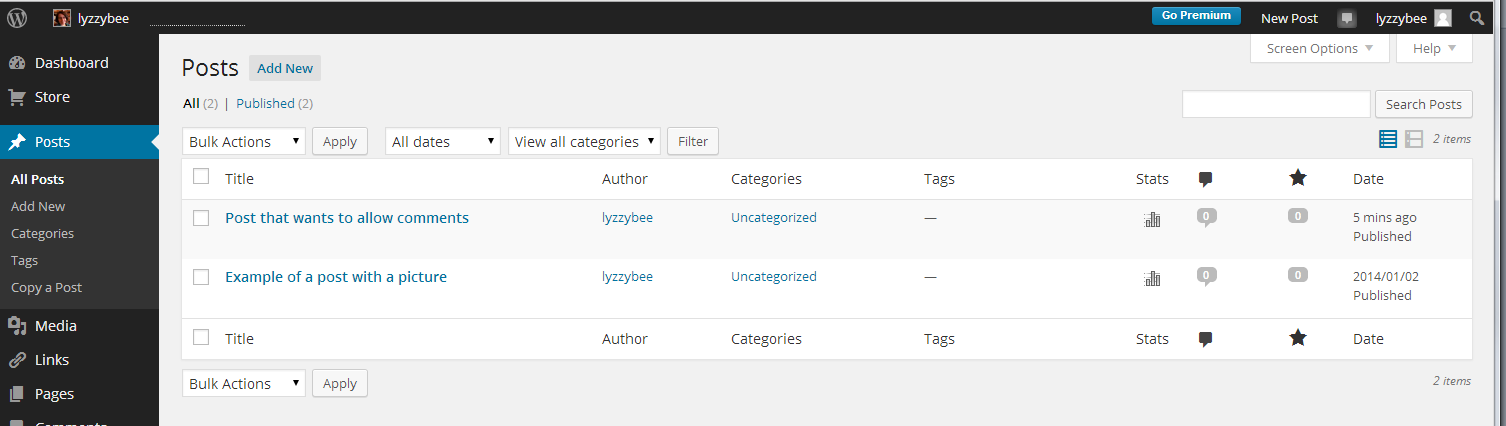
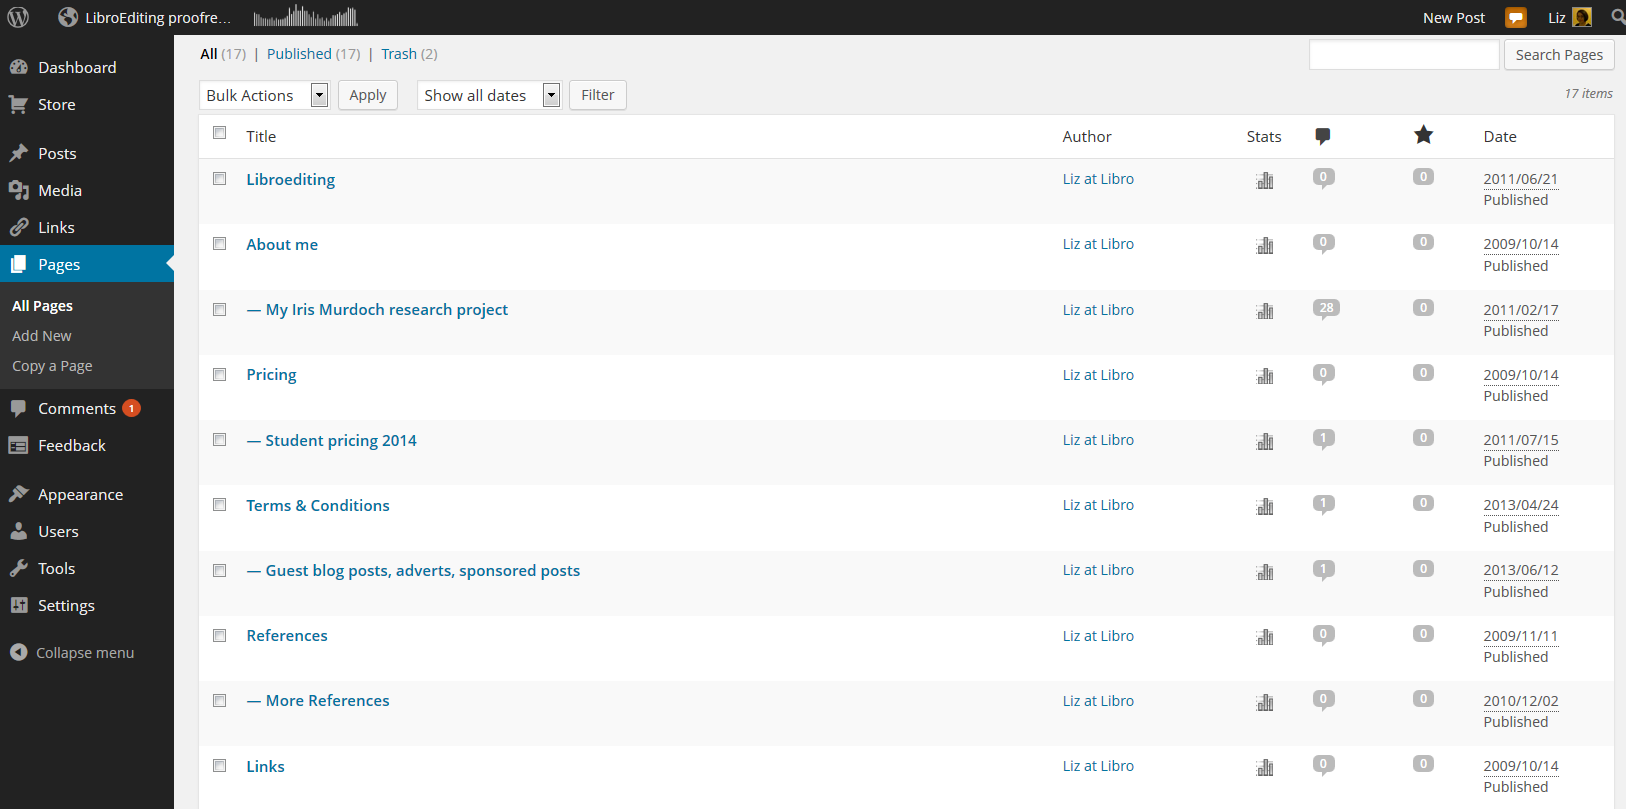
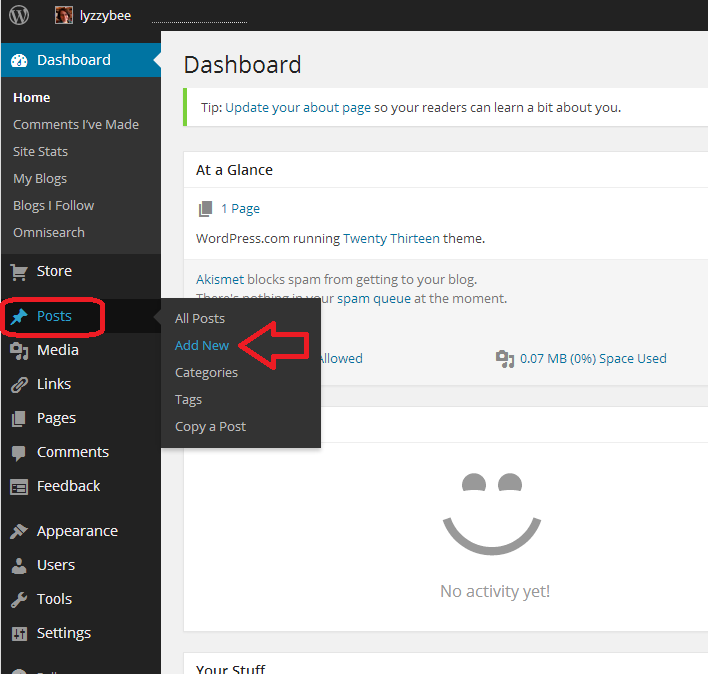
To write a blog post, go to Posts on the Dashboard and then click Add New. There are some other options there but this is getting LONG and we’ll just do the basics.

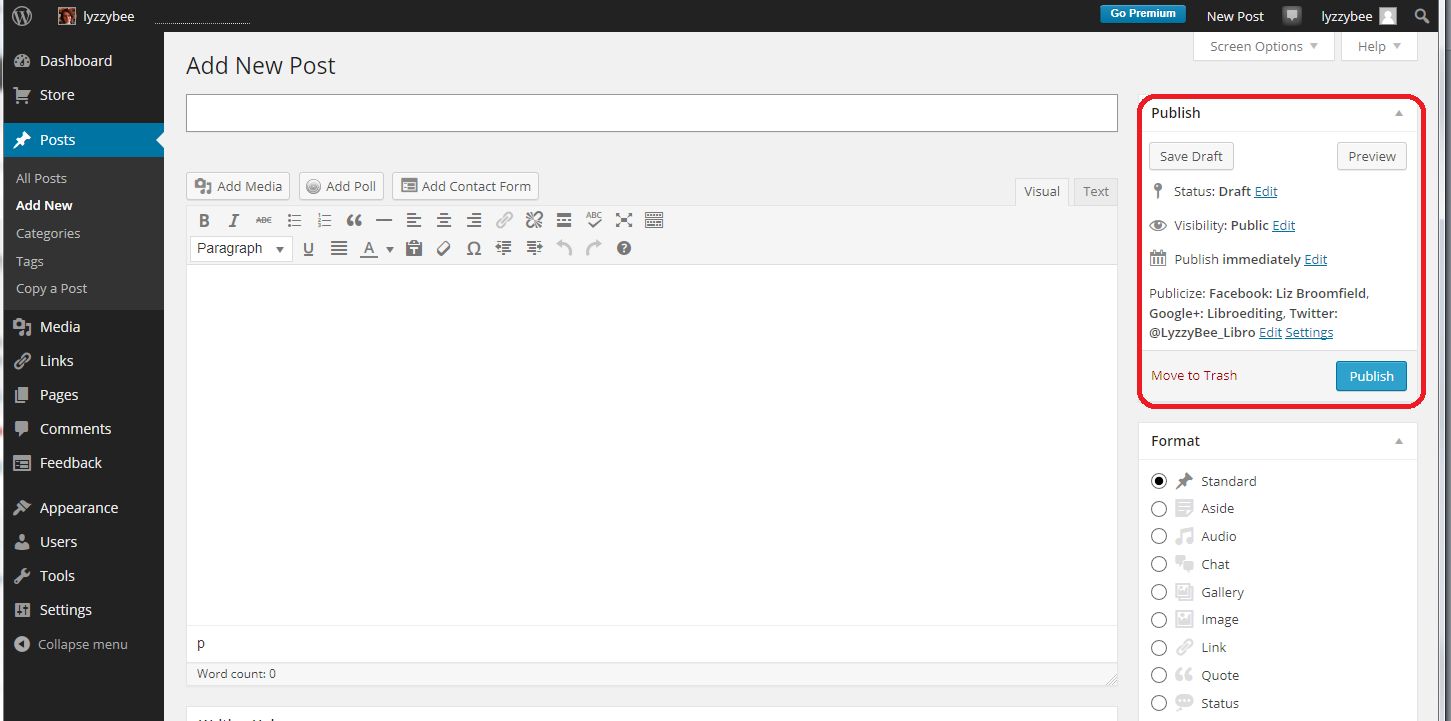
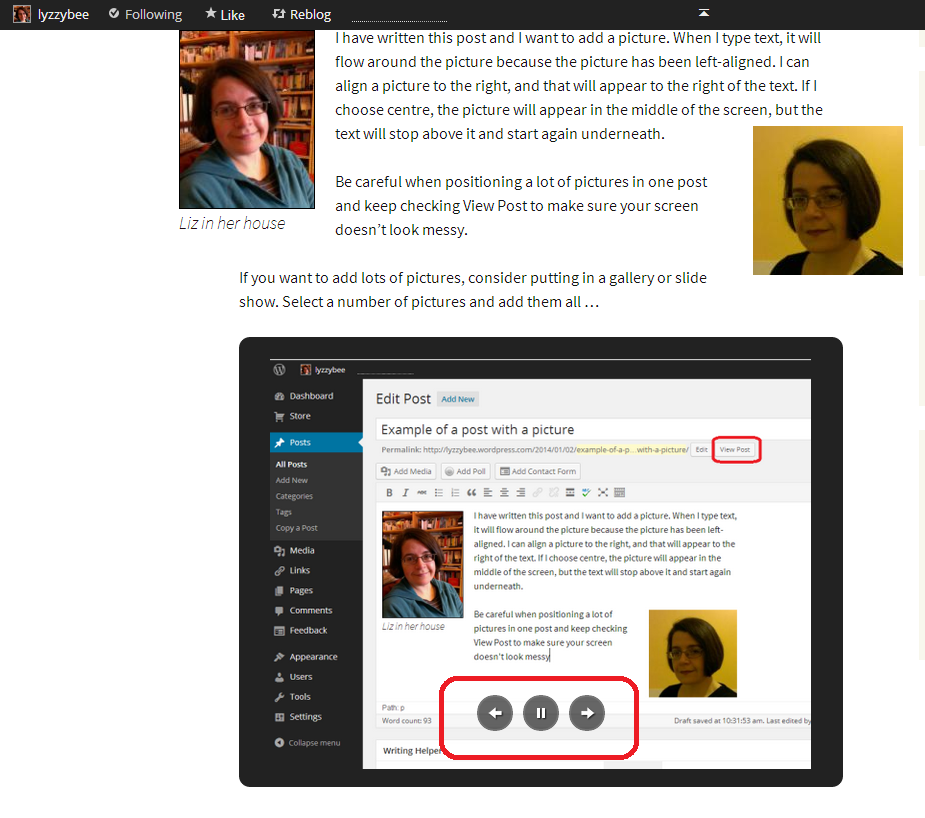
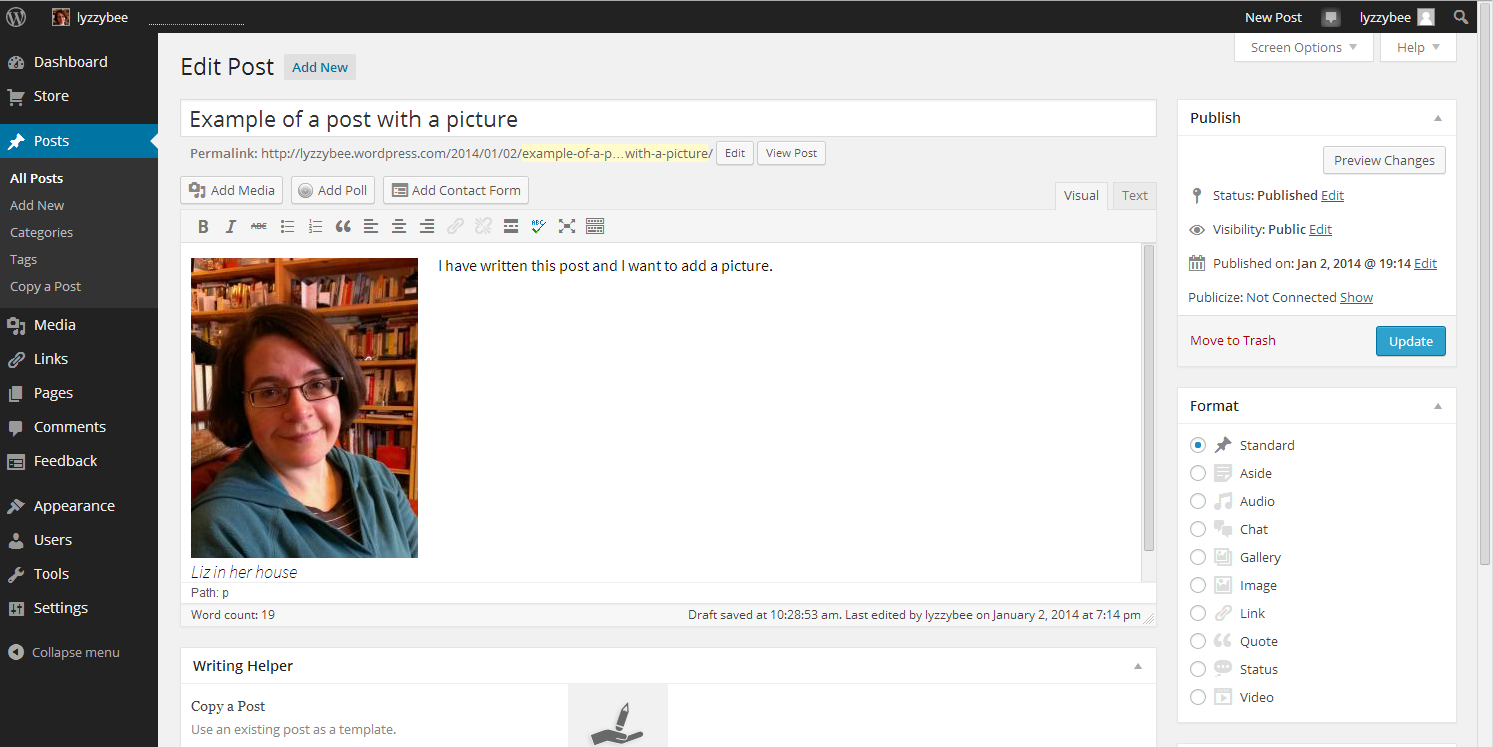
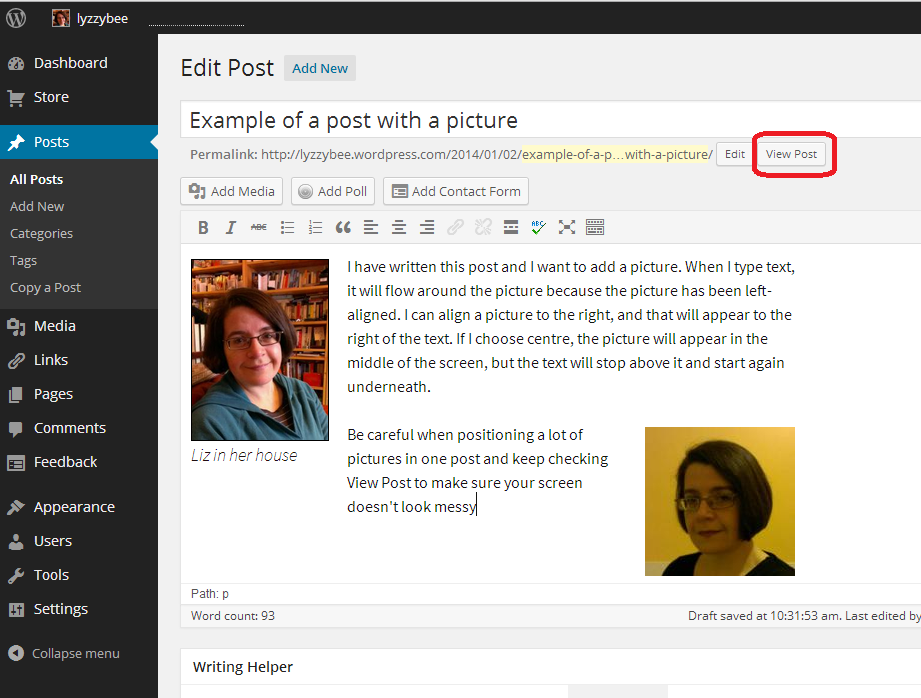
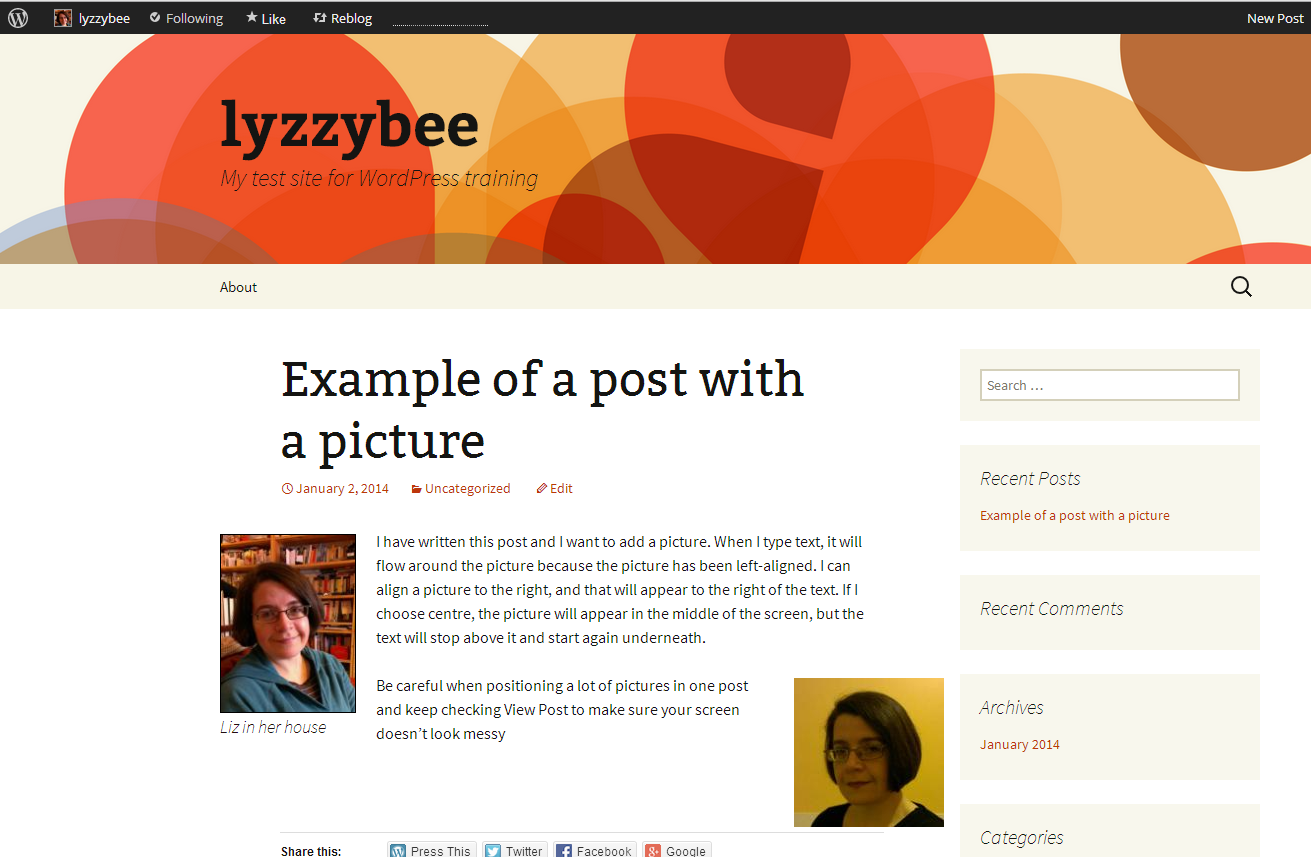
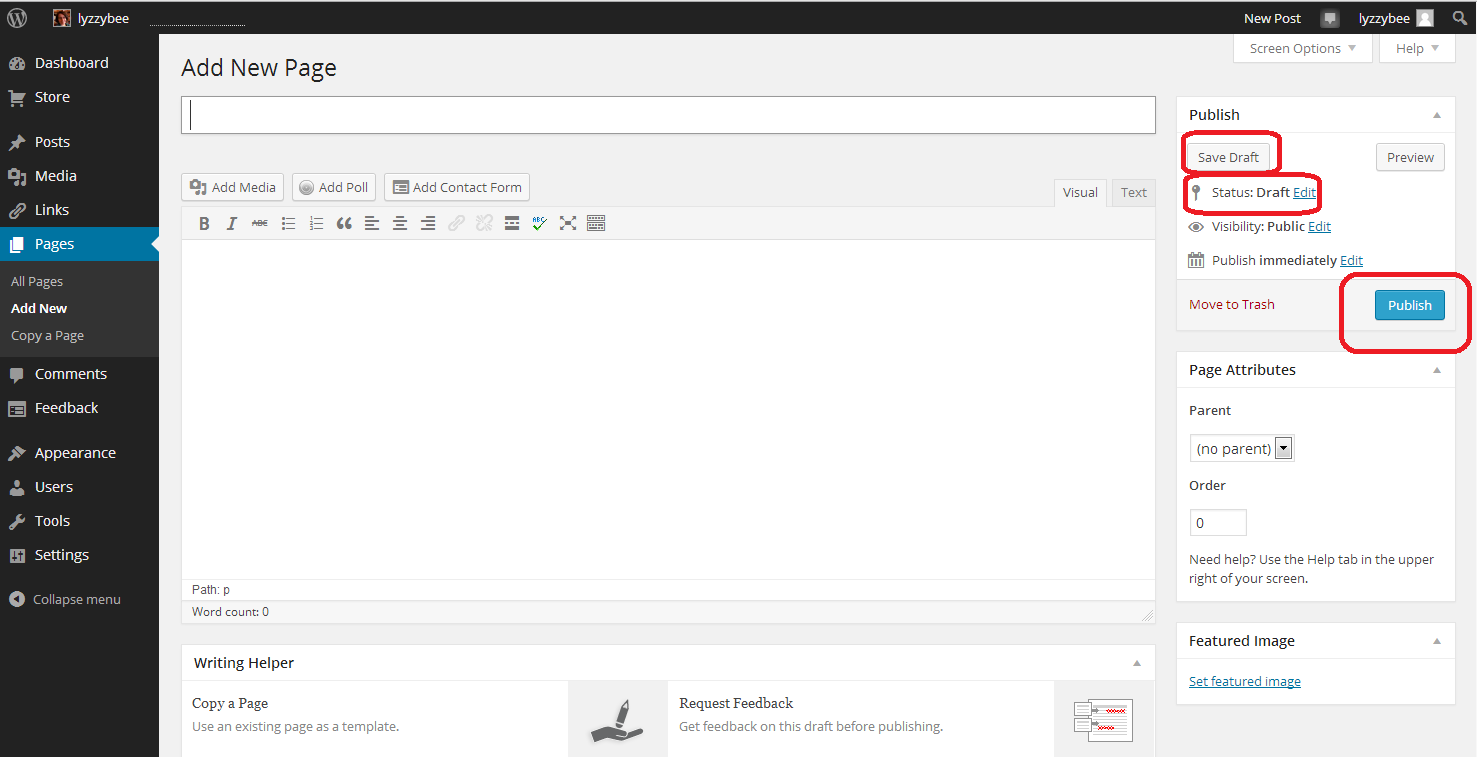
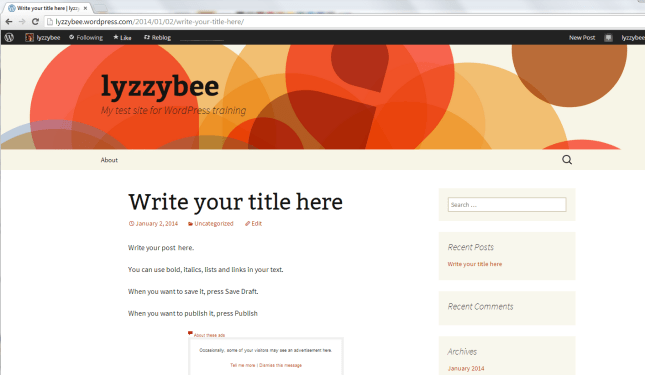
Once you’ve clicked New Post, you’ll be in your post editor. I’ve added a title and some text here (click to view larger and you can see my instructions).
Once you’ve got a title in place, WordPress will create a Permalink (URL) for it. You can alter the words in this after the date, so if you don’t want to be sharing a huge URL, you can cut it down (e.g. this very post has a URL ending wordpress-blog-basics, which is not the full title of the post).
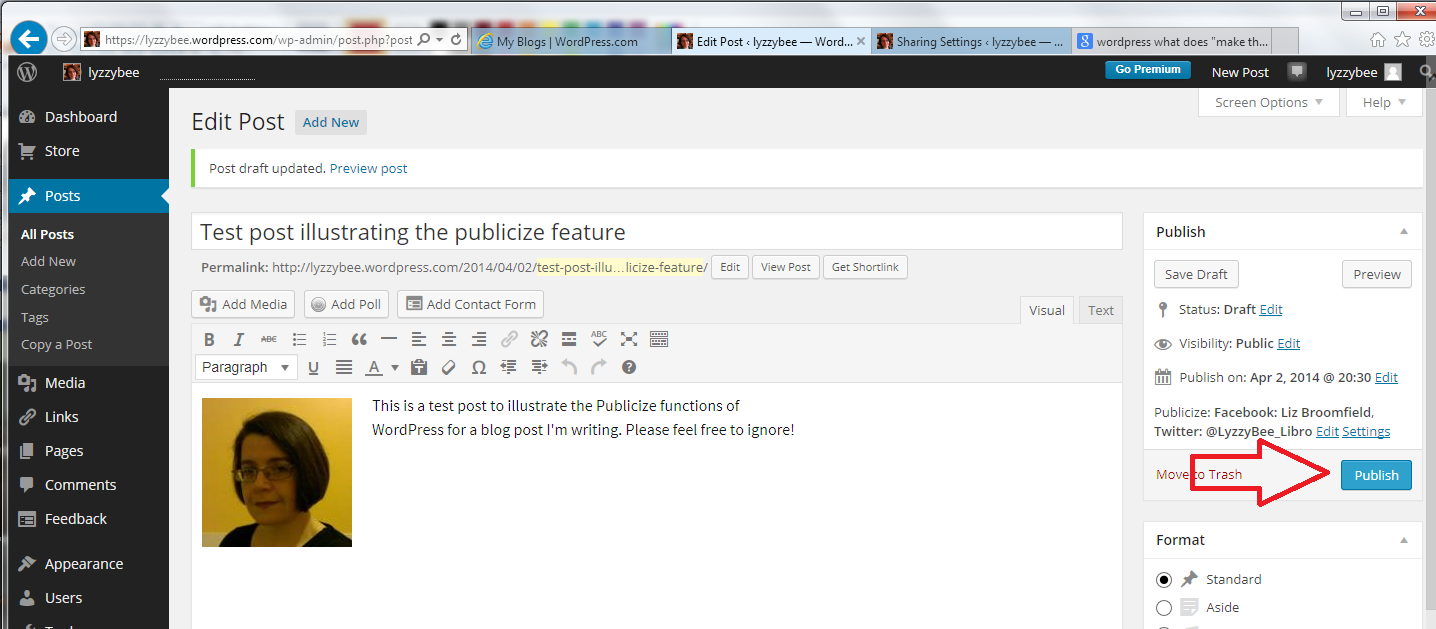
Once you’ve started writing your post, hit Save Draft and continue to press that regularly so you don’t lose your work. Once you’re ready to publish your post, press Publish!

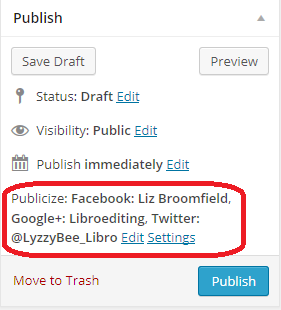
When you publish any post, you will get a side panel that tells you how many posts you’ve done – you need to click on the little arrow before you’ll get your URL at the top and your post in full screen. Note here that there’s a little square telling you that there might be an advert appearing there – see below for how to get rid of that.
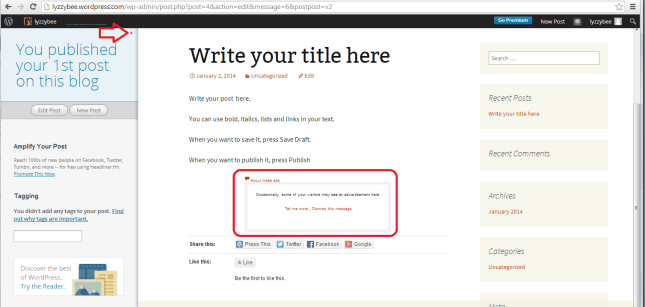
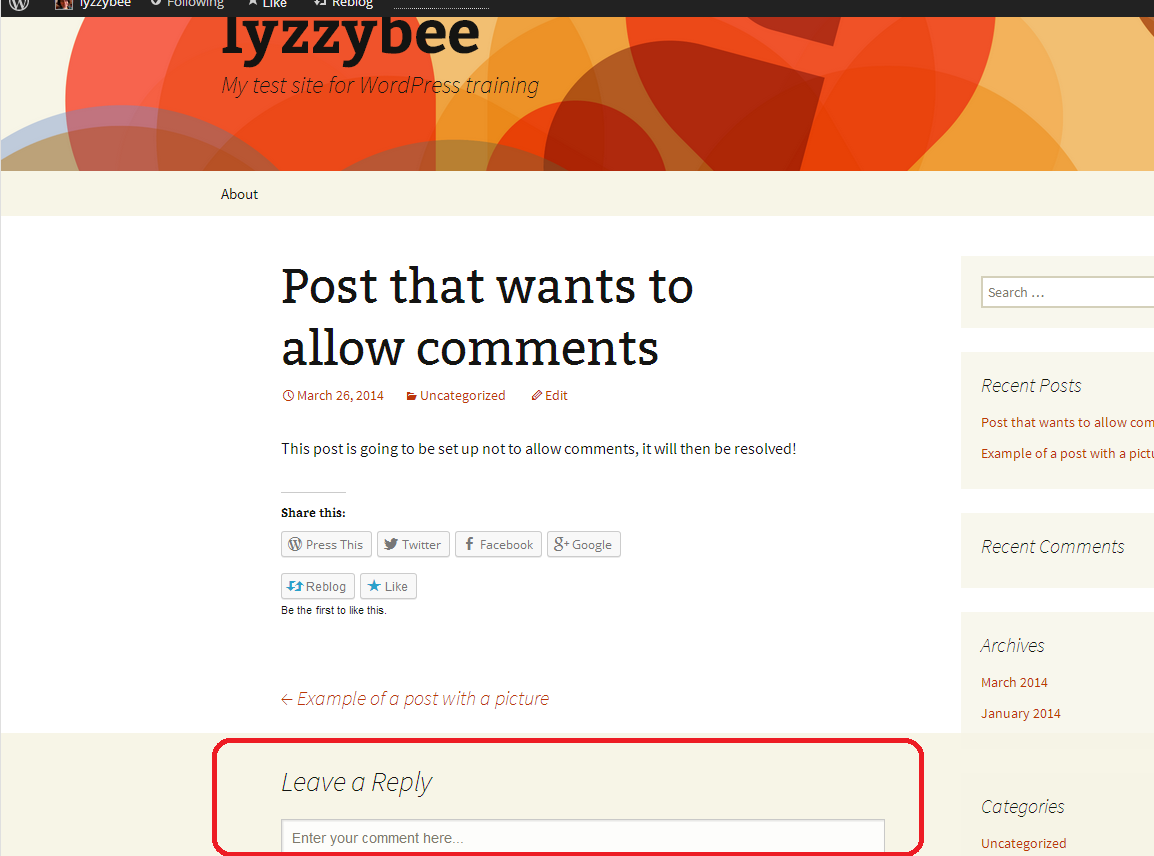
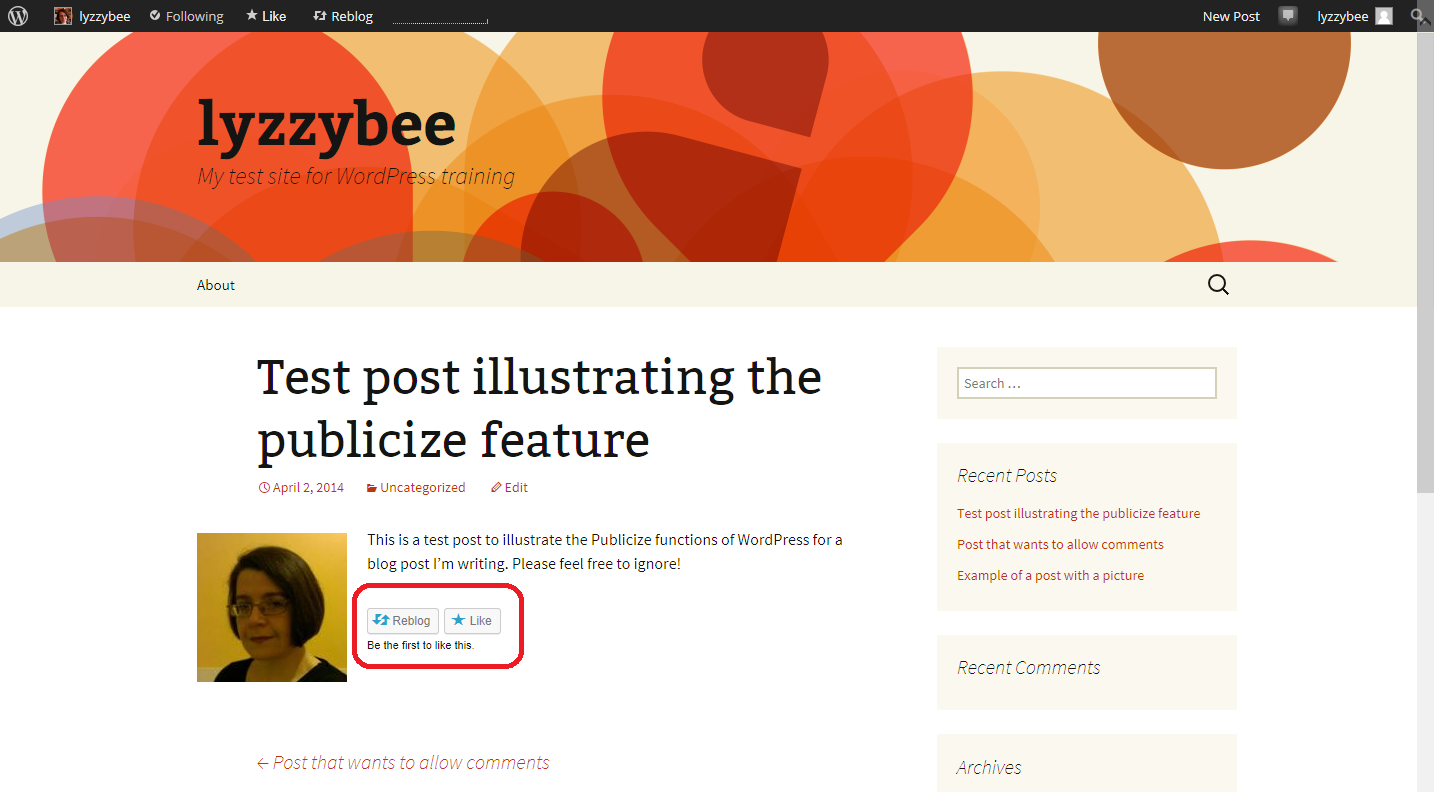
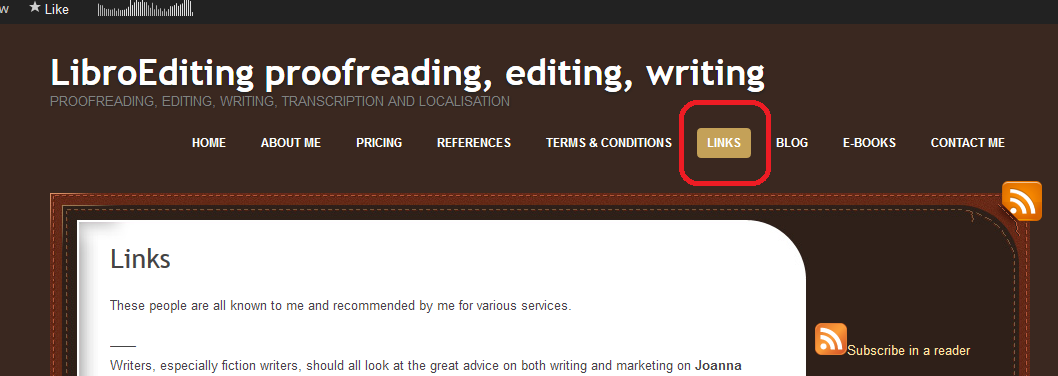
But for now, here’s our blog post, in all its glory, on the blog theme that we chose a little while ago:
How do I get back to the dashboard from my blog post?
At the top of the screen, you’ll see your username. Click on that and you’ll get a drop-down menu including Dashboard.
How to remove ads from your blog
WordPress will automatically place adverts on your blog. Nice, eh? But they have to make some money, and people pay them to do this. Note that this is NOT the same as having a service where you choose to have ads on your blog and can choose what they’re about. This is any ads they choose to promote, flashing all over your blog, in front of the content. The worst bit: you can’t see them if you’re logged in, even if you look at your own blog. And yes, people do have ad blockers, but I know from experience that readers do get put off and won’t return to look at your blog, or subscribe to it, if you have ads all over it.
You can remove the ads for $30 (about £20) a year. It’s up to you, but I think it’s worth it as the final stage of setting up a good, solid, useful WordPress blog.
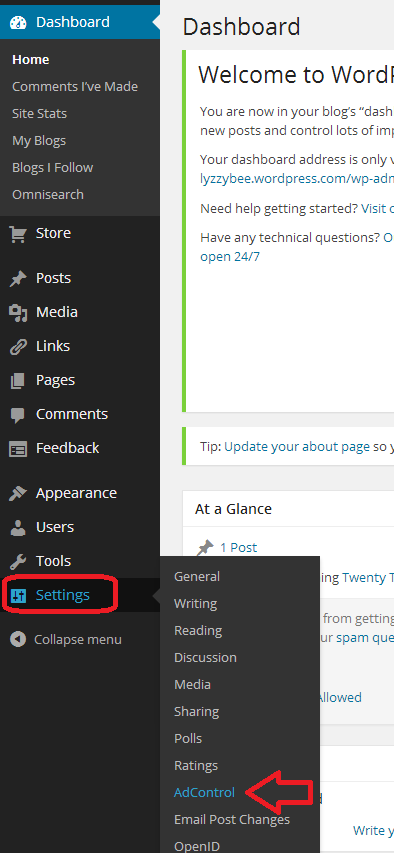
Here’s how you remove them. Go to Settings on the Dashboard and then Ad Control:

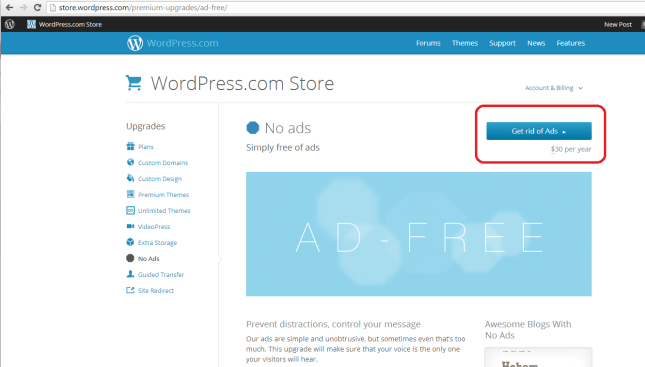
Choose No Ads upgrade. You probably don’t need a Bundle, which is more expensive and includes high levels of customisation which you just don’t need when you’re starting out. You renew this every year, and can always add customisation when you’re more confident with what you want to do with your blog.

You will be taken to the WordPress Store, where you can choose Get rid of Ads. This will take you to a payment screen where you can pay by PayPal or debit or credit card. As I said, well worth doing to avoid annoying people who read your blog.
By now, you should be able to set up a blog, post a blog post, set your comment moderation and remove ads, and choose and change your theme. Future posts will cover more details such as automatically sharing your posts on social media, adding photos, and other technical details. You can find more general articles about blogging in the list of related posts below.
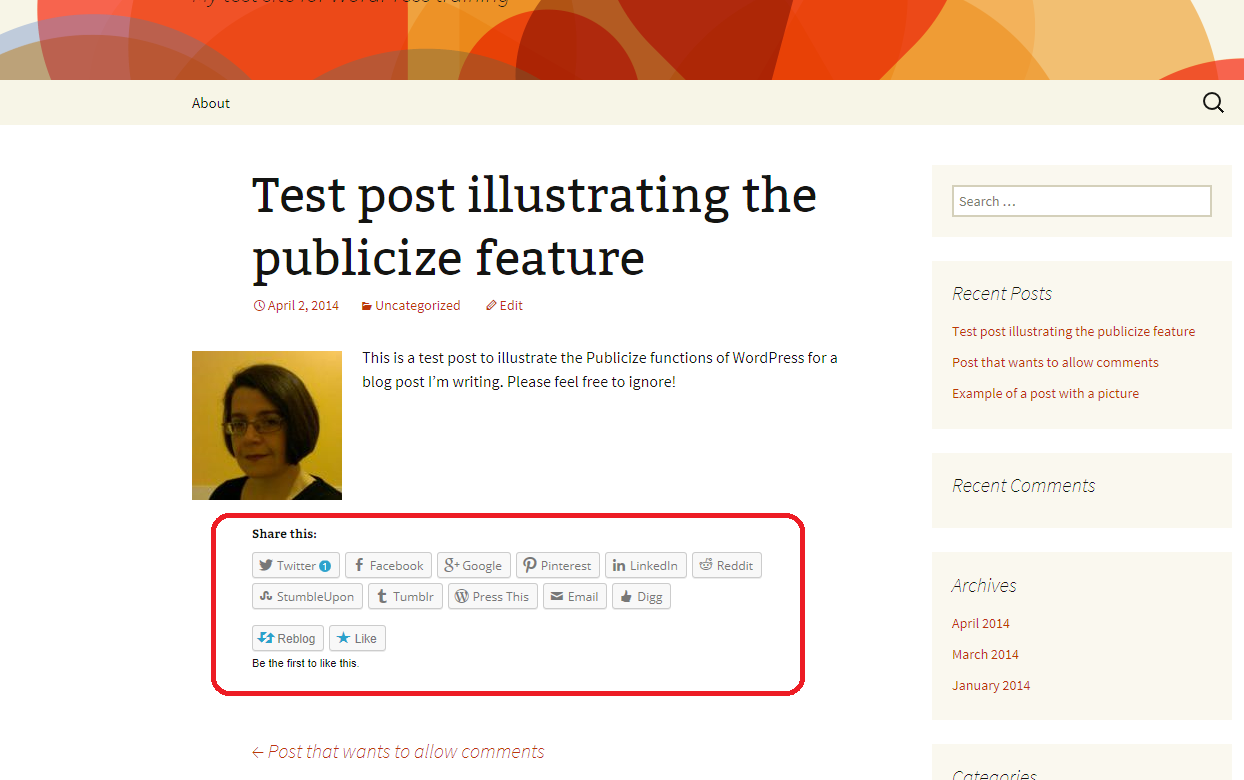
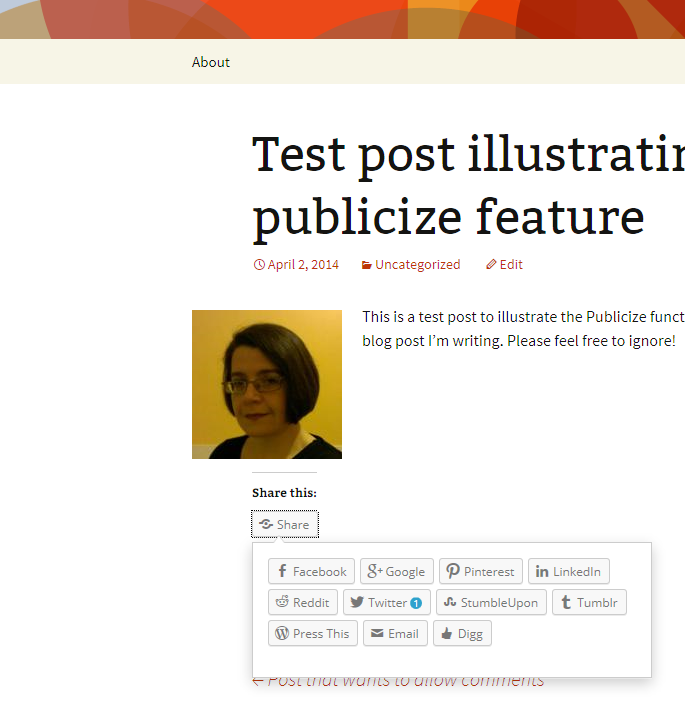
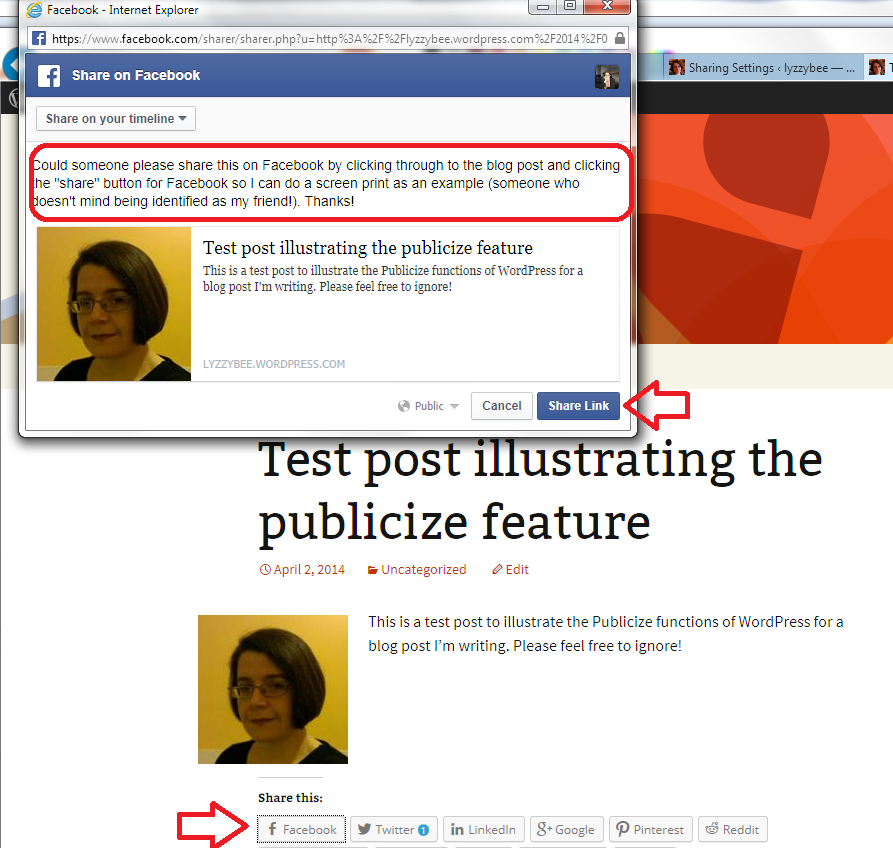
I hope you have found this article useful. Please share using the share buttons below, or post a comment, and do please let me know if you use this article to help you to set up your own blog, and post a link below!
Related posts on this blog:
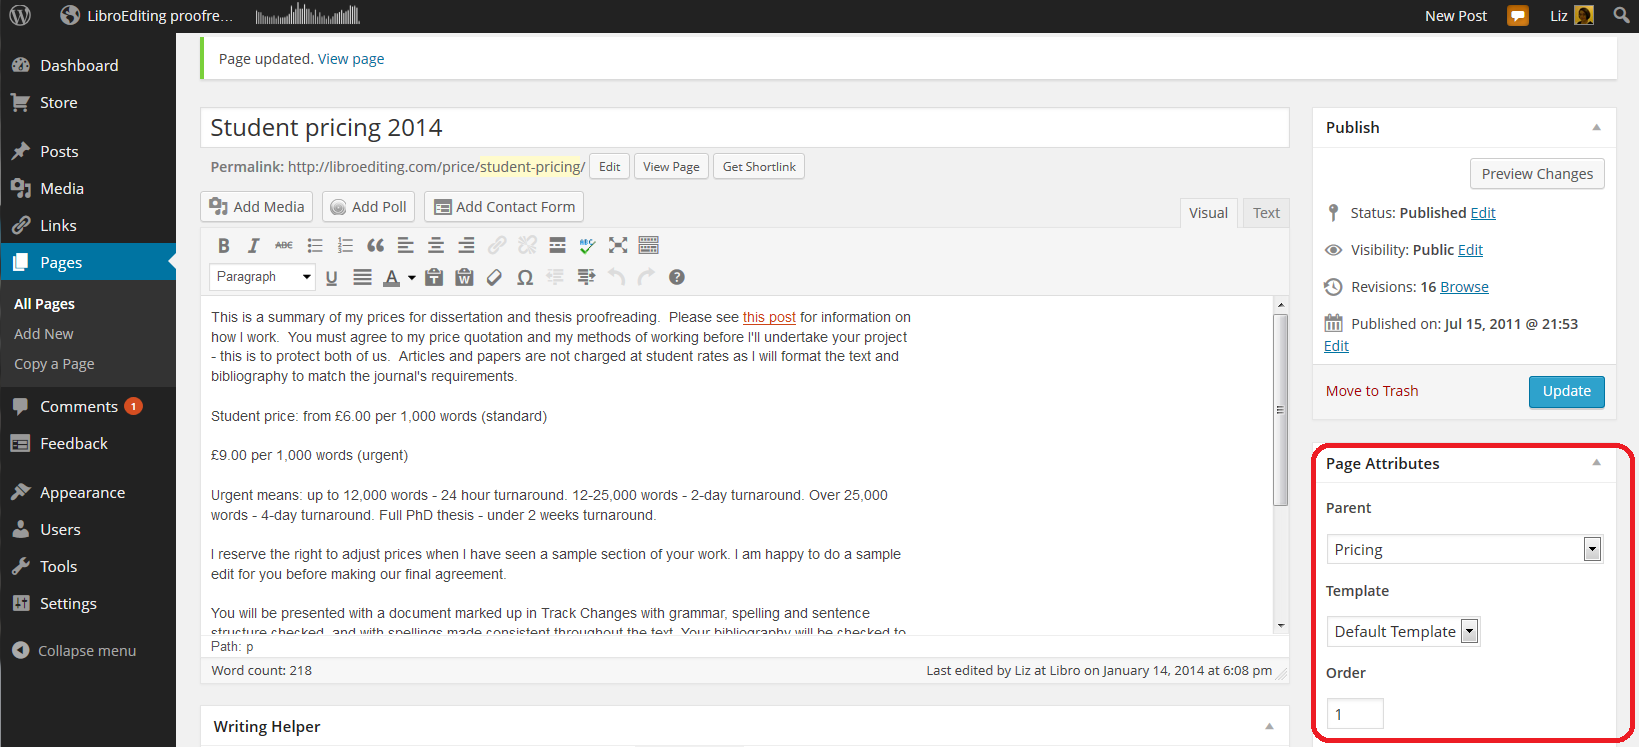
WordPress 2 – adding pages to create a website
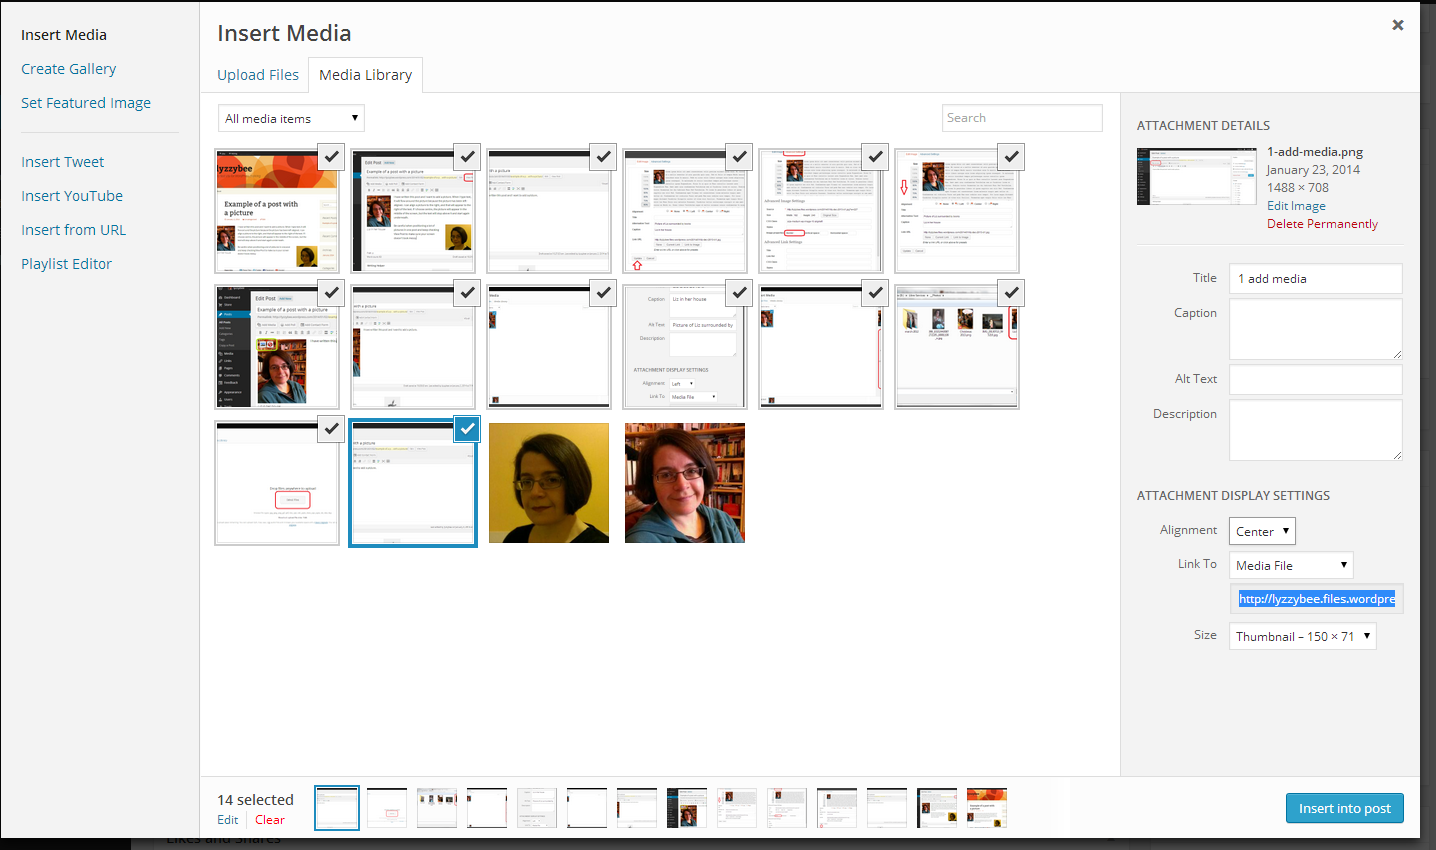
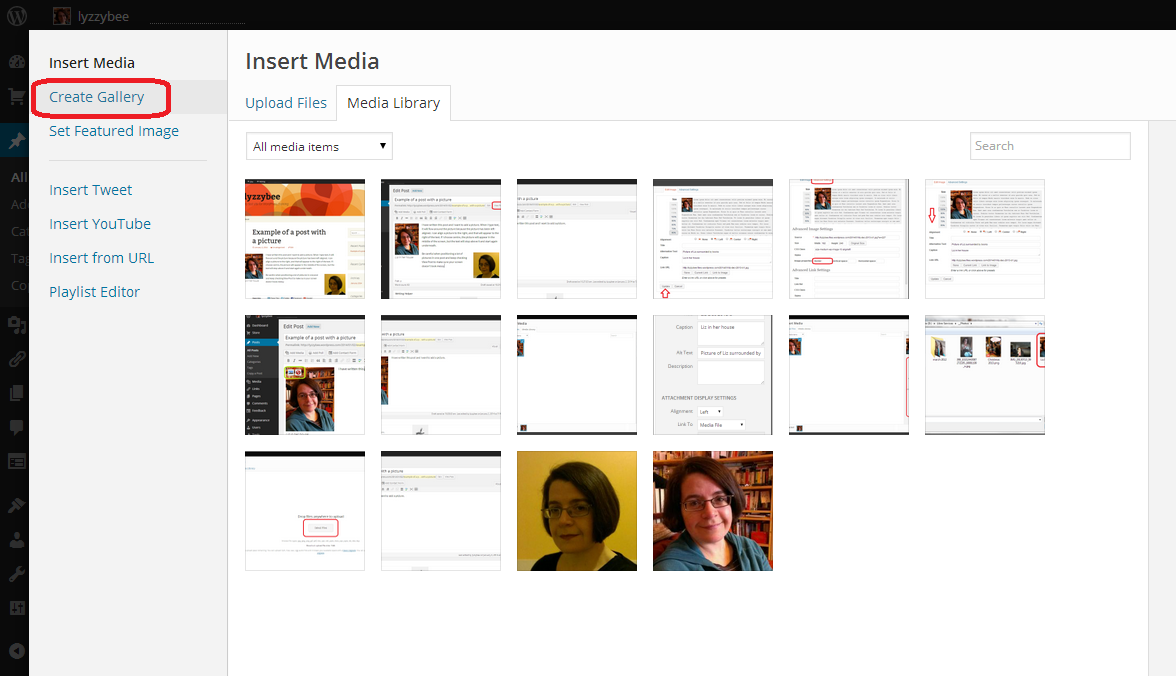
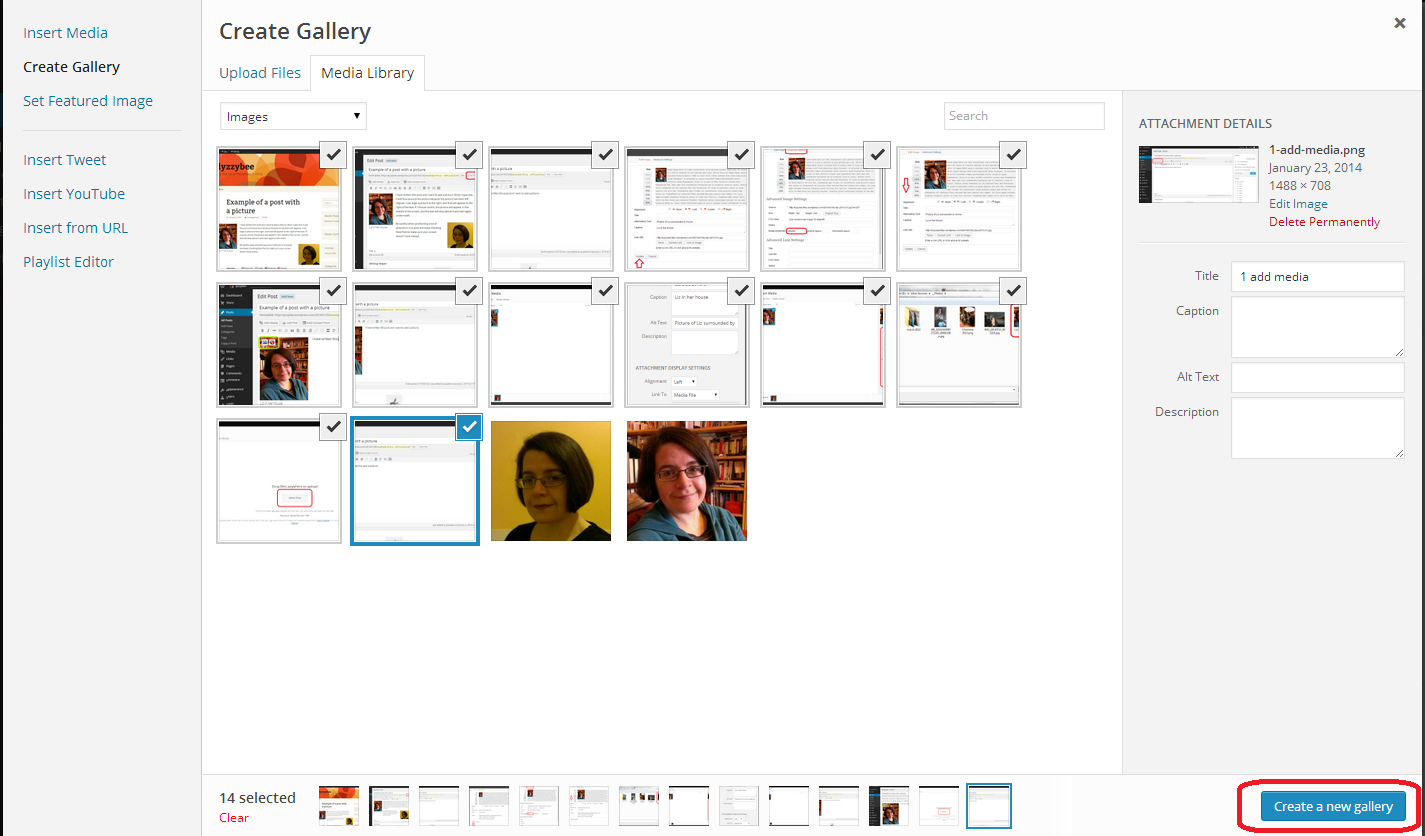
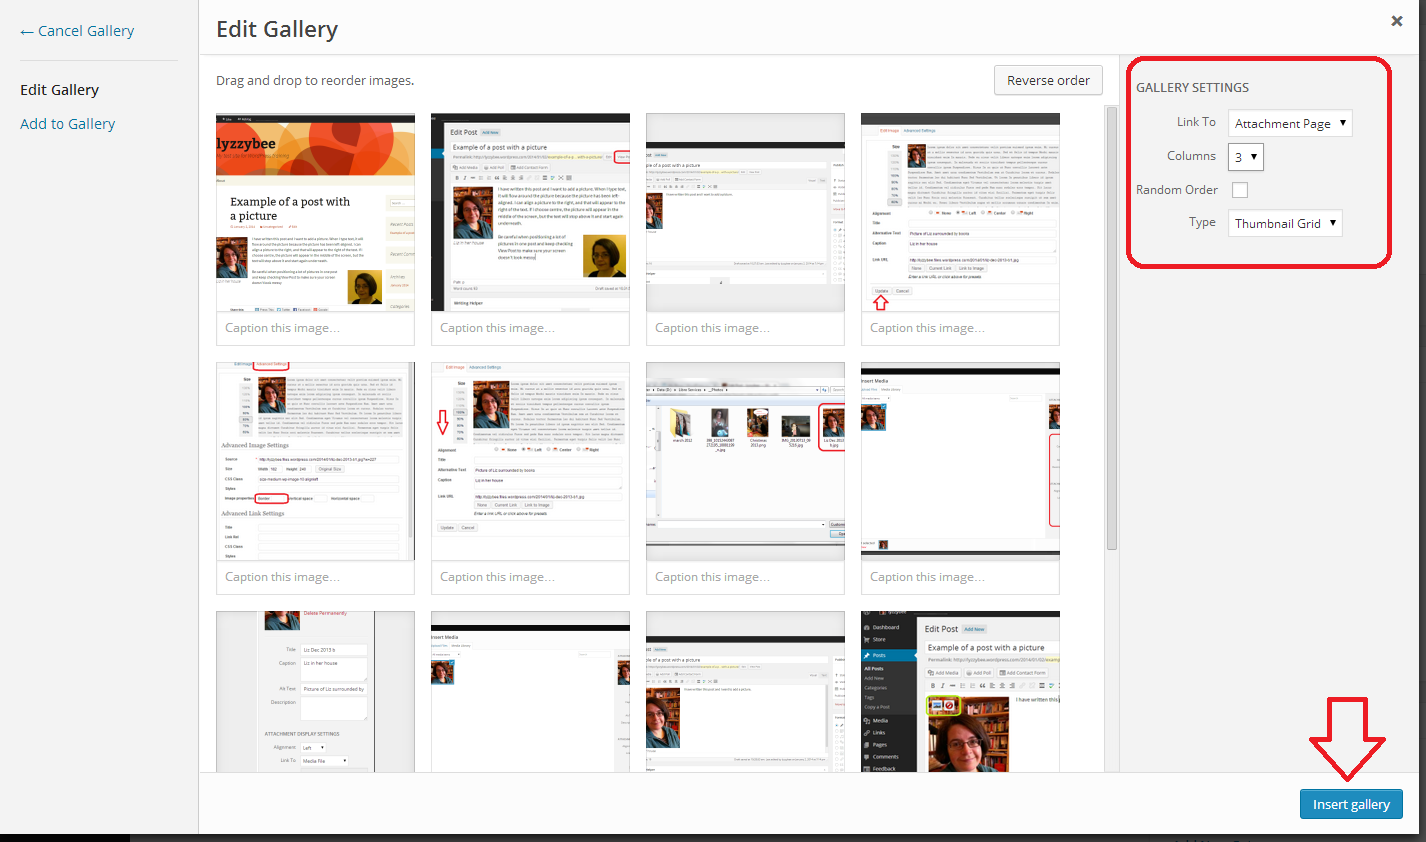
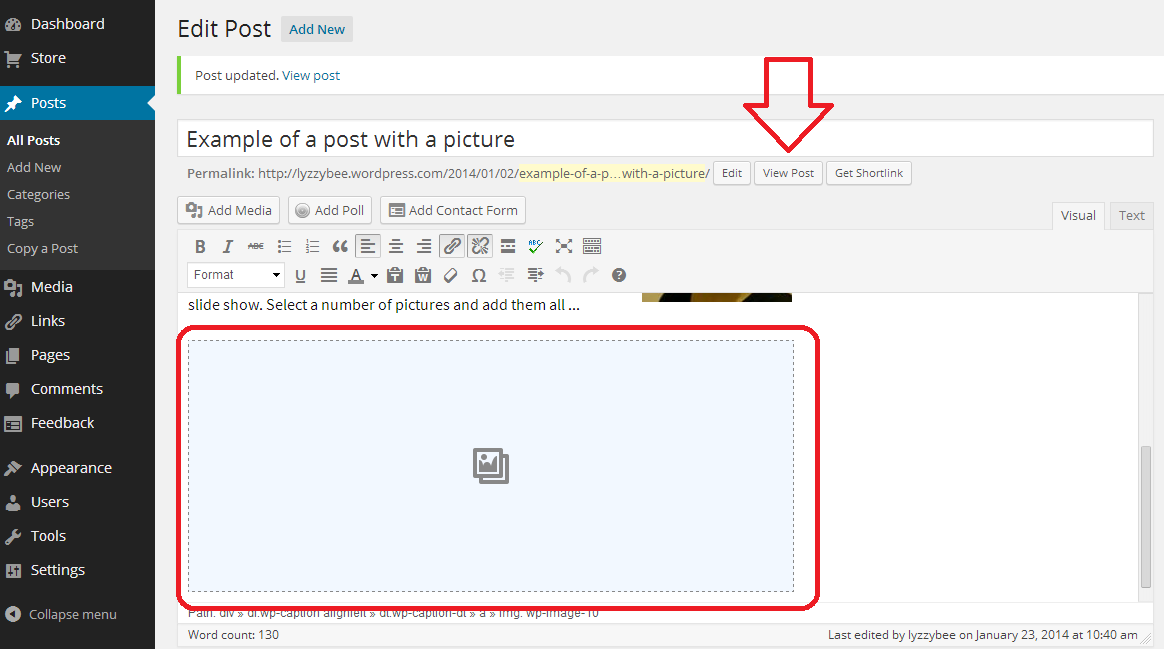
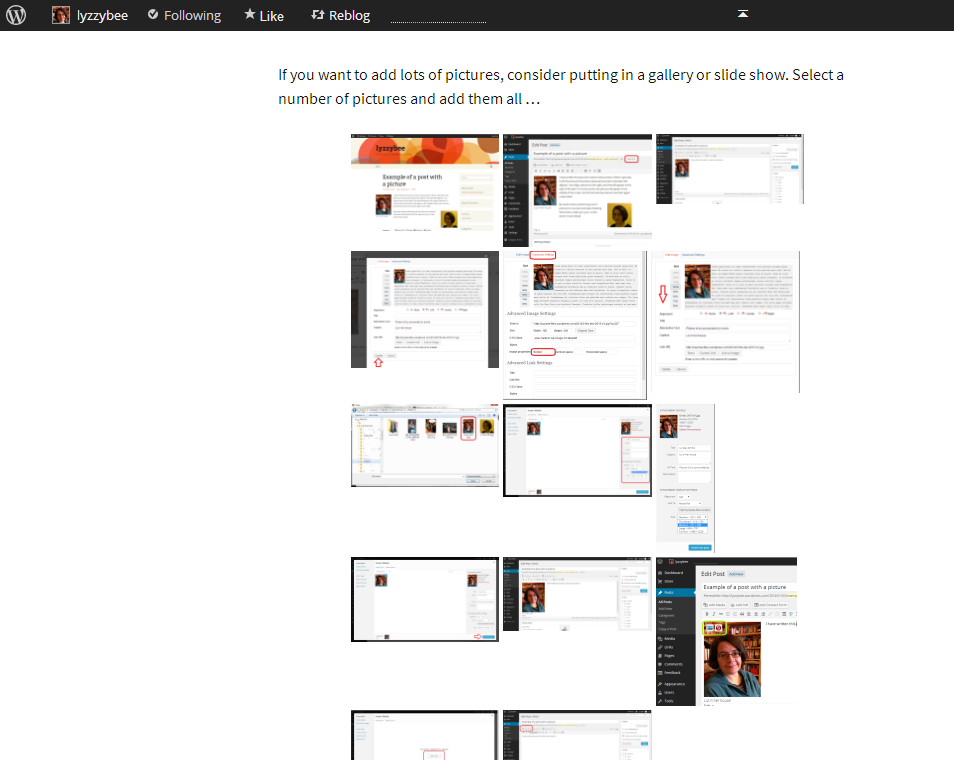
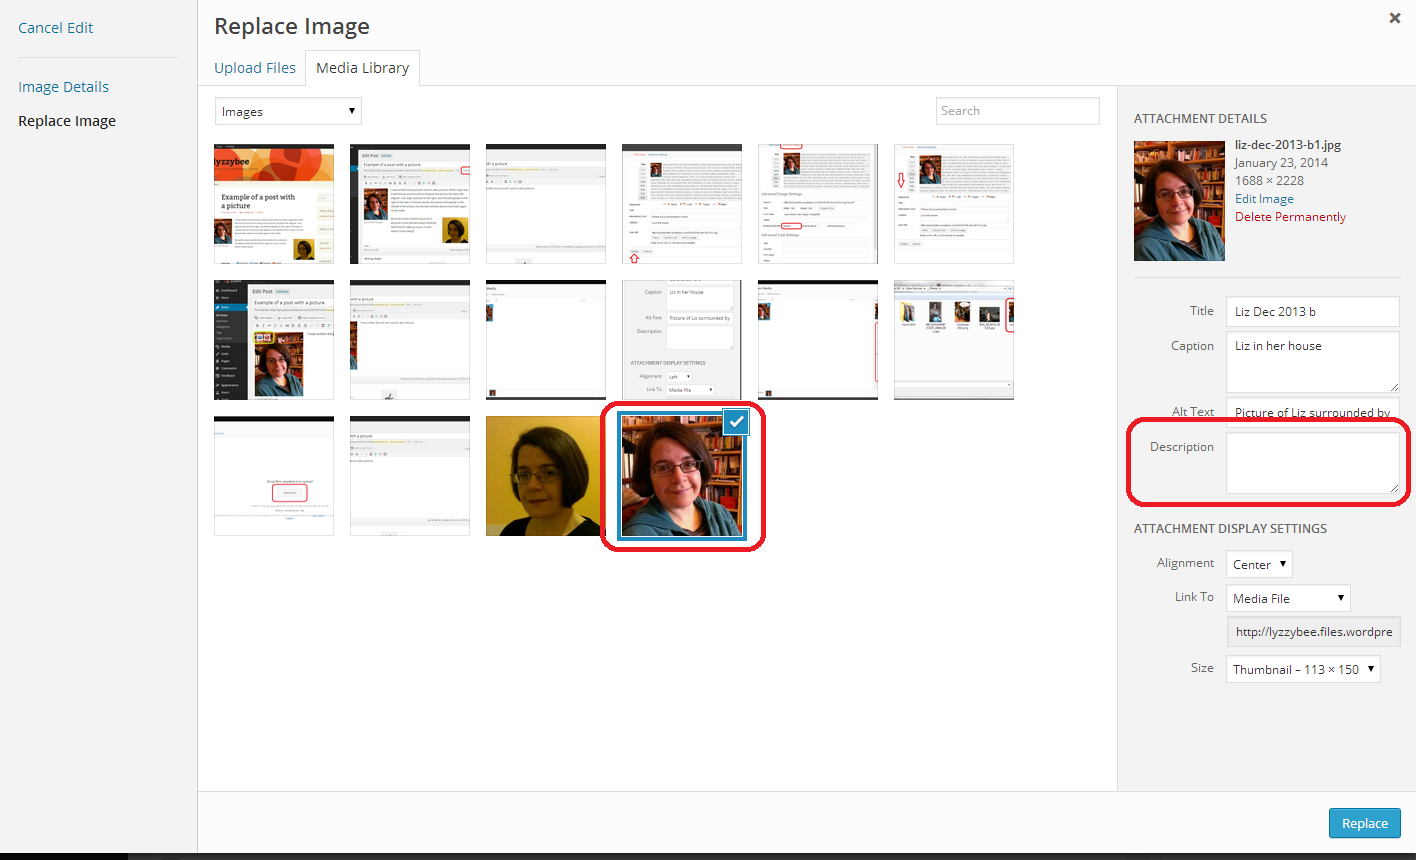
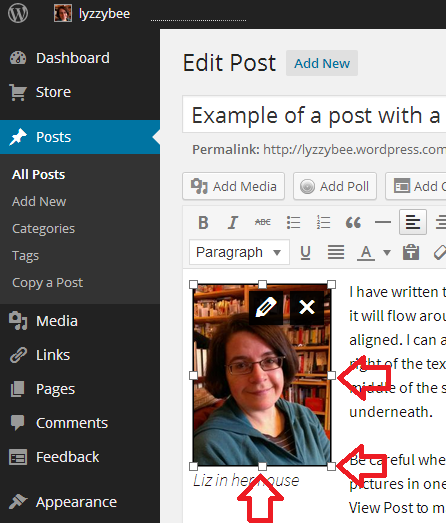
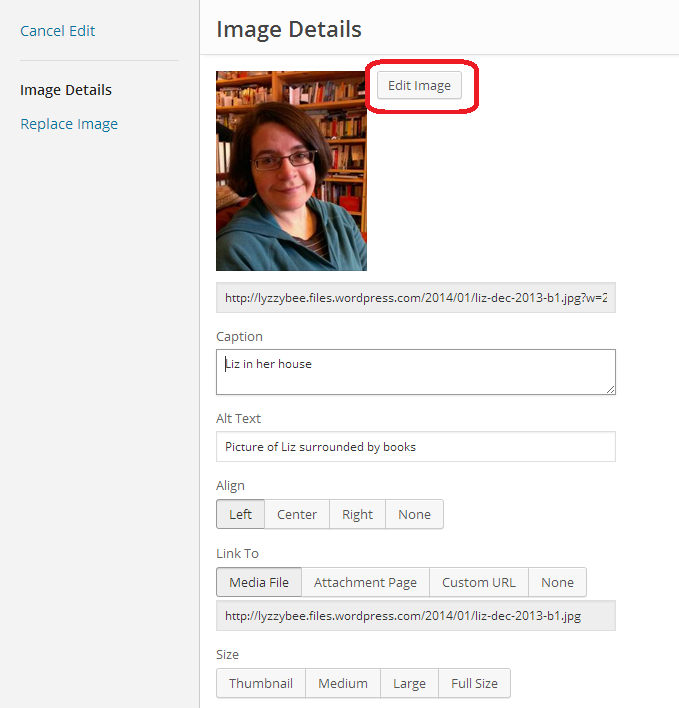
WordPress 3 – adding images to your post or page
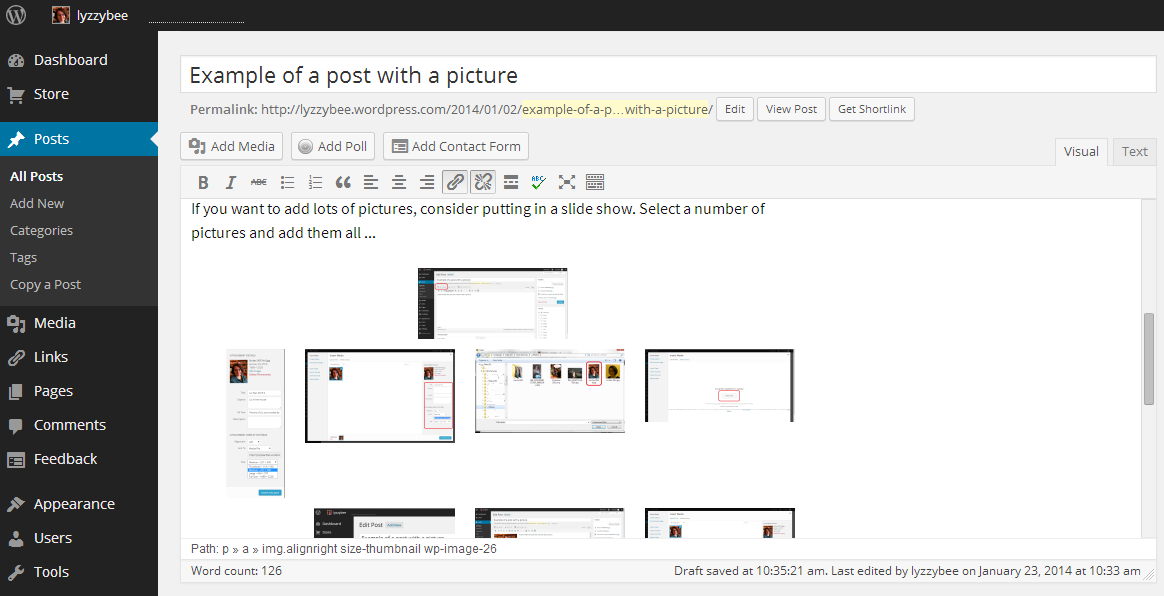
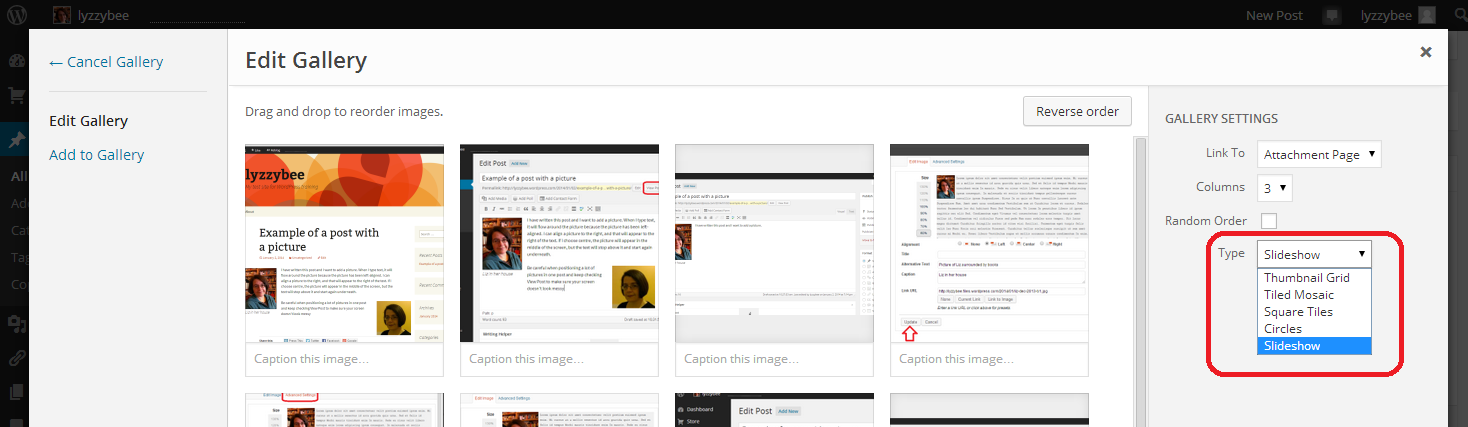
WordPress 4 – adding slideshows and galleries of images
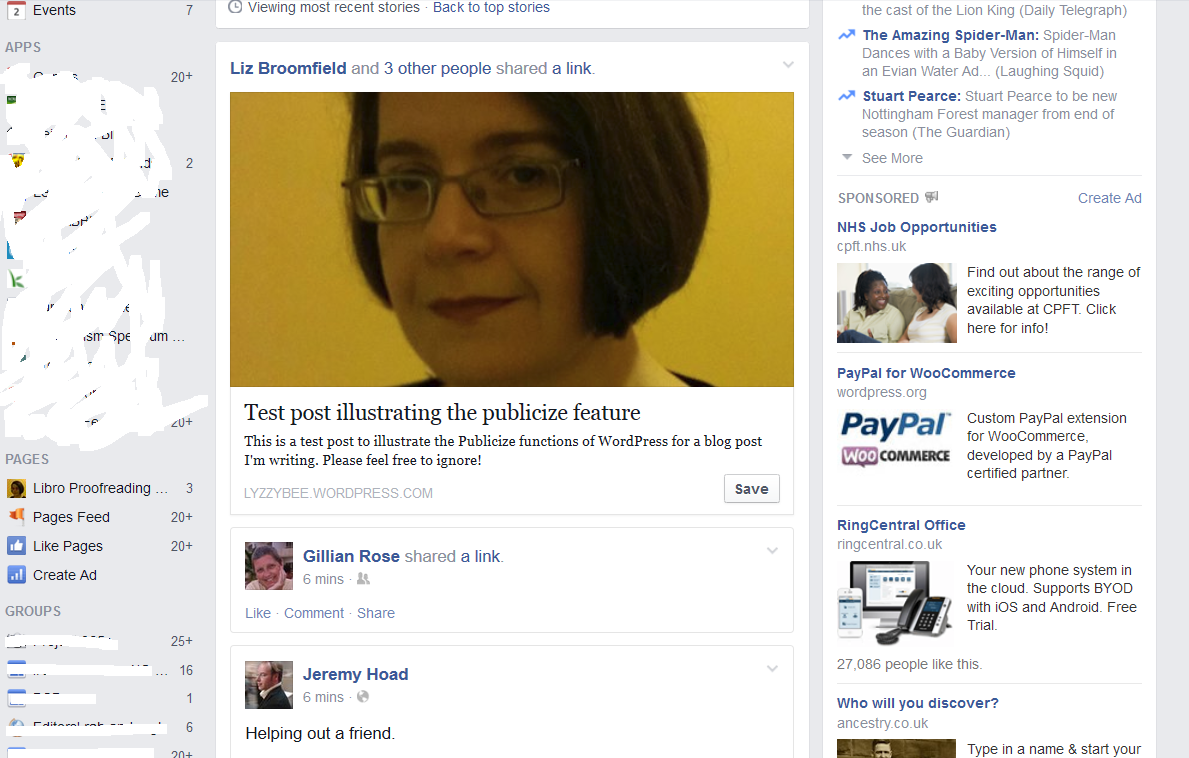
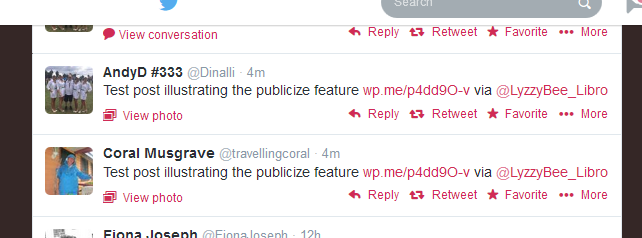
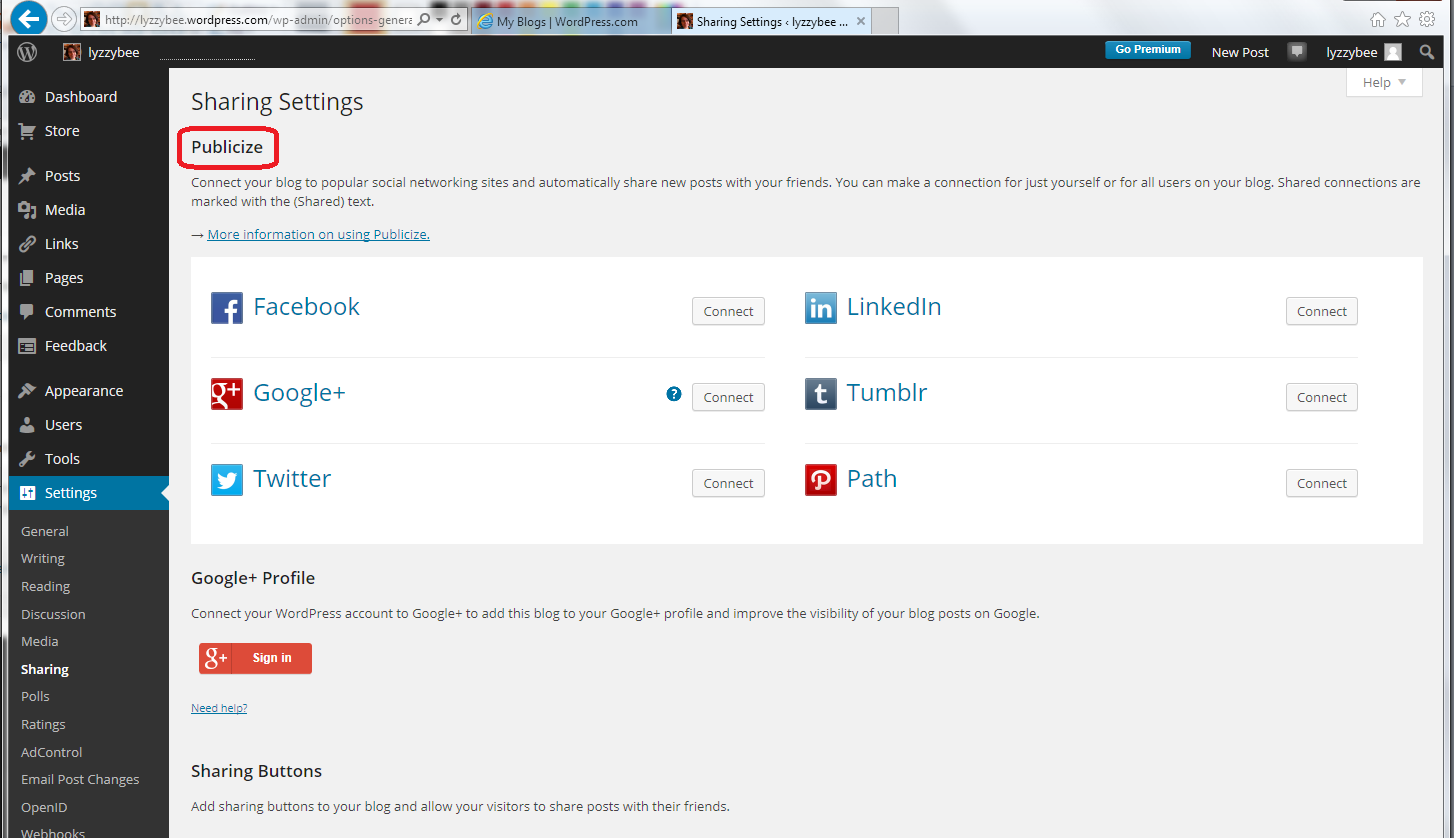
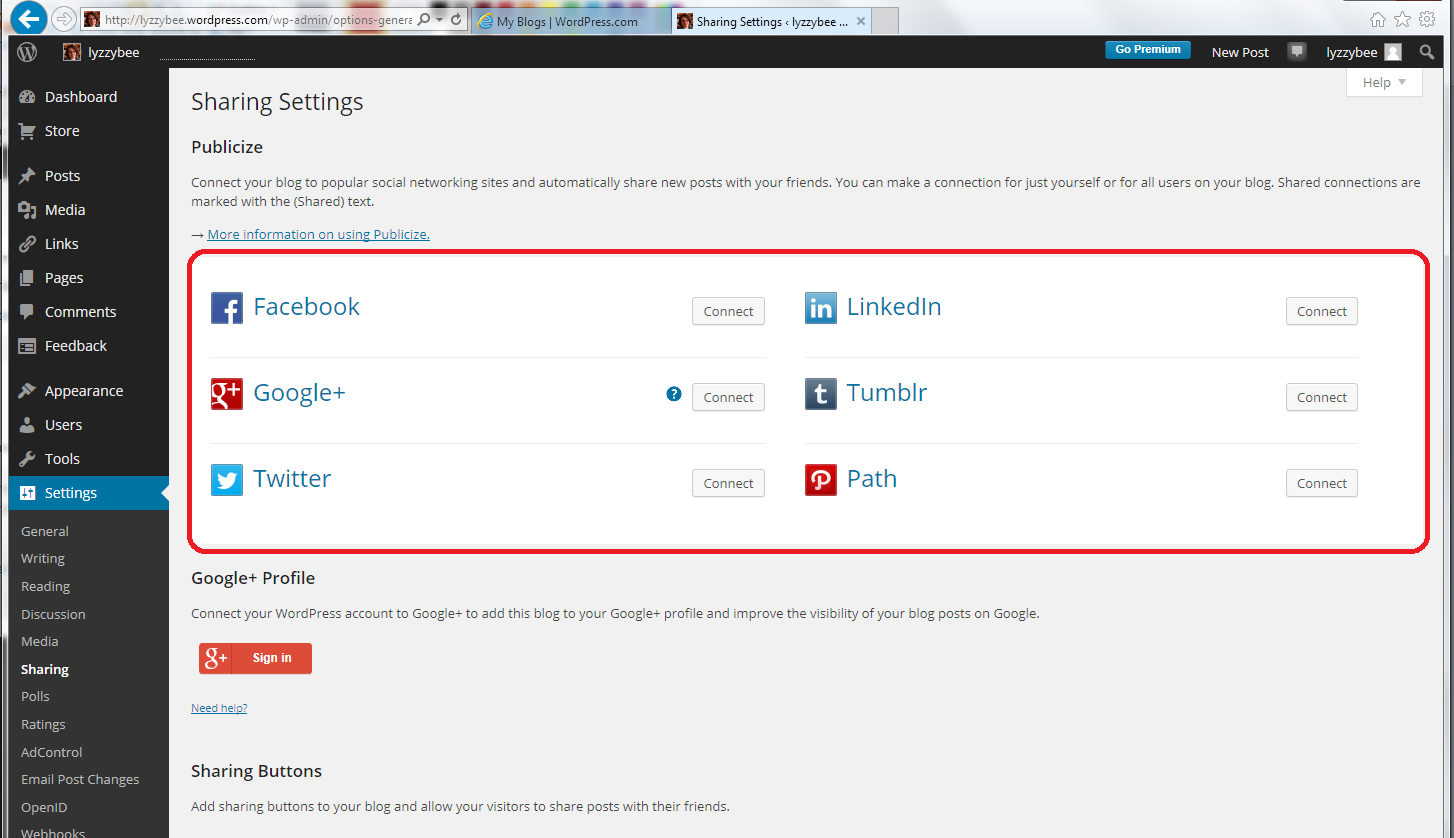
WordPress 5 – linking your blog to your social media
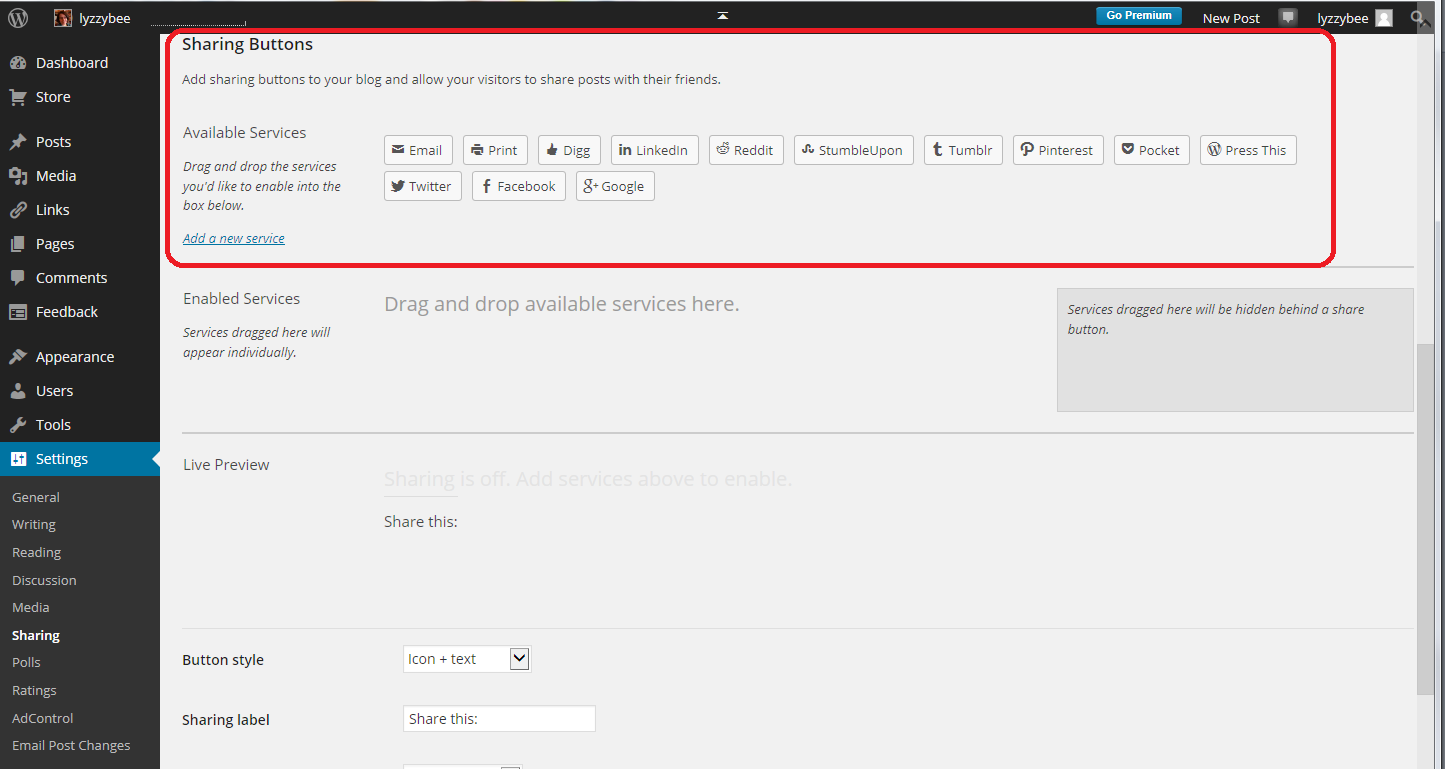
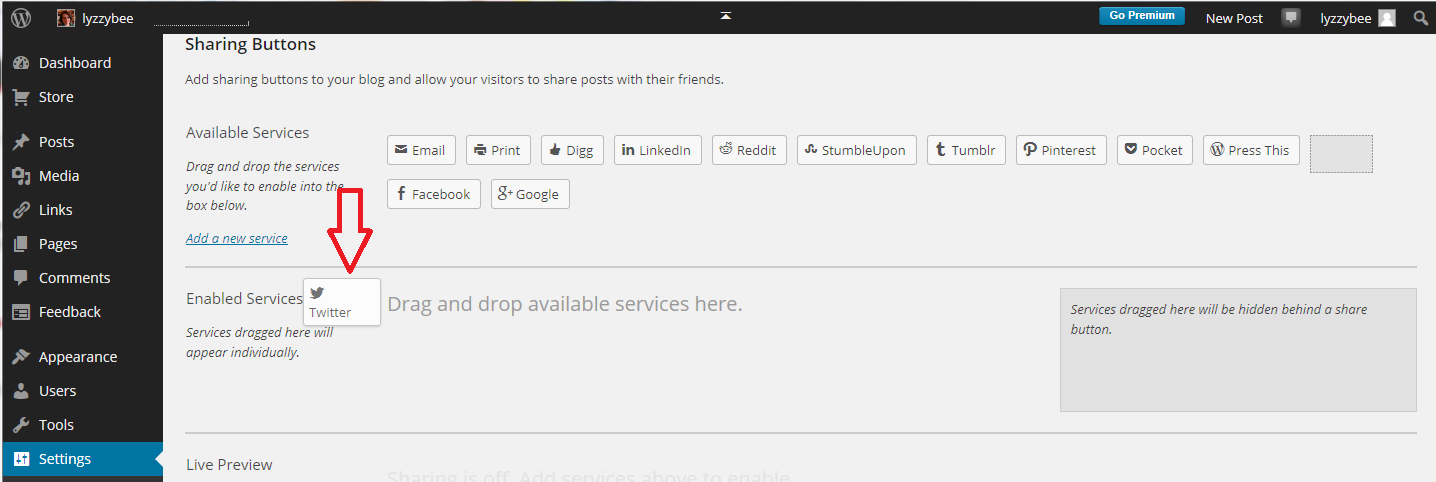
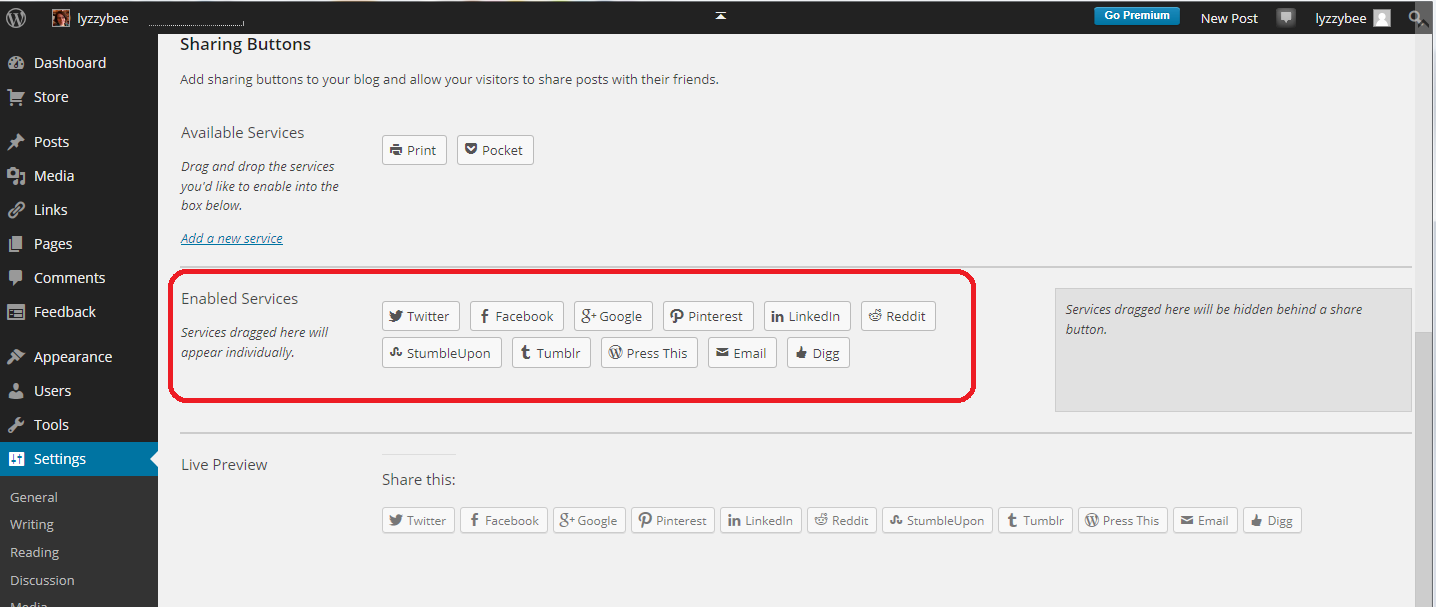
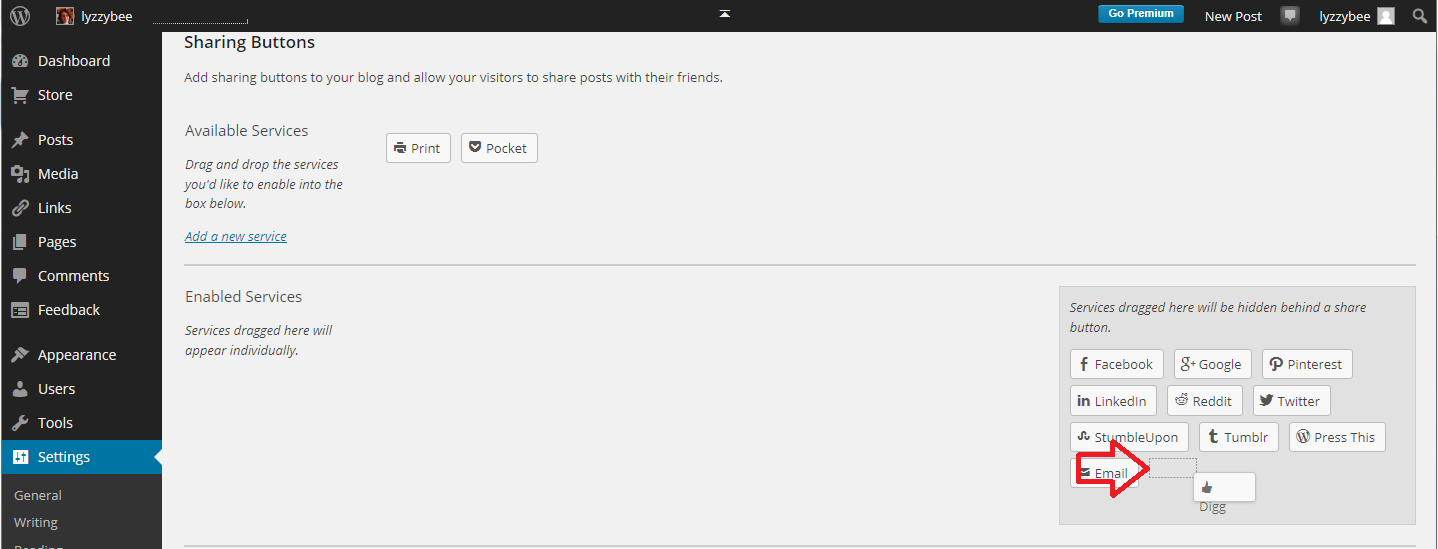
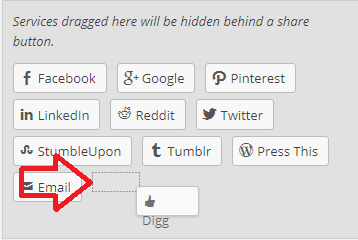
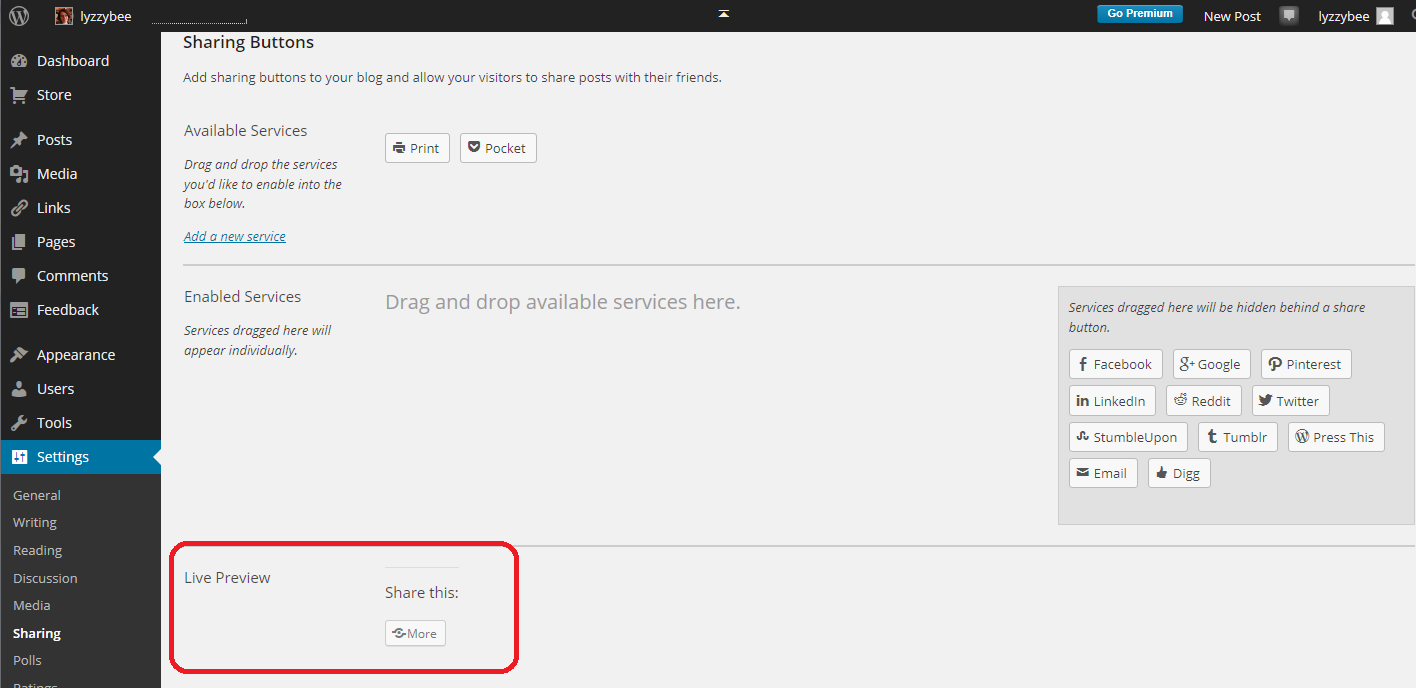
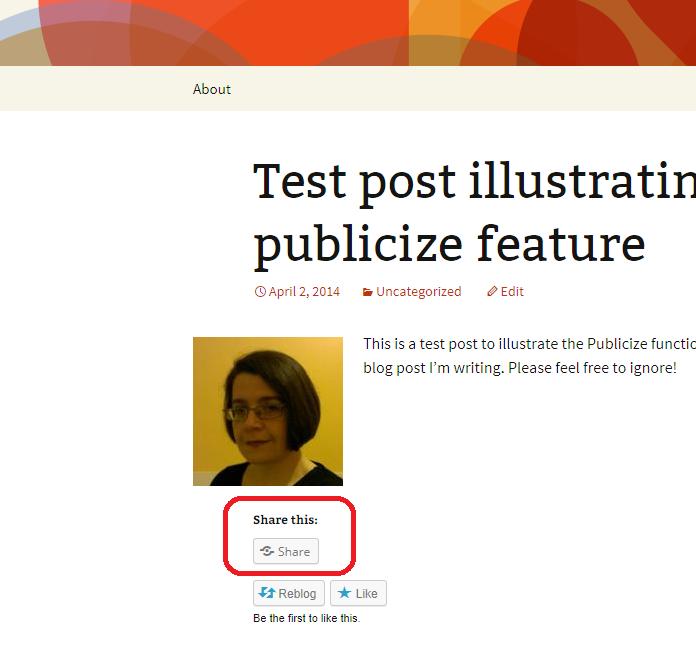
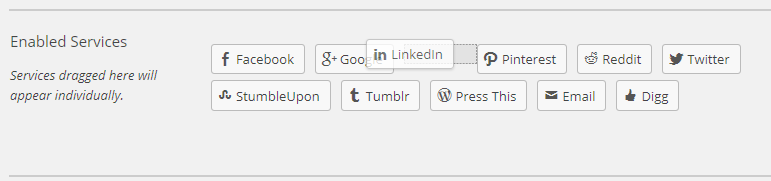
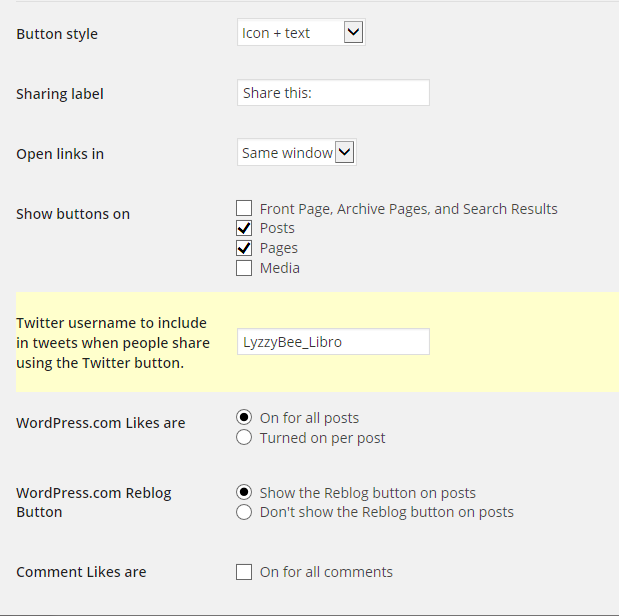
WordPress 6 – sharing buttons
WordPress 7 – adding an avatar picture
10 reasons to start a blog – why you should do it now!
10 reasons NOT to write a blog – and why you should stop and think, at least!
Reciprocity and Social Media – how to negotiate social media kindly and politely
Top 10 blogging sins – avoid these if you can!
Scheduling blog posts and keeping going – scheduling the posts and the writing of them
Guest posts (1) hosting – how to be the host(ess) with the most(est)
Guest posts (2) guesting – how to be the perfect guest
Adding links to blog posts – how to do it on the major blogging platforms (and email)