RSS

Tag Archives: Word tips

How do I hide the toolbars and taskbars in Word 2007, 2010 and 2013 and other MS Office applications?

In this article we’re going to learn how to (temporarily) hide the toolbars, taskbars, rulers and whatnot in Word.  Note that these processes will also work for other Microsoft Office applications such as Excel, PowerPoint, etc.

Why would I want to hide the taskbars in Word?

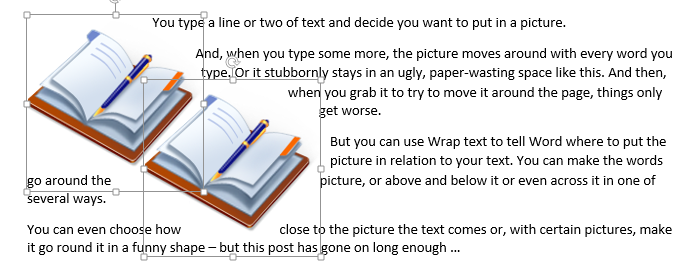
There are various reasons why you might want to have just a blank white screen in front of you when using Word. If you’re trying to write, write, write, you might want to remove all distractions. If you’re displaying Word on a large screen using a projector, there are many reasons why a plain screen with no additional information might be useful.

In fact, the second reason, wishing to display just some text and images via an overhead projector, is why I was asked to write this article in the first place.

How to hide taskbars and toolbars in Word

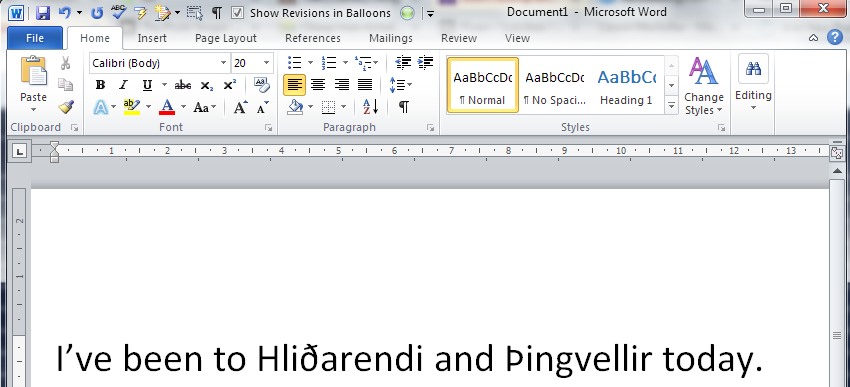
This works for Word 2007, 2010 and 2013: I’ve used Word 2010 in the example because it’s what I use most of the time, but the principles remain the same.

How to minimise the ribbon in Word

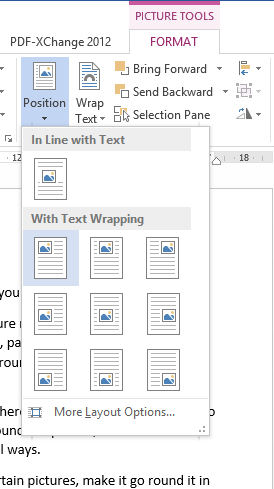
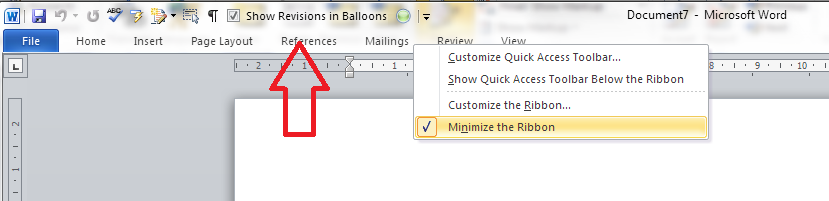
You might just want to minimise the ribbon. If this is the case, first right-click anywhere on the actual ribbon, then select Minimize the Ribbon from the menu that displays:

Word minimise ribbon

How do I reverse minimize ribbon?

To reverse the minimize ribbon action, you can either …

1. Right-click anywhere on the small ribbon headings that will appear and click again on Minimize the Ribbon: the tick will disappear and the ribbon will reappear:

un-minimize ribbon
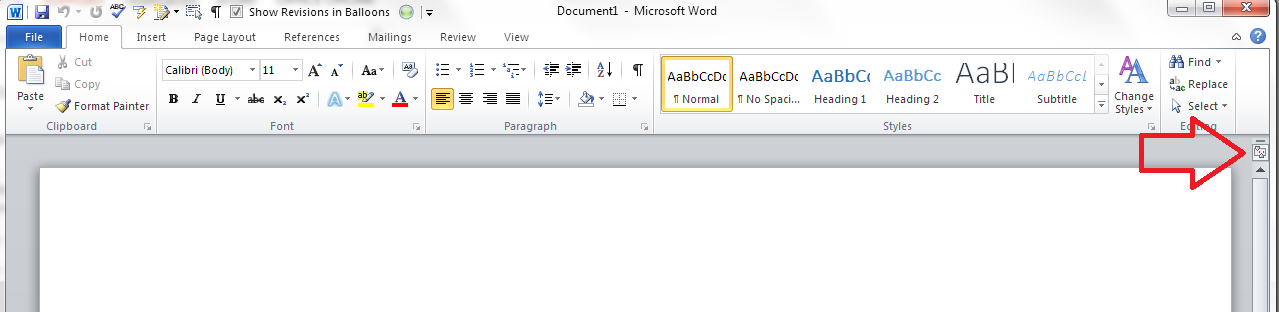
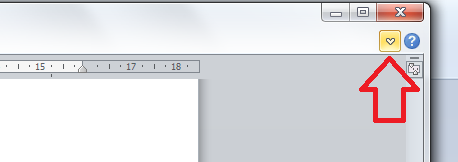
2. Click on the small down arrow that appears at the top right of the screen when the ribbon is minimised:

reverse ribbon minimise

How do I remove wording and symbols from the lower task bar

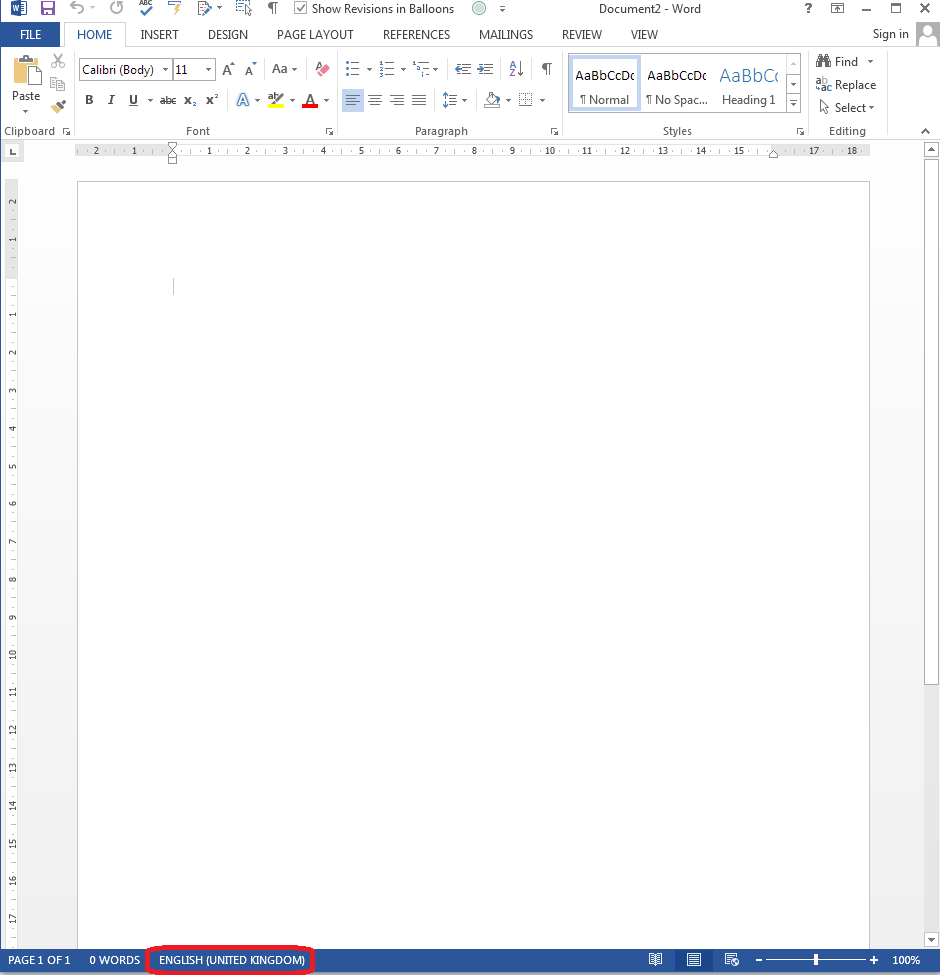
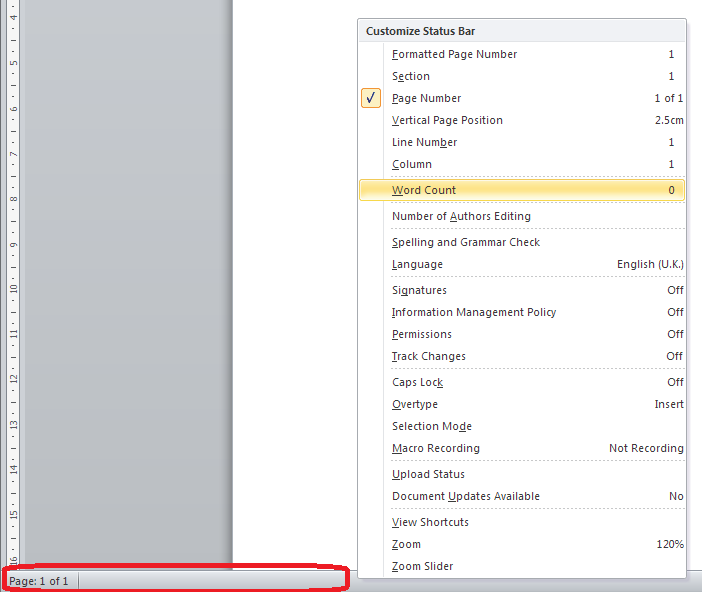
If you’re fed up of seeing your word count or document language in the lower task bar, you can right-click on the taskbar, at which point a list of all items you can display pops up, and you can untick the ones you don’t want:

remove items from lower task bar

You will see the displayed items at the bottom start to disappear until you’re left with just one:

remove from lower task bar

How do I reverse clearing the lower task bar?

To add items back on to the task bar, right-click on the taskbar and click on the features you want to see – the tick will reappear next to the items you select, and the information will display in the lower task bar.

How do I hide the rulers?

For instructions on hiding the rulers in Word, please see this article.

How do I hide all of the toolbars in Word and other Office applications?

If you want to go further and just have a blank screen, you can use the shortcut Alt+V, U

Note that you must follow this process to do this:

  • Press down the Alt key and keep it pressed down
  • Press the V key and release it (keeping Alt pressed down)
  • Press the U key and release it (you can then release the Alt key)

Pressing both letters together does not have the same effect. Once you’ve pressed this key combination, you will have just the document, no toolbars, taskbars, menus, etc. However, you are still likely to have the Windows taskbar showing.

Just a document, no toolbars

So you’re not quite there, but first …

How do I reverse Alt+VU?

The first time I did this, I got a bit panicky because I assumed that you needed to press AltVU again to get back to the menus, but that’s not what you do.

To reverse Alt+VU and get back to seeing your taskbars, hit the Escape key on your keyboard. Phew!

How do I hide the Windows taskbar?

You’ve got your lovely clean document showing but you want to get rid of that Windows taskbar at the bottom of the screen. Here’s what you do:

First, unlock the taskbar (if it is locked) by right-clicking on the lower task bar and seeing if Lock the taskbar is ticked. If it is, click on it to untick it.

unlock task bar windows

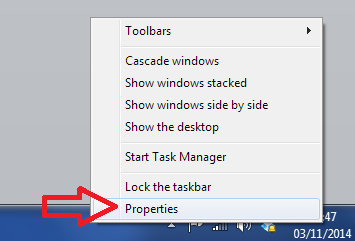
This dialogue box will disappear, so right-click on the taskbar again and this time choose Properties:

Windows taskbar properties

This will give you a new dialogue box:

Windows taskbar properties

Making sure that you’re in the Taskbar tab, click on the tickbox to Auto-hide thie taskbar.

The taskbar will now disappear, leaving you with a lovely clear screen containing only your document.

How do I reverse hiding the Windows taskbar?

To show the Windows taskbar, move the mouse to the bottom of the screen (assuming your Windows task bar is usually there), at which point it should appear. Then right-click at the bottom of the screen and select Properties, then untick Auto-hide the taskbar.

———————

This is part of my series on how to avoid time-consuming “short cuts” and use Word in the right way to maximise your time and improve the look of your documents. If you’ve enjoyed the post or found it useful, please use the sharing buttons below to share it via your social media networks – thank you!

Please note, these hints work with versions of Microsoft Word currently in use – Word 2007, Word 2010 and Word 2013 for PC. Mac compatible versions of Word should have similar options. Always save a copy of your document before manipulating it. I bear no responsibility for any pickles you might get yourself into!

Other useful posts on this blog

How to display and hide rulers in Word

How to add buttons to the Quick Access Toolbar

Find all the short cuts here … and see the full resource guide here.

 
8 Comments

Posted by on November 5, 2014 in Errors, New skills, Short cuts, Word, Writing


Tags: , , , , , , , ,

My work is being proofread – why do I need to use Spell Check?

Spell check buttonI recently posted a how-to article about using Spell Check (well, one for Word 2007/2010 and one for Word 2013, actually). Today I want to talk about why you should use Spell Check, even if you’re using an editor or proofreader of the human variety to check your work.

Using Spell Check before you send your work to your editor

So, you’re using an editor to check your work: why on earth should you need to run a spell check first?

I’m not talking about going through your document with a big pile of style guides and dictionaries by your side. I’m talking about taking maybe half an hour to press the spell check button and go through your manuscript removing the obvious errors. You know, the ones where you spell it obvis errrors.

As an editor, it can get a bit frustrating when you’re picking away at typos (form for from, fried for friend) which are composed of ‘real’ words (which obviously a spell checker program won’t notice) and then you find a load of fromms or frends which a spell check would have eliminated. And here’s the thing: we’re human. If we’re concentrating on picking up your incorrect spellings and non-existent words, we’re less likely to be able to concentrate in detail on what we’re supposed to be doing: making your language express your thoughts and meaning as clearly as possible.

Yes, we can run a spell check for you, and if I spot more than the odd error that this would eliminate, I will do that myself. But it’s time-consuming. And that’s another thing: time-consuming. Some editors charge by the time spent, some by the word. I’m a charge-by-the-word woman myself, but if you’re paying for someone’s time, why pay them to do something you can do yourself?

So, there are two points to bear in mind here:

  1. If your work isn’t spell checked, your editor will be concentrating on those issues and less able to go deeper into their work
  2. If you’re paying by the hour, you’ll be paying extra needlessly

I have to add here that it can seem a little impolite, too, to not run a spell check before you send the manuscript in to your editor. A little bit as if you’re the creative person with the big ideas and you’re sending it off to the paid help who will sort out things you’re too important to do. I’m pretty sure that this is NOT the case for the majority of authors, but it’s always best to avoid that impression if at all possible. See the caveats below …

What if I don’t know whether spell check is correct?

That’s fine. We’re the experts, you’re the creative one. If you’re not sure of your spelling and which word is correct, you can always either leave a note in the margin or let us know you ran a spell check but you’re not sure of a few things. In fact, spell check itself isn’t always correct (see below). All I’m saying here is that the fewer avoidable mistakes there are in your manuscript, the better the job that I’m able to do for you.

Times when pre-spell-checking isn’t appropriate

I’m not a monster and I’m not inflexible – nor are the other editors I know. We’re a kind and helpful bunch. If you have issues with your spelling, dyslexia or any other special situations, of course we’re not going to reprimand you over issues in the spelling in your document. Also, if you’re using voice recognition software, I’m not actually sure how the spell-checker works in that situation (if someone who uses such software wants to comment, that will be very so useful and I’ll include your notes in an update).

However, it is important to let your editor know if you have any special issues like these. It will help us to do a better job for you, and perhaps even to explain our choices and changes in a way that’s easiest for you. Also, we can look out for particular artefacts that might arise in your manuscript because of the way in which you’ve written it (voice recognition software is notorious for inserting homophones into the texts it produces). As I said, we’re an understanding and helpful bunch, and we want to help you in the best way possible.

Using Spell Check when you’ve received your work back from your editor

No – I don’t mean right away! Well, if you find a load of legitimate errors  you might want to speak to your editor (although nobody’s perfect and no editor I know can do 100% perfect work: we’re human). But, most of the time, your manuscript is going to come back to you either in Word with Track Changes turned on or in an annotated PDF which you then need to update. In both of those cases, you doing the corrections can allow errors to creep in. It’s nobody’s fault, it’s just what happens.

I learned this the hard way when I received my last manuscript back from my editor. I accepted changed as I went along and did one final Accept all changes once I’d reviewed the document, but some oddities had crept in, especially in the spacing around punctuation. Luckily, I noticed in time, ran a quick spell check and got it all sorted out – but if someone who’s an editor herself can manage to introduce errors when dealing with her editor’s edits (sorry!), I’m going to assume that anyone can manage to do that!

Beware: Spell Check is not always right (gasp!)

There is a caveat here.

Much of English grammar is not totally prescriptive. There are often two ways of going about doing something, especially when you look at hyphenation and capitalisation. This means that when you’re spell-checking after the edit, you should bear in mind the style sheet that your editor’s sent you. If they’ve chosen a particular word form to make things consistent in your manuscript, I’d consider keeping it even if the automated spell check says it’s wrong (in its opinion). Microsoft software appears to use something called the “Microsoft Manual of Style“, but obviously if you’re working to a particular style guide such as Oxford or Chicago Manual of Style, they will over-ride Microsoft if there’s a clash. A classic example of this is “proofreader” – that’s the accepted way of writing the word in most of the major style guides, but Word Spell Check does like to change it to proof-reader. I’d kind of assume your editor knows how to (not) hyphenate that one, but do bear this in mind when you’re doing that final check.

Also, if you’re writing creatively, your editor might have left something in which is correct, but creative, while spell check (even without grammar check) might take issue with it. A classic example I find is spell check trying to change they’re to their, irrespective of the actual correct use of the word. So beware on grammar or word form choice issues like that – you can always check back with your editor or consult a style guide if you’re not sure.

This article has talked about why writers should use spell check even if they have an editor. If you’ve got an opinion on this, or a good reason NOT to use spell check, do please post a comment below! And if you’ve enjoyed this post or found it useful, please do share it using the share buttons!

Related posts on this blog:

Using Spell Check in Word 2007 and 2010

Using Spell Check in Word 2013


Tags: , , , , , , ,

How to use spell check in Word 2007 and Word 2010

In this article we’re going to talk about using the spell checker function in Word, including how to find it, how to use it, and when not to believe it. This article works with Word 2007 and Word 2010 – screen shots are taken from Word 2010. I have written about Word 2013 separately as it’s a bit different.

What is Spell Check?

Spell check is a function in Word that will check both the spelling and appropriate word use in your document. It’s not perfect, but it will pick up all sorts of errors and typos that you might not realise you’ve made.

Spell Check will go through your document and highlight any words that it thinks are spelled incorrectly. If it can, it will offer alternative spellings for you to choose from. You can then choose to change the word to one of its suggestions, change all instances of that word to the suggestion, or ignore the “error” once or always.

We usually run a spell check after writing a document, although you can ask Word to check spellings as you go along (I personally find this distracting). It’s worth running it even if you think your writing is perfect and you’ve read through the document finding no mistakes – there’s always something, and that’s why, even though I’m an editor, I use spell check on my own posts and as a final check on documents I’ve edited, and why I have an editor for my books!

How do I start Spell Check?

We run Spell Check from the Review tab in Word:

How to start spell check

The eagle-eyed among you will have spotted the same icon in the Quick Access Toolbar at the very top of the document. I’ve added the Spell Check button there because I use it a lot. If you want to learn how to add buttons to the QAT, read this article.

With your cursor at the beginning of the document, click on the Spelling and Grammar button. Word will highlight each word that it thinks is incorrect, starting with the first one:

spell check in action

Here, I started at the beginning of the text, but you’ll notice that it’s missed out “peace of txt” even though that is clearly wrong. We’ll look at that in a minute, but let’s concentrate on what happens when it gets it right.

What options does Spell Check give you?

Spell Check has highlighted “misteaks” and you can see in the Suggestions box below that it’s suggested the closest word first, then a few other options. “Mistakes” is highlighted, but if I did mean “mistake” or “mistreats”, I can click on one of those.

To the right, we have some buttons – Ignore Once / Ignore All / Add to Dictionary are to be used when we know what we typed is correct and we want to keep it; Change / Change All / AutoCorrect will allow us to make that change:

  • Ignore Once will ignore just that instance of the word in question
  • Ignore All will ignore that exact word throughout the rest of the piece
  • Add to Dictionary will add that exact word to the Spell Check dictionary so it will never ask you ever again if you’ve miss-spelled it. I have used this for my name in the past, which is why this Spell Check process won’t pick up “Broomfield” or “Dexter”, and I also add in commonly used technical terms and jargon that comes up a lot in the texts I work with.
  • Change will change just that instance of “misteaks” to “mistakes”. Any other examples will stay as they are
  • Change All will change every instance of “misteaks” to “mistakes”.
  • AutoCorrect brings up the AutoCorrect screen (see this article for more on AutoCorrect) which allows you to set up an automatic correction for the future, so whenever you type “misteaks” it will change to “mistakes”. This is really useful if you notice that you’re mistyping a word regularly.

I’m going to click on Change All, and this will automatically change all examples of “misteaks” to “mistakes” in the text. Note, however, that it will not change “misteak” – it only looks for the exact same word. This includes capital letters, so it will now flag up “Misteaks” as a new error and make some new suggestions, the second of which is the correct one. I do tend to click on Change All, so that I save time and mouse clicks correcting the same form of the same word over and over again.

Now, let’s see what else Spell Check will look at.

It will notice if you’ve missed out an apostrophe, even if the word “wont” is a word in itself:

spell check apostrophe

And it will check incorrect punctuation, too:

spell check punctuation

Finally. you can ask Spell Check to check your grammar, too. Here, it’s picked up that I started a sentence with a lower-case letter:

spell check grammar check

There’s a caveat here, though: I find the grammar checker to be quite rigid and a bit odd. The eagle-eyed among you may have spotted that I have Check grammar ticked in the above image but not in the others – this is because I tend to turn off the grammar checker when I’m working on my own texts and other people’s. It’s up to you whether you do that, and instructions for tweaking the Spell Checker will appear in a later article.

What if I change my mind or make a mistake?

If you make a misteak, oops, sorry, mistake when you’re changing words in Spell Check, there’s a handy button that will take you back.

Here, I’ve clicked on the first suggestion for “Misteaks” which was “MI steaks”. Oops. I only see it when I’ve already hit Change All. But I can click the Undo button to take me back to that set of choices, and you can click the Undo button more than once.

undo spell check

Having pressed Undo, we’re back to looking at “Misteaks” instead:

spell check undone

Does Spell Check ever get it wrong?

In our example, Spell Check has missed the obviously incorrect phrase “peace of txt”:

spell check in action

It does sometimes notice when you use an incorrect but valid word (i.e. it is actually a word in itself), but not always. I’m guessing that it’s ignored “txt” because that’s a file extension (like .doc) which is used when saving documents. So Spell Check hasn’t picked that up, and you or your editor will have to notice it yourselves!

It also uses rules which don’t match standard common usage. Right up until Word 2013, it thinks that proofreader is two words, hyphenated:

Spell check getting it wrong

This makes it quite embarrassing when I’m checking a client’s acknowledgements, they thank me for proofreading, and then have spell-checked their work, so I have to change it back to proofreading.

Word is also not keen on swear words, and can give amusing alternatives if you try that …

Help – my Spell Check’s making everything go into American English!

Your Spell Checker will work with whatever variety of English (or any other language) that your text is set to. So if you have your text set to be in American English, that’s the language your Spell Check will use. Learn how to change the language of your document and your editing language  – and watch out, as your comment boxes might appear in another language, too, which will upset your Spell Checker – use this article to make sure your comment language matches the rest of the document.

Can I use spell check in other applications as well as Word?

Many applications have spell check functions. For example, the WordPress editor that I’m using to write this has a spell check button. so does my MailChimp newsletter editor, my email editor and Excel and PowerPoint. Wherever you see a button like this, you should find a spell check option:

spell check icon

In this article we’ve looked at what Spell Check is, how to access it, how to ignore and change words, and some things to watch out for. In future articles I’ll be sharing how to tweak your Spell Check settings, how to tell Spell Check NOT to look at particular text, and when to use Spell Check when you’re working with an editor. Oh, and there will be a parallel post on Spell Check in Word 2013, too!

———————

This is part of my series on how to avoid time-consuming “short cuts” and use Word in the right way to maximise your time and improve the look of your documents. If you’ve enjoyed the post or found it useful, please use the sharing buttons below to share it via your social media networks – thank you!

Please note, these hints work with versions of Microsoft Word currently in use – Word 2007 and Word 2010 for PC. Mac compatible versions of Word should have similar options. Always save a copy of your document before manipulating it. I bear no responsibility for any pickles you might get yourself into!

Other useful posts on this blog

Using Spell Check in Word 2013

How to change the language of your Word document

How to change your editing language

How to change the language of your comment boxes

How to use AutoCorrect

How to add buttons to the Quick Access Toolbar

Find all the short cuts here … and see the full resource guide here.

 
6 Comments

Posted by on October 15, 2014 in Errors, New skills, Short cuts, Word, Writing


Tags: , , , , , , , ,

How to use spell check in Word 2013

Because Spell Check looks different in Word 2013, here is a special article just on that version of Word. It should be read alongside the more detailed post on Spell Check for Word 2007 and Word 2010 which you can find here.

What is Spell Check?

Spell Check in Word checks  the spelling and grammar in your document, highlighting any words that it thinks are spelled incorrectly and offering alternatives.

It’s always worth using Spell Check, even if you’re an accomplished writer or feel you can edit your own work – we all make mistakes, and this will catch many of them.

How do I start Spell Check?

We run Spell Check from the Review tab in Word:

Word 2013 spell check

Note: I’ve added the Spell Check button there because I use it a lot. If you want to learn how to add buttons to the QAT, read this article.

With your cursor at the beginning of the document, click on the Spelling and Grammar button. Word will highlight each word that it thinks is incorrect, starting with the first one:

Word 2013 spell check

Here, I started at the beginning of the text, but you’ll notice that it’s missed out “peace of txt” – see more detail in the main article on this.

What options does Spell Check give you?

  • Ignore Once ignores that instance of the word in question
  • Ignore All ignores that exact word throughout the rest of the piece
  • If you own a copy of Word 2013 outright or have a subscription and are logged in, Add to Dictionary will add that exact word to the Spell Check dictionary so it will never ask you ever again if you’ve miss-spelled it. I have used this for my name in the past, which is why this Spell Check process won’t pick up “Broomfield” or “Dexter”, and I also add in commonly used technical terms and jargon that comes up a lot in the texts I work with.
  • Change changes that instance of “misteaks” to “mistakes”. Any other examples will stay as they are
  • Change All changes every instance of “misteaks” to “mistakes”.
  • If you own a copy of Word 2013 outright or have a subscription and are logged into your Microsoft Office account, AutoCorrect is available and brings up the AutoCorrect screen (see this article for more on AutoCorrect) which allows you to set up an automatic correction for the future, so whenever you type “misteaks” it will change to “mistakes”. This is really useful if you notice that you’re mistyping a word regularly.

Grammar check in Word 2013

Grammar check not only highlights where you’ve gone wrong, but gives you a little lesson in the Spell Check panel, too:

Word 2013 spell check grammar check

I find the grammar checker to be quite rigid and a bit odd. It’s up to you whether you allow grammar checking, and instructions for tweaking the Spell Checker will appear in a later article.

What if I change my mind or make a mistake?

In Word 2007 and 2010 there was a handy button in the Spell Check dialogue box that allowed you to undo previous changes. This has gone in Word 2013, so if you realise you’ve made a mistake, you will need to use the Undo button (or press Control-Z) to go back to correct your mistake.

Does Spell Check ever get it wrong?

In short – yes. See the main article for more explanation and examples.

Help – my Spell Check’s making everything go into American English!

Your Spell Checker will work with whatever variety of English (or any other language) that your text is set to. So if you have your text set to be in American English, that’s the language your Spell Check will use. Learn how to change the language of your document and your editing language  – and watch out, as your comment boxes might appear in another language, too, which will upset your Spell Checker – use this article to make sure your comment language matches the rest of the document.

Can I use spell check in other applications ?

Wherever you see a button like this, you should find a spell check option:

spell check icon

In this article we’ve looked at Spell Check in Word 2013 and how it differs from previous versions. In future articles I’ll be sharing how to tweak your Spell Check settings, how to tell Spell Check NOT to look at particular text, and when to use Spell Check when you’re working with an editor. Oh, and there will be a parallel post on Spell Check in Word 2013, too!

———————

This is part of my series on how to avoid time-consuming “short cuts” and use Word in the right way to maximise your time and improve the look of your documents. If you’ve enjoyed the post or found it useful, please use the sharing buttons below to share it via your social media networks – thank you!

Please note, these hints work with versions of Microsoft Word currently in use – Word 2007 and Word 2010 for PC. Mac compatible versions of Word should have similar options. Always save a copy of your document before manipulating it. I bear no responsibility for any pickles you might get yourself into!

Other useful posts on this blog

Spell Check in Word 2007 and Word 2010

How to change the language of your Word document

How to change your editing language

How to change the language of your comment boxes

How to use AutoCorrect

How to add buttons to the Quick Access Toolbar

Find all the short cuts here … and see the full resource guide here.

 
3 Comments

Posted by on October 15, 2014 in Errors, New skills, Short cuts, Word, Writing


Tags: , , , , , , ,

How do I stop pictures jumping around when I edit a Word document? Combining words and pictures 2

More from my own editor, Catherine Fitzsimons, creator of educational materials and community magazines, on the tricky task of controlling how images behave in Word documents …

Last week, we looked at the ways in which Word can wrap text around pictures. To control how close the text is to the edge of a picture we opened the More Layout Options window from the right click menu. You may have noticed there are two other tabs in this:

Diagram 9One lets you control the size of your picture, but there are easier ways to do that (see How do I change the size of pictures in Word? on my website). The other, Position, provides some detailed options for controlling where your pictures go and is the key to stopping them from jumping around. It looks complicated, but I don’t think I’ve ever, in years of creating worksheets and doing magazine layout, had to resort to changing anything in the sections labelled ‘Horizontal’ and ‘Vertical’ – I’ve just used the ‘Options’ section.

Diagram 11Before we go on to that though have a look at the ‘Allow overlap’ button. This is useful if you want to get two pictures closer together than their boundary boxes would otherwise allow. For example, here you can see that although the books themselves don’t overlap, the boxes round them do. Notice also how the Tight-wrapped text goes inside the boxes because these images have a transparent background.

Diagram 12

Why do pictures move? How do I stop pictures moving?

Basically, pictures can either be locked in position on the page or moved around with the text.

In Word 2013 ‘Move with text’ and ‘Fix position on page’ appear as options on the Wrap Text menu and on the little pop out Layout Options menu (so long as your picture isn’t in line with the text).

Diagram 5Diagram 4bIn earlier versions you have to go into More Layout Options|Position and check or uncheck ‘Move object with text’ – it’s checked as default. If you have a picture exactly where you want it on a page, all you have to do is uncheck the box (or make the appropriate selection from one of the menus in Word 2013). That picture will then stay exactly where it is when you edit or add to the text or insert another picture – it will move only if you grab it and place it somewhere else yourself (or play with the numbers in the ‘Position’ tab of More Layout Options).

Allowing pictures to move with text is a little more complicated and depends on understanding the idea of anchors.

When you whizz a picture around the page, Word makes a decision about what text to tie it to: it generates an ‘anchor’, usually at the beginning of the paragraph nearest to the top left corner of the figure (working up). If you then move or delete that bit of text, the image will move or be deleted with it — that’s why pictures sometimes vanish unexpectedly. They usually jump because an anchor and its picture have to be on the same page. That means that if you type an extra paragraph and the anchor moves to a new page, the picture will jump to that new page too. It’s Word trying to be helpful, aiming to keep pictures and the writing about them together, but it does feel pretty random if you don’t know the logic.

Word 2013 helpfully shows you the anchors whenever you’re clicked on a picture, but it is possible to see them in earlier versions: since they are formatting marks, they will show up if you click the symbol that looks like a backwards P in the Paragraph group on the Home ribbon. If you can see them, they can help you work out why a picture won’t go where you want it or keeps disappearing altogether.

Diagram 13

In Word 2010 or 2007 you can also get the anchor marks to show all the time (without the other formatting marks) by going to File (Office button in 2007)|Options|Display|Always show these formatting marks on the screen, then ticking ‘Object anchors’ and OK.

Once you get the hang of how the wrapping styles and the anchors affect where the pictures go, it becomes much easier to put a picture in the right place and make it stay there. Here’s the order I suggest for creating a document that has words and pictures:

  • Write and type all the text first (or work a page or two at a time).
  • If possible, get the pictures as close as you can to how you want them (size, resolution, cropping, colours) before you add them to your text – either use image editing software or get it right in a blank document then copy and paste into the one you’re working on.
  • Once you have a picture where you want it, with the right sort of size and wrapping, consider locking it in place.
  • If a picture that has to stay with the text appears to be misbehaving, go in search of its anchor to track down the problem.

Still can’t get the pictures where you want?

If you’re creating something with a lot of images, or need more complex layout — such as for a brochure or worksheet — then there are alternatives to putting the text and pictures straight into the document. I explain how to use a table to combine text and pictures in How do I organise a lot of pictures on a page? over on my own blog where, in future posts, I will look at alternative solutions, and other issues to do with using pictures.

Other useful posts

On this blog:

How do I make pictures go where I want them to in Word?

On Catherine’s blog:

How do I organise a lot of pictures on a page?

How do I change the size of a picture in Word?

 
14 Comments

Posted by on August 27, 2014 in Short cuts, Word


Tags: , , , ,

How do I make pictures go where I want them to in Word? Combining Words and Pictures 1

Today and next week we have guest posts from Catherine Fitzsimons on placing images in Word documents. This is a tricky topic and one I’ve been wanting to write about for ages: Catherine does a lot of work with newsletters and other complex documents, which makes her the ideal person to write these posts for me!

How do I combine text and pictures?

Have you ever tried to put a picture in Word and found your text, which started at the top of the page, suddenly moves down? And then, as you type more, or change the size of the picture* to make it fit better, things move to unexpected places? Or the picture stays where it is, but leaves you lots of blank space on the page? Then, when you try to move it around, things only get worse and you end up with something like this:

Diagram 4

This is because Word assumes two things:

  • That you want the picture (or, to be precise, the bottom left of it) to be placed where the cursor is. That means it goes immediately after the last thing you typed before choosing Insert|Picture and, when you try to move it, you can see a vertical line where it believes you want it to go.
  • That you would like the text to run right up to the picture and carry on straight after it.

In other words Word treats your picture like an outsize character and refers to this option as having the picture ‘In Line with Text’.

However, you can change your picture to what is known as a ‘floating figure’ so you can put it where you like but, before we delve into all that, have a look at a handy shortcut in the ribbon versions of Word. If you select your picture, go to the Picture Tools|Format ribbon that appears and click the down arrow by Position, you will get a choice of nine places to place your picture without any fiddling around at all.

Diagram 4a

In fact, in Word 2013 some of these appear in a little pop-up menu that you can call up by clicking the thing that looks like a rainbow drawn on lined paper which hovers at the top right of a picture when you select it.

Diagram 4b

All wonderful, but what if you need more flexibility? Read on.

Once again, select the picture and go to the Picture Tools|Format ribbon but this time click the down arrow by Wrap Text. (Alternatively, or in older versions of Word, right click on the picture and choose Wrap Text from the menu that appears.)

Diagram 5

Doing that brings up another menu which lets you choose the relationship between your text and picture. The icons helpfully explain the options:

Square means that the text will wrap all the way around your picture (strictly speaking around the ‘bounding box’ – the rectangle that appears when you select it). When you move the picture around the page the text flows above, below and to the sides – or one side if you put your picture up against a margin. Notice, though, that it doesn’t make text down the sides into columns – it reads across the picture. (If you want your picture in the middle of a page like this, it’s probably best to make your text into two columns first.)

Diagram 6

Top and Bottom does exactly that. It looks just the same as if you had typed Enter before and after inserting your picture but with the important difference that the picture moves as an object, not a character, so it’s easy to place it somewhere new.

Tight only works with images which are not rectangular or, like some clip-art, have a transparent background. It wraps the text around the edges of the image (assuming these ‘wrap points’ have been defined) rather than around the bounding box.

Diagram 7Through is a complicated one and I don’t know anyone who has used it. It works the same way as Tight except that it will also put words right down into any transparent sections of the picture that are linked to the background, again, providing that the wrap points have been set up properly.

Behind Text makes the words go over the top of your picture (which can work well so long as the image isn’t too detailed or too similar in colour to the font), whereas In Front of Text means that non-transparent parts of your image obliterate the words. Why might you want to do that? If you insert a an ellipse that has Shape Fill as ‘No Fill’ and Shape Outline red, and float it in front of text then you have a useful little shape for circling things you want to highlight.

Diagram 8You can refine Square, Tight and Through further in Picture Tools|Format|Wrap Text|More Layout Options. As you can see, you can tell Word to put text on one side of the picture only – Left, Right or whichever has the most space for text. This is also the window you use if you want to make your text squish up closer to your picture — if it already has a lot of white space around it for example — or back off a bit if the words run right to the edge of your picture. Unsurprisingly, you can also adjust the spacing above and below for Top and Bottom wrapping.

Diagram 9This version has text wrapped Tight to largest side only and the Distance from text adjusted to 0cm on Left and Right as well as top and bottom.

Diagram 10So, that’s the official way to put the pictures into the correct place in your document. And, more often than not, it works. However if you are adding more than one image, or later add a text box or table (anything that Word calls an ‘object’), or if you revise what you have written then pictures you’ve put in sometimes jump around or even disappear. You can minimise the chances of that happening by typing all your text before thinking about layout and images but, even then, it still sometimes happens. I’ll explain why, and suggest how to stop it next week.

*But how do I change the size of a picture? See How do I change the size of a picture in Word? on my own blog.

Catherine Fitzsimons has the unenviable job of being my own editor for my books on business and other careers topics. Ever since she first started using Word she has been finding ways of getting pictures and text to sit together exactly the way she wants: first as a teacher making worksheets then doing layout for community magazines.

Other useful posts

On this blog:

How do I stop pictures jumping around in a Word document?

On Catherine’s blog:

How do I organise a lot of pictures on a page?

How do I change the size of a picture in Word?

 
8 Comments

Posted by on August 20, 2014 in Short cuts, Word


Tags: , , , ,

How to insert non-standard English characters into almost any text

text including eth and thorn in wordToday we’re going to learn how to insert non-standard English characters into Word and pretty well anywhere else where you might want to type some text.

What do I mean by non-standard English characters? I mean those characters that do not appear in a standard English alphabet, i.e. diacritics (letters with accents that you find in most European accents) and additional letters you don’t find in English, such as the eth and thorn found in Icelandic.

I’ll show you how to insert these in Word in a couple of different ways, and then share the best and most simple universal way to create these characters, as well as the special codes for some of my favourites.

Why would I want to type non-standard characters?

There are many reasons why you might want to type non-standard characters in your English documents / text / fields / whatever. Here are some of the reasons why I’ve done this myself:

  • As a cataloguer (and this is where I learnt about them and memorised some of the codes), I was required to catalogue in different languages, or enter people’s names which had accents on various letters into author fields.
  • I have a client called Jörg. He has to spell it Joerg in his email address and email signature. I prefer to be polite and spell it in the correct way when I email him and say “Hello Jörg”.
  • I’ve just been to Iceland. If I’m talking about places I’ve been or things I’ve read, I want to be able to use the full range of Icelandic letters – and they have two extra ones that we don’t use (nowadays) in English.
  • I work with bibliographies which might include non-English words with accents, etc. – if I need to add something or make a correction, it’s handy to know how to add the correct characters.

In many of these cases, I’m typing in a Tweet, a special piece of software or an email, as well as using Word for some of them. Many people know how to insert special characters in Word, but not everyone knows about the codes that you can use to pepper all of your communications with nice non-standard characters.

I’ll talk about Word first, and then broaden things out.

How do I insert special characters into my Word document?

There are two ways to insert special characters into a Word document. If you know the Alt-code for the letter, you can just hit Alt and a special four-figure number. More about that later on.

The official way is to Insert Character. This is how you do it (this works for all versions of Word for PC).

When you get to the place where you want to insert your special character, in this case an é at the end of café, go to the Insert tab (or menu in Word 2003) and choose Symbol from the Symbols area on the right:

Insert symbol word

When you press the Symbol button, a selection of commonly used symbols will appear (this will give you symbols that you’ve recently used; however, it will carefully offer you a range of popular ones if you’ve not used this method to insert very many symbols in the past). The one I want isn’t there:inserting symbols


You can now click on More Symbols to bring up the whole range:

More symbols in wordAt this point, a box including lots of symbols and special characters will pop up:

choice of symbols in word

You can now scroll down to find your symbol. Most of the common ones are on this default list. Here’s my acute e …

Selecting a symbol in word

And once I’ve pressed the Insert button, it will appear in my text.

It’s worth noting at this stage that a list of your recently viewed symbols is displayed in this window, and you can click on any of those and insert them in the same way. Word populates this with common symbols if you haven’t used this method to insert many symbols before (I personally use a different method), but as you use different ones, they will appear here and on that pop-up that appears when you initially click on Symbol (see above):

recently viewed symbols

One more thing to note before we press Insert: this screen also displays character codes. These are codes that you can use in conjunction with other codes and keys, including the Alt key method that I mentioned above. Drop down the arrow by From to get to ASCII and you will find a very useful four-figure code that you can use with Alt to insert non-standard characters into anywhere, not just Word.

Symbol codes

So, that’s how you insert a non-standard character in Word. What if you want to put one in Facebook, Twitter, etc?

How to use the character map on your computer to insert special characters

There is a character map on your computer that you can use to insert special, non-standard characters into any typing that you’re doing that will support these. Note that this works for a PC.

How do you access the character map? Hit the Start button in the bottom left-hand corner of your screen (in Windows 95 onwards and Windows 8.1, Windows 8 doesn’t have one but you can use the Win-R shortcut below), then choose Accessories / System Tools / Character Map:

Character map

You can also use this handy shortcut: Hit the Windows button on your keyboard and R together

windows key

or the Start button and Run and type Charmap into the box that appears:

Run charmap

However you get to it, you should see the character map, which looks like this:

character map

This looks a lot like the map in Word, and works in a similar but not identical way. Find the character you want, scrolling down or changing font if necessary. Click on it until it is highlighted (pops out of the box as below). Press Select and it will appear in the Characters to copy box below the grid.

character map select character

Once it’s been Selected, you will need to Copy it by pressing the Copy button (note: this means that you can select several characters in a row, if you have two non-traditional characters next to each other, for example). Copy will copy everything in the Characters to copy box.

character map copy

Note also here that in the bottom right you are given the keystroke or ASCII code Alt+0233 which you can use as a keyboard shortcut (more on that again later).

Once you’ve copied your character, you can paste it into pretty much any text box you want to, here in Twitter:

Inserting character into Twitter

 Using ASCII codes / keyboard shortcuts / Alt+ to insert special characters

The way I insert special and non-standard characters is to use these Alt+ ASCII keyboard shortcut codes that I’ve been mentioning all the way through this post. Hit Alt-0233 and you’ll get an é without having to click all over the screen, copy and paste. There’s a code for almost every character you could think of.

How do I know a load of these off by heart? Because I used to be a cataloguer at a library, and one of the things I did was catalogue foreign language publications, which were full of diacritics and non-standard characters. So, every day I would end up needing to insert many of these characfers into the cataloguing program we used. I, and everyone else, had little handwritten notes of the ones we used regularly. Here’s mine (yes, when I left the library in December 2011 to do this Libro stuff and blogging full time, I took my little bit of paper with me):

Alt+ codes notes

So there’s a little bit of Liz history you weren’t expecting (ignore the MARC codes at the bottom unless you’re a librarian, too). You, too, can have a bit of paper like this if you use non-traditional characters a lot – or you’ll commit them to memory, as I ended up doing.

How can I find out the ASCII codes for special characters?

You can use one of the two methods I describe above:

  • In Word: Insert – Symbol, drop down From to change it to ASCII and note the Character code
  • In Character Map: click on the symbol and look at the bottom right of the dialog box

or you can search for it online …

In this post, we’ve learned why we might use special characters and how to insert special characters in Word, Twitter, Facebook and any other places that you might want to insert text. If you liked this or found it useful, do please comment below and/or use the sharing buttons to share it! Thank you!

Related posts on this blog:

ASCII codes for common special characters

Other posts of interest:

This blog post was referenced in this one on using the correct degree sign in scientific writing, which is a great resource!

 
7 Comments

Posted by on July 23, 2014 in Short cuts, Word, Writing


Tags: , , , , ,

How do I display the top and side rulers in Word?

The top and side rulers in Word are used to set your margins, and also any Indents you might require for your paragraphs. They should display by default. If they don’t, here are instructions on how to make them display.

If you can’t see the rulers, click on the View Ruler button at the top of your right-hand scroll bar:

view ruler in word

This will display both of your rulers, and you can use the sliders to adjust your margins:

Rulers display in word

To turn off the rulers, simply press that button again, and they will disappear!

Other relevant articles on this blog:

Indents and Margins.

I hope you’ve found these hints helpful! Do share or pop a comment on this post if I’ve helped you learn something new or solved a tricky problem for you, and do explore the rest of my blog if this is your first visit!

Please note, these hints work with versions of Microsoft Word currently in use – Word 2007, Word 2010 and Word 2013 all for PC. Mac compatible versions of Word should have similar options. Always save a copy of your document before manipulating it. I bear no responsibility for any pickles you might get yourself into!

This is part of my series on how to avoid time-consuming “short cuts” and use Word in the right way to maximise your time and improve the look of your documents. Find all the short cuts here


Tags: , , , ,

How do I change from having a gap between paragraphs to indenting them?

I’ve written this post because one of my clients just asked me how to do exactly this. She had a document where the paragraphs had an automatic line space between them, and no indent (because I’d produced the document and that’s how I like to lay out paragraphs), and she wanted to change it to have no line space between paragraphs, and the first line of the paragraph indented.

This article draws on two that I’ve already published, so for more detail, you might want to look at my posts on The Line Space Button and Indents and Margins. But what you’ll find here is a quick guide to changing your paragraph format from spaces between paragraphs to indented paragraphs (and vice versa). Note that although they all look a little different, this works for Word 2007, Word 2010 and Word 2013 for PC.

How to remove automatic spacing between paragraphs

There are many reasons to remove automatic spacing between paragraphs. To mention a rather obscure reason, I produce transcriptions to accompany a client’s YouTube videos. The formatting for these requires that a manual line space is added between paragraphs, but my version of Word adds these automatic spaces as a default, so I have to take them out.

Here’s what a document with automatic line spacing between paragraphs looks like:

Paragraphs with automatic spacing

To remove the spaces, first of all you need to highlight all of the text where you’re going to change the format. This is best done by going to the Home tab, then going to the Edit area on the right and clicking on Select:

select all text in word

Once you’ve clicked on Select, you will get a choice of options which includes Select All. Click on this and your whole text will be highlighted:

option for select allOnce the text is all highlighted, making sure you don’t click on the text (which will deselect it), staying in the Home tab, go to the Paragraph section in the middle of the ribbon and click on the Line Spacing button, which looks like this:

line space button

remove space after paragraph

If you have automatic spaces between paragraphs, one of the two bottom options will read Remove Space Before/After Paragraph. In this case it’s after. Click on that option (and it will change to Add Space After Paragraph).

This will have the effect of removing the line spaces between your paragraphs:

paragraphs with no line space in between

How do I indent my paragraphs?

Keeping the text highlighted (or re-selecting All if you’ve accidentally clicked and lost the selection), move below the Ribbon to look at the rulers in your top margin.

(If you can’t see the rulers, click on the View Ruler button at the top of your right-hand scroll bar:)

view ruler in word

Once you can see your rulers, move only the top half of the left-hand margin marker rightwards across the page until you reach the indent position that you want:

setting indent in word

This will give you indented paragraphs with no line spaces between them!

indented paragraphs

Done! To get from indented paragraphs to paragraphs with gaps between them, you just need to reverse this process …

Other relevant articles on this blog:

The Line Space Button

Indents and Margins.

I hope you’ve found these hints helpful! Do share or pop a comment on this post if I’ve helped you learn something new or solved a tricky problem for you, and do explore the rest of my blog if this is your first visit!

Please note, these hints work with versions of Microsoft Word currently in use – Word 2007, Word 2010 and Word 2013 all for PC. Mac compatible versions of Word should have similar options. Always save a copy of your document before manipulating it. I bear no responsibility for any pickles you might get yourself into!

This is part of my series on how to avoid time-consuming “short cuts” and use Word in the right way to maximise your time and improve the look of your documents. Find all the short cuts here


Tags: , , , ,

How to change your editing language in Word 2013, Word 2010 and Word 2007

This post is linked to my one on changing the language of your document in Word, however I’ve split them up to avoid screenprint overload.

Incidentally, this process also solves the problem of the language not appearing in the lower status bar of your Word document. This language note will only appear if you have more than one language set as the editing language in Word options.

Why would I want to change my editing language?

The main thing I’ve used this for is to force the language to appear, thus be changeable, in the lower status bar of my Word document. However, it’s also used if you are intending on loading alternative alphabets into your version of Word, if you want to use it for Chinese or Russian, for example.

How do I change my editing language in Word 2013?

This is done in Word Options. Find your Word Options by clicking the File tab:

Finding Word Options in Word 2013

Now choose Options:

Word Options Word 2013 2010

Within the Word Options window, choose Language:

Word Options Language

Look at the Choose Editing Languages section. You can see that only English (United Kingdom) is on the list at the moment. Click on the dropdown arrow by Add additional editing languages:

Choose editing language Word

Select your editing language from the list …

Choosing editing language Word

Once it’s selected, click the Add button:

Adding editing language Word

Now English (United States) has been added to the list – press the OK button at the bottom of the window:

Editing language added Word

What else can I change in the language section?

You will notice that you can also change the display and screentip languages on this screen, as well as asking Word to prompt you if you need to download any special proofing tools. This is useful if someone who only speaks a different language to the default is going to be using this copy of Word (of course, this is all changing this individual copy of Word and does not affect the document if it’s opened on different computers).

Making the changes take effect

You will now be prompted to Restart Word in order for the change to take effect. Press the OK button and close and re-open Word.

Restart Word

This process has the incidental effect of displaying the language of your document in the lower status bar in your copy of Word – and this is the way to make it display if it doesn’t do so initially.

Language displayed on lower status bar

How do I change the editing language in Word 2010?

Good news – the method of changing the editing language in Word 2010 is almost the same as in Word 2013 (above). The Word Options menu just appears slightly differently, in different colours and a slightly different layout.

Click on the File tab and then choose Options.

Word Options Word 2010

From now on, the process is exactly the same as for Word 2013 (above).

How do I change the editing language in Word 2007?

The process for changing the editing language is a bit different for Word 2007.

Access Word Options by clicking on the Office Button in the top left, then clicking on Word Options at the bottom of the window:

Word Options Word 2007

Stay on the Popular screen that comes up first, and click on Language Settings at the bottom of this screen:

Word 2007 change language

Now you have the option to enable and disable editing languages. Click on the language you want to add in the list on the left and press the Add button. Then click OK.

13 language Word 2007

In this article, we have learned how to change the editing language in Word 2013, Word 2010 and Word 2007. Do comment or use the buttons below to share if you’ve found this useful. Many thanks to Krys Williams for her help.

Related posts in this blog

How to change the language of your document in Word

How to change the language of comments

Please note, these hints work with versions of Microsoft Word currently in use – Word 2007, Word 2010 and Word 2013, all for PC. Mac compatible versions of Word should have similar options. Always save a copy of your document before manipulating it. I bear no responsibility for any pickles you might get yourself into!

Find all the short cuts here

 
13 Comments

Posted by on June 18, 2014 in Word


Tags: , , ,