RSS

Category Archives: New skills

Top 10 blogging sins

pens and ink bottleI’ve been talking about why and why not to blog recently. Once you’ve committed to your blog, it can be a bit of a minefield. Here are the top ten blogging sins that I see over and over again, or hear other people complaining about. No one can be expected to know everything straight away, and we’ve probably all made at least one of these mistakes, so hopefully I’ll help you to avoid the big, bad ones with this list.

1. Not having an RSS feed

File:Feed-icon.svg RSS is a way to allow blog reader software to collect your content whenever it’s  updated and send it on to any of their readers who subscribe to your blog This Wikipedia article explains it all and examples of RSS readers include Feedly.

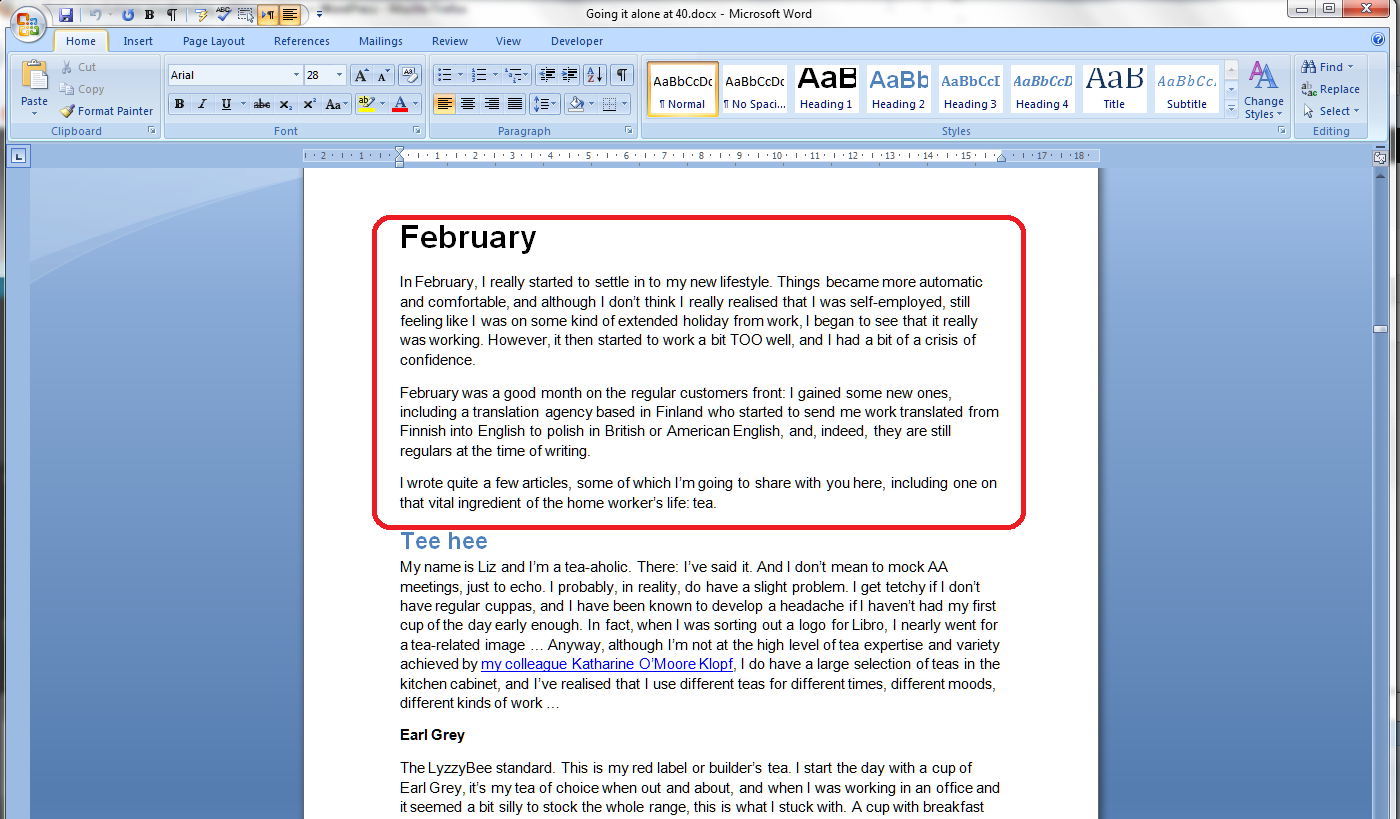
If you look at the top of this blog page, you will see that I have an RSS feed logo in the top right-hand corner, and a link in the right-hand menu bar, and I also offer a link to subscribe by email. All blogging software will have something in their settings that allows you to add this. If you don’t add this link, it makes it that bit harder for people who want to subscribe to your blog to do so (they can usually put the URL in their reader software, but are they going to do that extra process? Not always). Not having a button to use to do it quickly and easily can give the impression that you’re not interested in people reading your blog. That’s probably not true. But I’ve seen people get really cross about this and say that they’re not going to look at a person’s blog any more if they don’t have this. I know … but if one person’s saying it, how many are thinking it?

If you get stuck trying to add this button to your blog, the easiest way to find out how, is to Google your blogging software’s name and “RSS feed button”. You should find a YouTube video or set of instructions telling you how to do it.

2. Not updating your blog

If you set up a blog and you then don’t update it, it won’t help you to get more readers or to promote whatever it is you’re promoting. Google and the other search engines thrive on updated, fresh content. If you don’t update your blog regularly, it will fall further and further down the search rankings and no one will be able to find it. If you want to write a blog, commit to updating it regularly.

I’ll be publishing a post about scheduling and keeping active with your blog posts soon, so watch this space!

3. Stealing content from other people

It’s fine to “reblog” other people’s blog posts onto your own blog (where a snippet of the post appears on your page, with a link to the real thing). It’s fine to link to other people’s blog posts and tell other people about them. It’s even fine to be inspired by another person’s blog or content – one of my friends has started a questionnaire series a little like my Small Business Chat one but with an emphasis on marketing techniques: similar idea, different content, that’s fine.

It’s not fine to lift content wholesale from another person’s blog or website. If you quote large amounts of text written by someone else, it’s just the same as if you were using that in an article or essay – you need to reference where it came from and acknowledge the author. It’s fine to talk about newspaper articles or reports in your blog and react to them, not fine to quote them verbatim, or quote people they have quoted, and not give the original source.

Never be tempted to take someone else’s content for your blog post. At best, you won’t get picked up by the search engines anyway (see below). At worst, you’ll find yourself slapped with a lawsuit for plagiarism! And it’s just not right.

4. Reusing content in exactly the same form

Say you’ve had a guest post on someone else’s blog and you’re really pleased with how it’s turned out – so much so that you want to share it. So you post it in its entirety on your blog, too. Not a good idea.

All of the search engines, like Google, like to offer their users varied content. So if the same content appears in two places, both places won’t come up in search results. Effectively, one of them will be invisible to search engines, therefore invisible to people searching for keywords that might lead them to that content.

To look at it from a different viewpoint, if you’ve published information in a guest post, the owner of the blog you’re guesting on will want to be posting up original content, not things that can be found elsewhere. Some people actually specify that the content must be original in their guidelines for guest posters. See more about this in a week or so when I blog about guest posts.

How do you deal with this? Publish a snippet of the post on your blog, with a link to that post. Put some of your own text around it, then the search engines will find your post and your guest post, both of you will get found and viewed, and no one’s copied anything. There are clever ways to deal with all of this in the coding behind your blog, but I’m guessing that most of us aren’t the kind to deal with that level of complication – I’m certainly not!

5. Being rude or negative

I feel like a  bit of a hypocrite writing this, because obviously this post is a little bit negative. But I’m also genuinely trying to help people to avoid making common mistakes! In the same way, I tried to make sure that my 10 reasons not to write a blog article talked about reasons for reviewing your blogging and content and making a positive decision. Whining and moaning and relentless negativity won’t make your readers like you any more than they would like you in real life.

Being rude can get you views in the short term. But it’s like those restaurants that people go to only because the waiters are desperately unfriendly. Fine for a laugh: but will they go back regularly for birthdays and anniversaries? Probably not. Even ranty blogs about politics or issues have to be constructive as well as rude!

If you want to have a rant or talk about a mistake you’ve made, try to vary and space out these posts, and make them as constructive as you can. We can all get a good blog post out of a bad experience, but make sure that you and your readers come away having learned something. I’m going to post soon about managing your social media brand, and this comes very strongly into that, too.

6. Posting inappropriate content

I don’t just mean lurid or dirty pictures here. If you want to share information about your management courses, then blogging about your exercise classes won’t get you the audience you want to buy your courses, unless you’re doing some very clever keyword placement and making the articles valuable to both groups of readers.

I have to admit to having a laugh at funny spelling mistakes as much as the next person. However, I’m careful not to mock or talk about or post pictures on this blog, because a lot of the people I work with as an editor are unsure about their English and using it as a second, third, fourth language … and would be mortified if they thought people were laughing at them (I don’t laugh at their English: I know I couldn’t do half as well as my overseas clients if I was writing in my second language. Bong joor toot le world).

7. Not giving your guest posters what they need

If someone takes the time to write a guest blog post for you to to give you more, fresh content, bring their fans over to your website, give you a marketing opportunity, etc., etc., then you need to do certain things to make the experience a good one on all sides. Chief among these, and something I see people having issues with all the time, is making sure that you provide live links back to their website and whatever it is they’re promoting, be it another website, their book on Amazon, or whatever. A live link is one that your readers can click on and be taken to their page, like this one which takes you to a post I wrote telling you how to add links to your blog posts!

Formatting guest posts that have come through in an email or an attachment can be tricky, full stop. I recommend pasting the text into a Notepad file on your computer, then pasting it from there into your blog post. Lots more on this in an upcoming article. But please make your guest blogger’s links live so that your readers can visit them online!

8. Not letting people respond to your posts

I like responding to blog posts. We all like responding to blog posts. We like to feel it’s a two-way conversation when we read something online, don’t we. But I still come across blogs every day that either don’t allow any comments at all, or make the commenting process so complex that people give up.

I have to say that the blogging software can be a culprit here. I can never seem to reply to Blogger posts, and WordPress itself can give the impression that you have to sign up to a WordPress account in order to comment on one of its blogs (you really don’t, you just need to add your name and email address).

Enable comments, even if you moderate and check all of them for spam (most blogging platforms allow you to set the level of moderation, for example, I hand-moderate the first post by anyone, and am alerted to all new comments, so I can check they’re not spammy or inappropriate). And listen to your readers – if you’re getting complaints about how hard it is to reply to a post, have a look at your settings and see if you can make it easier. One of my blogging friends has a note whenever you go to comment with an email address to use if the process won’t work – very helpful!

9. Not responding to comments

Allied to the above, if people take the time to reply to your blog, it’s only polite to take a moment to respond to them. Some people who get a lot of comments will do a general reply mentioning all of the previous commenters with a sentence addressed to them, and that’s of course fine. But I get a bit frustrated if I comment thoughtfully on a blog post and the author never responds. You don’t have to do it immediately, but I try to do it within 24 hours, a couple of days at most.

Conversations on your blog can be one of the most interesting things about blogging – so get out there and engage with your readers!

10. Only advertising, never helping

Yes, I and other people have told you again and again that having a blog will help your business. That’s true. But just blaring out adverts to your readers won’t make them keep coming back. Imagine two blogs, both about plumbing:

  • One lists the different areas of plumbing the plumber can do, and has carefully inserted keywords to attract the search engines
  • One talks about the jobs the plumber has done this week, including how she solved a particularly tricky question. She sometimes posts a question and answer about a common type of issue, like changing the washer on a tap

Which blog will you go to once, to find a plumber? Which one will you bookmark and read, share and tell other people about? Which one will actually bring the plumber more business in the long term?

I give away quite a lot of free advice on my blog, but just because I tell people how to set up a table of contents doesn’t mean that none of my clients ever ask me to do that now. On the contrary, seeing my expert advice, they trust that I can sort it out for them!

———–

That’s my personal top 10 list of blogging sins. Would you add any to that? Are any of those NOT sins in your book? I’d love to know what you think, and whether you’re enjoying this new series of articles all about blogging!

Related posts:

Top 10 reasons to write a blog

Top 10 reasons not to write a blog

Scheduling blog posts and keeping going

You can find a growing set of articles on blogging and social media in the resource guide. Do click on the share buttons below or comment if you found this article interesting or useful!

 
35 Comments

Posted by on August 19, 2013 in Blogging, Business, New skills, Writing


Tags: , , , , , , ,

Portrait and landscape orientation in Word and Excel

In this article, we’re talking about the Portrait and Landscape orientations in Word and Excel, what they are, why you might want to use each one, and how to swap between them.

What are Portrait and Landscape?

Portrait and Landscape are the terms used for the orientation of the page in applications that deal with pages, such as Word and Excel. Orientation means the relative position of the page when you’re looking at it:

1 pages

Portrait means that the page has the shorter sides at top and bottom. Think of a portrait in a gallery or museum. They are usually this way round. Landscape means that the page has the shorter sides on the left and right. Again, think of an art gallery. Which way round are views painted of the landscape? Exactly.

Why would I want to use the landscape orientation?

Word and Excel documents default to being in the portrait orientation. That’s the format of most books, reports, folders, etc. But landscape can be very useful if …

In Word

  • Your layout is such that it comes out wider than it’s high – maybe a poster or a sign to put up in your office or building
  • You have a wide table to insert into the document with lots of columns and it gets too squashed up and hard to read if you try to fit it onto a standard portrait A4 page
  • You have a diagram to insert into the document that’s wider than it’s high
  • You have a picture to insert into the document that’s wider than it’s high

In the last three incidences, you might only want one page of the document to appear in landscape. That’s easily done, and you can find out how to have portrait and landscape in one document here.

In Excel:

  • Your spreadsheet is too wide to fit comfortably onto a portrait A4 page

How do you change between Portrait and Landscape in Word 2007 and Word 2010?

You swap between Portrait and Landscape using the Orientation menu in Word. This can be found in the Page Layout tab, in the Page Setup section:

2 menu

Press the Orientation button (or the little arrow at the bottom) to access the menu:

3 menu

Choose your orientation, and the whole document will change to that orientation, unless you’re only changing one section (see below)

How do you change one page in Word to be in Landscape?

To change one page in Word to be in Landscape, you need to set Section Breaks first, so that Word knows which pages you want to change. See this post on Section Breaks for instructions on how to do this and change just one page or section.

How do you change between Portrait and Landscape in Excel 2007 and Excel 2010?

Changing the orientation in Excel works in exactly the same way as doing it in Word. Find the Orientation menu by going into the Page Layout tab and Page Setup section:

4 excel

Then press the Orientation button to make your selection.

How do you change between Portrait and Landscape when you’re printing?

Sometimes you don’t realise that you need to print your document in Landscape rather than Portrait (it’s usually this way around, I find) until you have printed out one copy and find that your lovely picture or table falls off the edge of the page.

You can change the orientation of the printing while printing – however, the orientation of your original document will NOT change if you use this method, and if you want it to change to Landscape permanently, you will need to go back and follow the instructions I give above.

If you want to change the orientation of your printing (in Word or Excel or when you’re printing off a web page or a map or anything!) …

First, select the Print option. When the Print dialogue box comes up, click the Properties button:

5 printer

You will usually then be given a screen something like this which will have a Features tab:

6 printer

Find choice buttons for Portrait / Landscape, select the one you want, and OK, and then your printout will be in that orientation.

—————–

In this article we have learned what the portrait and landscape orientations are, why they are useful, how to change them in Word and Excel and how to change orientation when you are printing.

If you have enjoyed this post, please share the link using the buttons below or sharing the Facebook, Twitter or LinkedIn alert that you followed to get here!

Other useful posts: Section breaks in Word

Please note, these hints work with versions of Microsoft Word currently in use – Word 2007 and Word 2010, for PC. Mac compatible versions of Word should have similar options. Always save a copy of your document before manipulating it. I bear no responsibility for any pickles you might get yourself into!

Find all the short cuts here

 
28 Comments

Posted by on August 14, 2013 in Errors, New skills, Short cuts, Word, Writing


Tags: , , , , , , , ,

10 reasons to write a blog

pens and ink bottleWhy should you write a blog? Why should you start writing a blog, and why should you continue writing a blog? Here are my top reasons why. I’m really looking at business blogging here, but the first one applies to everyone!

1. Because you want to

This reason covers both personal bloggers and business bloggers. You should start writing, and continue writing, a blog, because you want to. Forcing yourself to do something you don’t want to do is no fun, and you should enjoy the time you spend designing and honing your blog and writing those entries. Whether you want to share holiday pictures or reviews of restaurants or share your professional expertise, do it because you want to.

2. You’ve got something interesting to talk about

There are so many interesting things to talk about. I often meet people running businesses where I have no idea of the nitty gritty of their everyday lives. How does a carpenter learn his trade? What does a freelance solicitor do, day to day? How many projects does a crafter have on the go at any one time, and how does a mobile hairdresser help their clients to choose a new hairstyle?

I have found that my posts on building my business struck a chord and interested many people. A series of posts that I started really for myself about Word hints and tips has turned into a popular series. If you run a business, think about some of the behind the scenes things, some of the aspects of your knowledge that people might be interested to know about (don’t worry about giving away your secrets – I might publish articles on Word headings and tables of contents, but I still get asked to do them by my clients!).

Of course, it goes without saying that you shouldn’t share personal details about your clients. But I think it’s fine to talk about them if they’re heavily disguised – or ask if they’d like to have a case study published with links back to their website!

3. It will set you up as an expert in your field

This is invaluable when you’re building your reputation and your business. Don’t see it as giving away information for free, think of it as sharing your expertise with the world. Once you start appearing in people’s Google searches when they’re trying to resolve a problem, they’ll be more likely to come to you for help when they need your services. If you can offer a back catalogue of useful, targeted advice on your blog when you’re negotiating with a new prospect, they will see that you can walk the walk as well as talk the talk.

This may not lead to direct sales – but I’ve often seen my blog posts shared among other people and organisations in my field. Keep your name in front of them as well as prospects, and you never know where the next recommendation and job might come from!

4. It will attract people to your site

This links in to the above point. The more content you have on your website which is packed full of keywords and language to do with your business, the more findable it is in the search engines. The more people find information that is useful to them and engages with them, the more time they will spend on your website. The more time people spend on your website, or the more repeat visits they make, or the fact that they’ve signed up for your RSS feed and get regular updates into the RSS* reader or email inbox, the more likely they are to remember your name and your products or services when they or a contact need them.

More website visitors does not directly lead to more sales in a quantifiable relationship. But as long as you do show genuine expertise and a willingness to engage with your audience, you will build your exposure, get more visitors to your site, and this will help you to become better known and gain more sales.

5. It will build your platform

Your platform is the group of people who are engaged with you in whatever way – through personal connections, social media such as Twitter, Facebook and LinkedIn, through your email newsletter, through your blog – and who can then be “leveraged” (horrible word) when you want to get the word out about something new that you’re offering.

For example, if you’re self-publishing a book, it’s vital to have built a circle of connections before it comes out, so you have a guaranteed audience of at least a few people. If you start offering a new service, for example when I added transcription services to my proofreading and editing offering, it’s useful to have people who you can tell, and who will then hopefully spread the word.

Having a blog builds your platform because it engages people’s interest. It brings them to your website, it gets them reading your content regularly, and it encourages them to sign up for your RSS feed or to receive your posts by email as they’re published. Once you have subscribers, you can get information out to that guaranteed audience when you need to. That’s much harder if you only have a static website for them to visit.

6. Regularly updated content will boost your position in search engine search results

It’s fairly common knowledge that the search engines (Google, Yahoo, etc.) like content that is regularly updated. This means that their complex and little-known (and ever-changing) algorithms will promote websites that are frequently updated above those that are static. Updating your blog once a week or more gives all of the content on your website a better change of being found by potential contacts and clients, because it gives it a better chance of appearing in a higher position in the search results.

7. So will information crammed full of the keywords that are important in your industry

Keywords are vital for search engines, too. If you just write a set of keywords over and over again, the chances are the the search engines will pick up that it’s not real content, and will not show it to searchers. But if you are writing well-crafted copy which includes a good sprinkling of keywords among the text, you will find yourself doing better in the search engine results.

I write natural text in my blog posts that is (hopefully) interesting and gives something to the reader – but I am also careful to include relevant keywords at a regular rate in the blog posts I write, which does improve my search engine optimisation no end (it’s also good to get them into sub-headings and the blog title itself). SEO is a fairly dark art, but the more keywords you can sensibly insert into your content, the more the search engines will be happy to find and display your content to their users.

8. You want to engage with your readers / prospects / clients

Blogs are not a one-way conversation. Once your audience has built a bit, you will get comments, shares, etc. on your blog posts, and on the places where you promote them (I will get almost as many comments on my Facebook post advertising a new blog post as I will on the post itself).

One of the golden rules of blogging is that you need to respond to your comments. Some bloggers are very good at this, some are not. I’m sure everyone’s commented excitedly on a blog post, only to find their comment is effectively “ignored”, with no reply from the writer. I think that’s quite rude, and I am likely to engage a lot less – or stop engaging – with bloggers who have a habit of not replying. Obviously, we all get times when we’re away or too busy to reply that moment, but most blogging platforms alert users to replies, and you want to keep that feature switched on and engage with your audience, otherwise they will stop coming back.

And those commenters might just be your friend Ali or your ex-colleague Steph, but every person who engages with your blog is a potential client or recommender.

9. You want to engage with other bloggers

There’s nothing like blogging for building communities of like-minded people. Once you’re blogging in a niche area, whether it be fiction writing, editing, ironing services or Sage, people who are interested in the same sorts of areas will start to follow your blog, comment on your posts and share what you’re saying.

This is useful for a couple of reasons: firstly, it’s always good to have colleagues. I’ve written elsewhere about how I treat other people in the same line of business as me as colleagues rather than competitors. It’s always good to have people to recommend prospects on too if you’re fully booked and can’t take them on, and to have people to send you referrals. Sometimes you need to have a moan or a chat or ask advice, and you might want to do this privately rather than publicly, which is where your network of colleagues can come in very handy. You can also read what they’re saying, get new ideas, keep up to date, and slot into networks that offer mutually useful posts, services and applications.

Secondly, this may give you the opportunity to guest post on other people’s blogs, and vice versa. We’ll talk about sharing your content in other places next. But just to give you some examples, if I hadn’t started blogging, I wouldn’t have got to know many of the editors I now know who link to my blog articles, share them on social media, and act as a sounding-board when I need to talk things through. That’s worth every hour of effort I put into my blog, to be honest!

10. You want to share your content in other places on the web

The good thing about your URLs and name appearing in places on the web that are not connected directly with you, your website and social media is, you guessed it: it boosts your position in search engine results. The more times your URL appears on a website that’s on a solid standing itself and has followers and people talking about it, the more the search engines will consider your website to be appropriate to present in their search results listings.

These links to your content on other people’s pages are called backlinks. You can secure these in a number of ways:

  • Comment on someone else’s blog post, including your URL
  • Contribute when someone asks for examples, experiences or feedback, again making sure that your URL is included
  • Write a guest blog post for someone – ensuring that the biography at the end includes all of your links

Now, you’ll know if you’ve ever allowed comments on a website or blog that a lot of companies do this seemingly randomly, just to get their URL into other people’s comments, and now you know why they do it. So do make sure that the content and comments you share are appropriate to the topic of the post on which you’re commenting! But this is a great way to increase traffic to your website and blog.

So, there are 10 top reasons for writing a blog. Do you have any others? Why did you start yours? Do also read … 10 top reasons NOT to write a blog!

File:Feed-icon.svg *What’s this RSS stuff I keep talking about? RSS feeds are file formats that allow your regularly updated content to be collected and sent on to readers, usually involving them reading all of the blogs etc that interest them using an RSS reader that accumulates them all in one place. This Wikipedia article explains it all and examples of RSS readers include Feedly. RSS feeds can be found on blogs around the symbol at the beginning of this explanation.

Related topics:

10 top reasons NOT to write a blog

Reciprocity and social media

Top 10 blogging sins

Scheduling blog posts and keeping going

 
39 Comments

Posted by on August 9, 2013 in Blogging, Business, New skills, Writing


Tags: , , , , , , ,

Using the split screen view in Word

In this article, I’m going to tell you all about using the split screen view in Word, including why you would use it, how to use it, and how to stop using it. I’ve also added an alternative way to get the split screen view, which explains the problem: “help! I’ve got a split screen and I don’t know how I got it!”

What does split screen mean?

If you split the screen in Word, it means that you can see two parts of the same document in the same window, allowing you to scroll through both parts independently or keep one section on screen at all times. It’s a bit like splitting panes in Excel, although you can only do it horizontally.

Why would I want to split the screen in Word?

It’s often useful to be able to see two sections of a document at one time, without having to open two copies of the document (if you do that, one will be read-only and you can’t make amendments to it). Some examples of why split screen view is useful:

  • You are creating a large table and want to be able to see your column headings all of the time (this is similar to the use of Freeze Panes in Excel)
  • You’re creating a lesson plan and you want to look at the plan and notes at the same time.
  • You’re checking that a contents page includes the correct titles and page numbers and you don’t want to keep whizzing back and forth through the document.
  • You’ve written an introduction to a chapter and want to make sure that it refers to all of the content in that chapter.
  • You’re working on some worked examples in a textbook and you want to check the answers at the end of the document

In this worked example, I want to review the text in the February chapter of my book to make sure that the content within it is reflected in the introduction to the chapter. I want to keep the introduction (circled in red) visible on the screen while I scroll through the rest of the chapter.

1 all one screen

How do I make the screen split in Word 2007 and Word 2010?

This is another example where Word 2007 and Word 2010 operate in exactly the same way.

The Split button can be found in the View tab, in the Window section:

2 menu

Once you press this Split button, the screen will automatically split into two. Initially, a grey line will appear – this is a guide line that you can move and position as you wish:

3 line

Once you’ve positioned the screen split (it can go anywhere horizontally on the page), it turns into a second ruler:

4 ruler

Your screen is now split and ready to use.

You can scroll up and down both halves of the screen, although usually you will want to keep the top half still and just move the bottom. Here, I’ve scrolled down to the bottom of the essay on tea to see what comes next:

5 scroll

The scroll bars on the right hand side will remind you of your position in each part of the document.

Remember that you must have your cursor in the half of the screen that you wish to scroll!

How do I cancel Split Screen view?

You can revert to a single viewing pane at any time by pressing the Remove Split button (which was the Split button):

6 remove split

Your document will return to single pane view – starting at the top point of your upper pane:

1 all one screen

Using the Split Screen button

You can also use a tiny button on the top right of the screen to split your screen (and you can use this in any Microsoft Office application). I didn’t realise this until I was trying to sort out a problem for someone who had got stuck with split screen and couldn’t make it go away – I couldn’t work out how he’d got a split screen without choosing those particular menu items above. Now I know.

In the top right of your Word screen, you’ll find a tiny button like a letterbox, just above a bigger button:

7 split button

Here it is in close-up:

8 split button

Left-click on this button and the cursor will change to having two horizontal lines. Drag the cursor down, holding the left mouse button down, and the grey line will follow, just as with the other method.

9 split down

Return it by clicking, keeping the mouse button down and moving the split line up to the top of the screen.

You can mix and match these ways of adding and removing the screen split, so if you start one way, you can remove it in the other way.

So, if you’ve got a split screen and you don’t know why, you probably clicked on that little button by accident, and you can remove it in one of two ways: go into View and Remove Split or click on the split bar and move it up to the top of the screen.

In this article, we’ve learned about splitting the screen in Word, why we might want to do that, how we do it, and how to return to standard view.

If you have enjoyed this post, please share the link!

Please note, these hints work with versions of Microsoft Word currently in use – Word 2007 and Word 2010, for PC. Mac compatible versions of Word should have similar options. Always save a copy of your document before manipulating it. I bear no responsibility for any pickles you might get yourself into!

Find all the short cuts here

 
17 Comments

Posted by on August 7, 2013 in Errors, New skills, Short cuts, Word, Writing


Tags: , , , , , , , ,

Section breaks in Word

Today we’re going to be talking about adding section breaks in Word documents.

Why would I want to add a section break?

Section breaks are used if you want to have different formatting in different parts of your document. For example, you might want to …

  • have your page numbering in Roman numerals for part of your document and Arabic numerals in the rest of it
  • have some pages in portrait and some in landscape (for example if you’re including wide tables or images in your document)
  • include watermarks for branding or protection in parts of your document but not other parts
  • have different headers and footers associated with different parts of your document

Basically, if you want to change parts of your headers, footers, background or page layout for parts of your document only, you will need to divide up those parts using Section Breaks.

We’re going to use a document where one page should be in portrait and one in landscape for demonstration purposes.

What happens if you don’t use Section Breaks?

In this example, we want Page 1 to be in portrait and Page 2 to be in landscape orientation.

If you don’t enter any section breaks, even if you have your cursor on Page 2, changing its orientation to landscape …

1 without section break 1

… will change the orientation of Page 1, too:

2 without section break 2

Where is the Section Break menu in Word 2007 and Word 2010?

The good news is that the Section Breaks menu is exactly the same in Word 2007 and 2010.

Go into the Page Layout tab, and you will find the Breaks menu in the Page Setup area:

3 section break menu

Note that you can apply Section Breaks to automatically happen continuously and on every odd or even page. I’ve never needed to do that: what I have done many times is insert a section break and start the next section on a new page.

How do I insert a Section Break into my document?

Make sure that your cursor is flashing where you want your Section Break to appear (i.e. at the end of your current section). Then select Section Break – Next Page:

4 section break menu

Once you’ve done this, the section break will have been inserted at the point at which you had your cursor. But you can’t see it – it’s one of those hidden messages that is only displayed if you use the Paragraph Mark button (see this article for further information):

c

Once you’ve pressed the Paragraph Mark button, you will be able to view your section break:

5 section break visible

If you look at your Header and Footer, you will see that they also show that Page 1 is part of Section 1, and Page 2 is part of Section 2:

6 header and footer showing section break

This is a good way to check which parts of the document belong to which section.

What effect does inserting a Section Break have?

Now that your document is divided up into Sections, you can apply different formatting to different sections of the document. Page numbering is covered in this post, and in order to have Section 2 in landscape, all we need to do is make sure that the cursor is in Section 2, and select the landscape option:

1 without section break 1

Now that it has been separated off into Section 2, Page 2 will change to landscape, while Page 1, in Section 1, will stay in portrait orientation:

7 portrait then landscape

How do I add more sections to my document?

There is no limit to the amount of sections you add to a document, however, it’s worth keeping track of them and remembering that your formatting will need to be set individually for each section – if you’ve changed everything in Section 2 into landscape, if you add a new section, it will stay in landscape and you will need to change it back to portrait if that’s how you want it to orientate.

How do I delete a Section Break?

To delete a section break, simply turn on Paragraph Marks so you can see the section breaks (see above), put the cursor next to the break and press the Delete button on your keyboard.

—-

In this article you have learned about Section Breaks, what they are used for, how to apply them, and how to use them to change the page orientation in your document. If you’ve found it useful, please share!

Other useful posts:

Proper page breaks

Page numbering – how to have different page number formats in different parts of your document

Changing between Landscape and Portrait (to come)

Please note, these hints work with versions of Microsoft Word currently in use – Word 2003, Word 2007 and Word 2010, all for PC. Mac compatible versions of Word should have similar options. Always save a copy of your document before manipulating it. I bear no responsibility for any pickles you might get yourself into!

Find all the short cuts here

 
14 Comments

Posted by on August 2, 2013 in Errors, New skills, Short cuts, Word, Writing


Tags: , , , , , , , ,

Reciprocity and social media

handshakeHere’s a guide to how to be polite and maintain reciprocity on social media, including Twitter, Facebook, LinkedIn and your blog, so as to “leverage your social capital”, which actually just means make social media work for you and use sharing and friendliness to help yourself and others.

It’s all about reciprocity. What does that mean?

What is reciprocity?

The dictionary definition of reciprocity – is gaining mutual benefit from exchanging things with other people.

In the case of social media, in which I include blogging, as done well it should be a two-way and mutual activity, this means building strands of connection which can, over time, turn into powerful networks that can help you start, grow or develop your business or other endeavour.

By responding to comments and forging links, sharing and re-tweeting, you make yourself more prominent in other people’s eyes, for the right reasons.

If you are unfailingly polite, share people’s content, always say thank you, share people’s details with other people and act as an ambassador and connector for other people’s personal brands as well as your own, that will come back to you in bucketfuls.

Whether you’re just starting out, embracing a new form of social media, or need a gentle reminder (I know that writing this reminded me to return to sharing more on Twitter), I hope you find these tips useful.

Reciprocity on Twitter

  • Always respond to @ comments that require a reply (i.e. they ask you a question or tell you about something).
  • Always respond to RTs, Follow Friday mentions, etc., with a thank you Tweet.
  • If someone recommends you to someone else, always a) thank the original person, b) make contact with the prospect – don’t wait for them to come to you.
  • Take part in peer-group events like #watercoolermoment etc. to encourage the people who run them and engage with your peers – you are likely to find new, interesting people to follow and talk to.
  • Retweet other people’s content if interesting to you / your followers. People often talk about the 80/20 rule – 8 retweets or shares of other people’s content via the social media sharing buttons on their blog posts to 2 promoting your own words or interests.

Note: Twitter works fast. Many people don’t see their whole stream, just snapshots through the day. If someone has seen your content and contacted you / shared, etc., try to thank them within 12 hours or less.

Use Twitter to forge links, have short conversations, support and encourage others and share content with your followers. People who you retweet will be more likely to retweet your posts. People who you recommend to others will remember the favour.

* not sure what I’m on about with all this talk of @ and RTs and followers and # signs? I’ll be putting together at Twitter 101 post to clear all that up soon!

Reciprocity on Facebook

This applies mainly to people using Facebook for their business, however it helps keep the wheels of general social interaction running smoothly, too!

  • If someone asks a question on your business page or a business-related question on your own timeline, always respond. My business page doesn’t always alert me when I have a new comment – so keep checking yours to make sure you’re not ignoring someone!
  • if someone sends you a Facebook message, always respond if it’s appropriate and meant for you, not spam.
  • Check your “other” messages for messages from people who are not “friends” with you but are making genuine contact, and respond appropriately.
  • If people comment on your status updates, “like” their comments and engage with them.
  • If people share your status updates, “like” the share and say thank you publicly or privately.
  • If people recommend you via Facebook, thank the recommender and contact the prospect as soon as you can
  • Share other people’s content.
  • Like business pages as yourself and as your business (click on cog next to message).
  • If you join groups of peers, people in the same business, people who are also self-employed, etc., join in with the group once you’re there, help other people and don’t either relentlessly self-promote or stay silent.

Facebook works on friendship and commonality. Share your peers’ posts and you’ll build up a network of people who will recommend, help and support you.

Reciprocity on blogs

I’m including blogs in social media because the best blogs that work well for businesses and people who want a “successful” blog are those that engage in two-way conversation, share content and link people together. Sounds like social media to me!

  • On your own blog, mention and link to people who have helped, advised or inspired you.
  • ALWAYS reply to comments. If you don’t have time to reply to each individually, at least put up a thank you and a mention to the most important ones.
  • Keep an eye on your search statistics and respond to what your readers are looking for (e.g. I noticed people were searching for “comment boxes too large” so added new blog post about that).
  • If people like and comment on your blog, pop over to their blog and scatter a few comments and likes if you find their content interesting.
  • Use those social media buttons on other people’s blogs to share their content – and make sure you enable the ones on your blog to allow and encourage people to share.
  • Engage with other bloggers especially in your industry sector or area of interest – comment, share, etc.
  • Offer guest post spots on your blog for other people to contribute content.
  • If you give someone a guest blog spot, make sure that you include all their links as well as a little biography about them. Make it easy for people to find them.
  • If you place a guest post on someone else’s blog, make sure that you give them all of your links to include, and talk about it as much as possible on your other social media channels.

Blogs can be a powerful way to meet people, link with people, learn from people and get your content shared around the world.

Reciprocity on LinkedIn

  • When you link to someone, change the standard message to a personal one, maybe reminding them where you met or making another tailored comment. Some people get quite annoyed with the standard messages and might even ignore then on principle, so it’s worth making that extra effort.
  • Introduce people who you think would be useful to each other.
  • Press that endorse button and give your contact some more stats.
  • Use the recommend feature if you’ve worked with someone to place some feedback on their profile, LinkedIn displays how many recommendations you’ve made, and everyone wants to work with someone who’s generous with feedback and honest praise.
  • If someone endorses or recommends you, or introduces you to a third party, send them a message to say thank you.
  • Join groups and share content kindly and generously.
  • When you join a group, get to know people and comment on other posts and questions before you start self-promoting.
  • if a group seems to be full of spam and self-promotion and no discussion and mutual encouragement, leave it alone – you won’t be able to change it and it’ll just annoy you. But learn what not to do from that!

LinkedIn can be a very powerful tool for IT and other business people, with most recruiters looking for a LinkedIn profile these days. Make sure that your full CV is on there, and a good photo.

Reciprocity on Google+

Google+ works much like Facebook, in that you can +1 posts, make comments etc. The major point about Google+ is that if you share your content and others’ on there, Google will pick up on it that little bit quicker to add it to its search engine. So it’s worth engaging on there even if it isn’t as busy or active as the other networks (or maybe it is in your field?)

Reciprocity on Pinterest, Tumblr, etc.

I’ve talked here about points regarding social media networks that I use. I don’t know much about Pinterest, Tumblr, etc. If you have points like the above to share on these, please pop them in the comments or send them to me via my Contact Form, and I’ll include them in this post (with an attribution of course!).

This article should help you to grasp the conventions of reciprocity in social media. If you’ve enjoyed it or found it useful, and think that other people will, too, please take a moment to share it using the buttons below or by sharing any alert you might see on Twitter, Facebook, LinkedIn or Google+. Thank you!

Related topics

10 top reasons to write a blog

10 top reasons NOT to write a blog

Top 10 blogging sins

Scheduling blog posts and keeping going


Tags: , , ,

How to protect your Word 2007 document

As part of my series on protecting your document, which has looked at Applying Watermarks and Protecting Word 2010 Documents, today we’re going to look at the features for protecting your document offered by Word 2007.

Why would I want to protect a document?

We covered this in more detail in the post on Word 2010, but in summary, it’s useful to be able to protect your documents because …

  • You can stop the wrong people from opening the document (including if you’re sending it via email etc.)
  • You can stop the wrong people from editing the document (protecting what you’ve written and/or changed)

Where is the menu for protecting documents in Word 2007?

You will find the menu for protecting documents under the Start button at the extreme top left of your screen. Once you’ve clicked on the round button, you will see a menu starting with New, Open …

Click on Prepare and you are given a menu to do with preparing the document to be sent, protecting it, and editing its properties:

Word 2007 1 menu

How do I add a password to a Word 2007 document?

The most simple way to protect a document is to add password protection. This means that no one without the password can open it (so if you email it to someone, it can’t be intercepted and opened, or people who aren’t meant to see confidential information can’t open a confidential document).

Go to the Encrypt Document entry on the menu and click on it:

Word 2007 1 add password

You will then be asked to enter a password (twice). Do remember this, and remember to share it with anyone else who might be permitted to open and read it.

Word 2007 2 add password

This is what happens when you or anyone else tries to open the file:

Word 2007 2a add password

How do I make a Word 2007 document read-only?

Another way to protect your document from unwanted edits is to make it read-only. Of course, anyone can “save as” the document and make all the changes they want, but your original document, with its file name, is protected, and often people don’t realise that they can save as, anyway.

To do this, select the Mark as Final entry from the menu:

Word 2007 7 mark final

Now, when someone opens this document, they will be told that it is read-only and they cannot edit it.

How do I restrict editing in a Word 2007 document?

Another option is to restrict certain types of editing in your document.

Confusingly, this is in a different area of the menus to the rest of the protection features. You will need to go to the Review tab, then the Protect section, which consists of a single button marked Protect Document. Click on the button itself or, if you must, the little arrow at the bottom right of that button (this has exactly the same effect. Why did they add that little arrow? Who knows!) to bring up the menu:

Word 2007 10 restrict editing

Click on Restrict Formatting and Editing to be given a list of options: Formatting restrictions, Editing restrictions and Start enforcement:

Word 2007 11 restrict editing

Formatting restrictions

This option allows you to select what formatting other people can apply to the document (you will want to do this after you have done all your own formatting to make sure that you can do what you want to do). Click on the tick box and then Settings to choose what formatting can be changed:

Word 2007 12 restrict editing

You are given a dialogue box with lots of different options. Note that you can allow the AutoFormat to override the formatting restrictions if you want to. But this is where you can choose what can be amended and what cannot be amended. This is particularly useful if you want to ensure that the Headings Styles that you’ve carefully set up will stay the same in the document.

Editing restrictions

You can edit what changes other users can make to your document in terms of textual changes, too. Have a look at the Editing restrictions section, tick the tick-box, and drop down the menu to see the options:

Word 2007 13 restrict editing

Editing restrictions allow you to choose whether the document becomes Read only or will allow tracked changed editing only or adding comments or filling in forms. Some of my clients make the documents that they send me tracked changes only so they can see exactly what I change in their documents. It’s a good way to remind people to keep Track Changes on if you’re working together collaboratively. Filling in forms is useful if you want people to fill in your form but not change the actual form.

Restricting editors

It is possible to restrict the ability to make changes to certain people if you’re working in a multi-user, networked environment:

Word 2007 14 restrict editing

These permissions can be restricted to individual editors; however, see the next section for details on this option, as it needs to run alongside other network options that you may or may not be using..

Start enforcement

When you want to put these restriction in place, click on the Start enforcement button that appeared as soon as you click or change anything:

Word 2007 15 restrict editing

How do I add individual editing permissions to a Word 2007 document?

The Restrict Permission part of the original menu we’ve been talking about, under the top left button and Prepare, allows you to add individual editing permissions to your document (this can also be accessed in the Review – Protect menu as discussed in the section above):

Word 2007 3 permissions

This is a Windows option that allows you to set permissions for different people, and is usually used within an organisation. You need to use Microsoft’s Information Rights Management Service alongside it and be signed up to Windows Live. The message that comes up if you click Restricted Access or Manage Credentials explains in more detail:

Word 2007 4a permissions

Most larger organisations have rights management systems that inform their procedures and file/drive setups, and these will usually allow you to set permissions and protect your document in that way. As this is outside the scope of this article: you will need to talk to your administrator or  IT support department.

But this option is here for you to use, and can be done if you have the relevant signups.

Be careful: Contact IT or your systems administrator before signing  up for something that can affect access to documents on a shared organisational system.

How do I add a digital signature to a Word 2007 document?

Adding a digital signature to a Word document can protect it to an extent and mark it as yours, plus an increasing number of companies request this if they’re signing you up to their pool of contractors, etc. Once again we’re in Start button – Prepare territory – this time we want the Add a Digital Signature section:

Word 2007 5 digital sig

In order to use this feature, you need to purchase a signature service from the Office Marketplace, as Word will tell you if you click on this option:

Word 2007 6 digital sig

Alternatively, you can sign up to a third-party digital signature service which will apply your digital signature to documents via an uploading and downloading service.

How do I print to PDF using Word 2007?

Making a Word document into a PDF is still the best way to protect it. A PDF is like an image of the document that can’t be edited, a bit like a photocopy or a picture taken of it.

Unlike with Word 2010, you can’t actually print direct to PDF using Word 2007. If you want to turn Word 2007 document into PDFs, you will need to download a PDF printer such as Adobe or CutePDF Writer.

Once you have got a PDF writing program installed, you can “Print” to PDF by hitting the Print button as usual then selecting your PDF writer as the “printer”:

Word 2007 8 print to pdf

Once you’ve pressed OK, you will then be asked to choose a filename and a path under which to save the document:

Word 2007 9 print to pdf

Note that, as in the above picture, you can password protect your PDF at this stage. This is a good idea, as software is now available that will let people edit PDFs, something that was not previously easy to do. We’ll talk more about using PDFs to protect your document in the next article.

In this article, we’ve learnt how to use the features of Word 2007 to protect your document, using passwords, read-only status, editing restrictions, permissions and digital signatures.

———————

This is part of my series on how to avoid time-consuming “short cuts” and use Word in the right way to maximise your time and improve the look of your documents.

Related posts:

Applying Watermarks

Protecting Word 2010 Documents

(coming soon)

Protecting your document using PDF

Please note, these hints work with versions of Microsoft Word currently in use – Word 2003, Word 2007 and Word 2010, all for PC. Mac compatible versions of Word should have similar options. Always save a copy of your document before manipulating it. I bear no responsibility for any pickles you might get yourself into!

Find all the short cuts here

 
14 Comments

Posted by on July 24, 2013 in Errors, New skills, Short cuts, Word, Writing


Tags: , , , , , , , ,

What are these funny symbols? Paragraph marks and other marks in Word for PC and Mac

A friend got in touch recently in a bit of a panic. All sorts of odd marks had appeared in her Word document. It looked something like this:

d

What were all these funny symbols? Where had they come from and, more importantly, how could she get rid of them?

Showing paragraph marks and other hidden formatting symbols

Word gives you the option to view paragraph marks and other hidden formatting symbols. Basically, this means that you can see where the author of a document has pressed the Return key or Tab or Space, or inserted a forced break or some other formatting. Why is it useful? It means that if you are editing or otherwise tidying up a document, you can see what’s been done in order to resolve it. For example, in this document, I can see that the author has used the Return key to force text to appear on a new page (instead of using Ctrl-Enter to force a page break):

bb

and when I’ve done it properly, I can see the page break marked:

cc

So, how did I get to see these funny marks? In Word for both Mac and PC, you can find a button with the paragraph mark on it which will make them display:

Show Paragraph marks in Word for PC

Go to the Home tab and you’ll find it half way along. Press the button, it will go orange, and your formatting marks will display.

c

I’ve actually put this button onto my Quick Access Toolbar (find out how to do that) as it’s a very useful button for an editor/proofreader!

Show Paragraph marks in Word for Mac

In Word for Mac, the Show Paragraph marks button is handily already in the top toolbar. Press the button and all your formatting will become visible.

on a mac

How do I hide the Paragraph marks and other formatting?

If the marks appear and you want to hide them, simply find the Paragraph Marks button and press it again. It should stop being orange, and your formatting marks will no longer be displayed.

Thanks to Linda for the inspiration and Mac screenshot!

———————

This is part of my series on how to avoid time-consuming “short cuts” and use Word in the right way to maximise your time and improve the look of your documents.

Please note, these hints work with versions of Microsoft Word currently in use – Word 2003, Word 2007 and Word 2010, all for PC. Mac compatible versions of Word should have similar options. Always save a copy of your document before manipulating it. I bear no responsibility for any pickles you might get yourself into!

Find all the short cuts here

 
33 Comments

Posted by on July 17, 2013 in Errors, New skills, Short cuts, Word, Writing


Tags: , , , , , , , ,

How do I protect my document in Word 2010?

In a previous article, we talked about protecting your Word document using a Watermark (watermarks can also be used to extend your corporate or other branding through your documentation). Today we’re going to look at other, stronger ways to protect your Word 2010 document and prevent people from making changes to it.

Why might I want to protect my Word 2010 document?

Protecting a Word 2010 document means that anyone apart from you can either only access the document by using a password or is unable to make certain, or any, editorial changes to the original document.

Why would I want to stop people opening a document?

  • If you are storing confidential documents on a shared drive in a company-wide network
  • If you want to send a document to someone who shares an email address with a number of other people (for example a general email address at your accountant’s office)
  • If you want to send a document to someone but need to ensure that anyone intercepting it cannot open the document

Why would I want to stop people editing a document?

  • You’ve completed a final version of a document and want to make sure no one does any more edits
  • You are sending something like an invoice or a contract and want to make sure the recipient does not change anything
  • You’ve created a procedural document to be saved on a shared drive and don’t want your colleagues to make unauthorised changes

Where is the menu for protecting documents in Word 2010?

To access the menu for protecting documents, select the File tab at the extreme left of the row of tabs (remembering that it’s Home that is automatically selected), then visit the Info area, where you will find a section titled Protect Document:

Word 2010 1 menus

Click on the Protect Document button and you’ll be presented with a list of options:

Word 2010 2 permission options menu

We’ll go through these in turn. Some of them are not applicable if you’re working on your own, with only one computer on your network, but we’ll take a quick peek at them anyway.

What are my options for protecting my document?

Taking the options in turn …

Mark as Final

The Mark as Final option creates a read-only version of the document which will be marked as final and which will not let anyone make any changes. Access it via the menu we discussed above:

Word 2010 3 mark as finalClick on the button and you’re given a dialogue box to click on:

Word 2010 4 mark as final

Note: it’s a good idea to save this under a new file name.

You will then need to go and set the document to being Read-Only, which you can see how to do below in the Restrict Editing section.

Note 2: No one else can edit the read-only document, however they could possibly “save as” and then edit it (only turning a document into a PDF protects it from all changes).

Encrypt with Password

The second option allows you to apply a password to the document. This will mean that no one can open it without having the password, whether on your standalone computer, a shared network drive, or a copy of the document that you have emailed to them:

Word 2010 5 password

When you click this button, you will be asked to enter a password:

Word 2010 6 password

You will then be asked to enter the password again (the dialogue box looks the same).

When you or anyone else tries to open the document, this box will appear:

Word 2007 2a add password

If you want anyone else to be able to access the document you will need to let them know the password. If you’re sending the document as an attachment to an email, common sense tells you not to send the password in the body of the email …

Note: Once the user has accessed the document using the password, they will be able to edit and save it freely unless you have also applied one of the other levels of protection.

Restrict Editing

The next option, Restrict Editing, allows you to choose what parts or aspects of the document can be edited:

Word 2010 7 restrict editing

Click on this option and you are able to choose what levels of the document anyone else can edit. It will return you to your original document and give you a sidebar on the right hand side of your document:

Word 2010 8 restrict editing

Lots of options here, but looking at them in turn, you can …

Limit which styles can be edited – you will be given a list of options. This is useful if you have carefully set lots of headings styles and don’t want them to be changed:

Word 2010 9 restrict editing

Or allow only certain types of editing to be done:

Word 2010 10 restrict editing

This is where you can make the document Read-Only, i.e. it cannot now be edited.

Once you’ve made your selections here, you will need to press the Start enforcement button to initiate this. I believe that you cannot then make restricted edits yourself, although clearly you can go in and change these settings on your own document.

Word 2010 11 restrict editing

I suspect that almost no one knows about these settings, by the way, so if you are setting such restrictions, it might be polite and save time in the long run to let the recipient know that you’re doing this.

Restrict editors

This is a Windows-specific option that can allow you to set permissions for various people, usually within an organisation.

Word 2010 12 restrict by people

This involves using Microsoft’s Information Rights Management Service and being signed up to Windows Live. The message you get if you try to click Restricted Access or Manage Credentials explains it in more detail:

Word 2010 12.5 restrict by people

As the message says, many organisations (and all of the ones that I’ve worked in) have their own rights management systems embedded in their procedures and file/drive setups. It’s fine to set permissions and protect your document in that way, but that’s outside the scope of this article: you will need to talk to your IT support people or a knowledgeable administrator in your department. But this is there, and can be done if you have the relevant signups (again, contact IT or your systems administrator before signing yourself and others up for something that can affect access to documents on a shared organisational system).

Adding a digital signature

This last option is another one where you have to sign up for something extra …

Word 2010 13 digital signature

This is another useful way to protect your document, however, you will need to purchase a signature service from the Office Marketplace or you can sign up for a third-party service which will apply a digital signature to your document.

Word 2010 14 digital signature

I have signed up to a third-party system which applies a digital version of my signature which I have previously uploaded onto documents, which some of my clients insist on me doing when signing contracts, etc. I am not entirely sure how this would hold up legally in a court of law if you were trying to protect your document, however.

Creating a PDF using Word 2010

The best way to protect your document from being changed is still to convert it into a PDF. A PDF is a copy of a document, a bit like a photocopy, which cannot be edited and changed. Well, that’s not strictly true nowadays: the VERY best way to protect a document is to turn it into a PDF and password protect it so it can only be opened by the recipient and make it read-only so it can’t be edited. I’m going to publish an article on PDFs soon, so look out for that.

You used to have to use a separate programme to create a PDF from a Word document; however, from Word 2010 onwards, you can create a PDF directly within Word.

In the Save and Send menu under the File tab, choose Create PDF/XPS Document:

Word 2010 15 pdf

What is an XPS document? Open XML Paper Specification (also called OpenXPS) is an open specification for a page description language and a fixed-document format, developed by Microsoft. It’s kind of an equivalent standard to PDF. If you’re asked to send someone a document in this format, now you know what it is (I’ll admit here that I have never done this myself).

Hit the Create PDF/XPS button and you’ll be taken to the Save As screen to save your document as a PDF (note that it might well take you to a temporary file folder and you’ll need to navigate to whichever folder you’ve saved your original document in).

You can also use the Save As menu directly from the Home tab for this function:

Word 2010 16 pdf

I’ll go into more detail about how you can protect that PDF further in my article on PDFs.

For now, we’ve learned how to protect a document in Word 2010, including information on why you’d want to do that, where you can find the menus, and what you can do.

Related articles

How to Watermark your document

How to protect your document in Word 2007

(coming soon):

Protecting your document using PDFs

———————

This is part of my series on how to avoid time-consuming “short cuts” and use Word in the right way to maximise your time and improve the look of your documents.

Please note, these hints work with versions of Microsoft Word currently in use – Word 2003, Word 2007 and Word 2010, all for PC. Mac compatible versions of Word should have similar options. Always save a copy of your document before manipulating it. I bear no responsibility for any pickles you might get yourself into!

Find all the short cuts here

 
25 Comments

Posted by on July 10, 2013 in Errors, New skills, Short cuts, Word, Writing


Tags: , , , , , , , ,

How to set a watermark in a Word document

1 watermarked pageSometimes you want to set a watermark on a Word document. This article explains what a watermark is, why you might want to add one to your document, how to add a watermark, how to customise a watermark, and how to remove them.

What is a watermark?

A watermark is a word, phrase or picture that appears “behind” the text in a document. It gets its name from the physical marks that are created during the paper-making process. The pulp is floated in water, and a frame is brought up under it to collect the pulp into a square. The frame is lined with thin wires (and symbols or text can be included, too) and when the pulp is collected in the frame, it will be thinner where there’s a wire or other protruding part of the frame. When the pulp has dried into a sheet of paper, the thinner parts of the paper will let through more light when held up to a light source, and so you can see the symbols and words, as well as the lines of the original frame (this is how papermakers marked their stock and also how you can tell how a book was put together. For more information on the fascinating world of watermarks, you can start off with this Wikipedia article.

Why would I want to watermark my Word document?

If you watermark a document, whoever opens that document will see the watermark sitting behind that document. This is basically to stop it being used either in their everyday work or for other commercial purposes. It’s very much like the way that photos from mass sports events or wedding photographer sites often have words printed faintly across them. It stops you printing them out and using them without buying them.

Some reasons to do this:

  • You’ve prepared a document for someone and you’re charging them after you’ve completed the job. Sending them a watermarked document will proved that you’ve fulfilled your side of the bargain but prevent them from actually using the document. Once they’ve paid you, you can send them a non-watermarked version.
  • You’ve prepared a document to send out to people but you don’t want them to share it further or claim authorship, or you want to remind them it’s a sample. I’ve done this with the sample chapter of my book that I send out to people who sign up to receive my newsletter. It has “Sample” written across the page behind the text, so that people can’t use it in another way and to remind them that it’s just a sample and they can buy the whole thing.
  • You’re sending out a late reminder of an invoice and if you were doing it on paper, you’d use one of those URGENT stamps and red ink.
  • You’re creating a corporate document and want to include corporate branding of some sort behind the text.

Note that if you’re watermarking to protect your work, the watermarking should go alongside copyright statements if you want to use it for that purpose, and I’m not an expert on, or advising you on, copyright here – just telling you how to apply a watermark.

How do I add a watermark to a Word document?

To access the Watermark menu, go to the Page Layout tab, then look in the Page Background area, where you will find the Watermark button:

2 watermark button

The Watermark button has a small downward-pointing arrow which implies that you can access a menu. Click on the arrow and there’s the menu:

3 watermark menu

If you select any of the standard examples that they give you (and note the scroll bar on the right, which you can use to see more default watermarks, that watermark will go straight onto your document. But you might want to customise the watermark in terms of wording, colour, text size and font, etc. and you can do that by selecting Custom Watermark at the bottom of this menu.

How do I customise my Word watermark?

Of course you will find lots of options for customising. Select Custom Watermark at the bottom of the Watermark menu to access the Custom Watermark menu:

4 custom watermark menu

You can see here that the menu defaults to No watermark, because that’s what we started with. But there are options for adding a Picture watermark or Text watermark, and you select which you want to work with by clicking on the radio buttons in the left-hand margin. We’re going to work with a text watermark in this example, so we click on the radio button next to Text watermark:

5 custom watermark menu changed

Now the fields to do with text watermarks become active (are no longer greyed-out) and we can change the language, the actual text, the font, size, colour and orientation.

Here I’m changing the text – it defaults to the first standard text but you can just type in what you want to appear there. I’m also changing the colour – but note that I’ve left Semitransparent ticked. If you don’t do that (see below), the watermark will be much heavier and will actually obscure part of the text … which can be useful, of course!

Once you’ve made your choices and changed the text, colour, etc., press the Apply button to apply the changes.

6 custom watermark

And here’s my custom watermark – my text, in the colour I chose.

Advanced watermark customisation

We won’t go into all the detail about customising here, as the menus are pretty self-explanatory. You can use the Picture watermark option to, for example, add your company logo to a tender document, or another image to make your documents look more attractive (beware of making them too “busy” or, worse, undermining their readability: remember that you need to consider people with low vision who might be reading the printed or on-screen document, and if you suspect the document might be photocopied in the future, steer clear of a lot of watermarking, as it’s apt to become darker and more visible when it’s copied).

A quick look at transparency: if you untick the Semitransparent box in the Custom Watermark menu above, your watermark will be a lot heavier and may obscure some of the text. Here I’ve changed the colour to black and unticked Semitransparent.

6.5 heavy watermark

How do I edit my watermark?

In the case I’ve just shown you, I simply went back into the Watermark menu then the Custom Watermark menu; my choices were there already and I changed them. The choices you have made will stay in the menu until you change them or remove the watermark entirely, so you can pop in and adjust it as you like.

How do I remove watermarks?

If you want to remove the watermarks on a document, go to the Watermark menu and select Remove Watermark:

7 remove watermark

Of course, this means that other people could remove your watermark, too. So if you watermark a document to protect it, and you don’t want someone to remove that watermark, you will need to protect the document itself by making it uneditable, either by security protecting it or changing it into a pdf document (the latter is what I have done with my sample chapter). That’s an article for another time …

How do I apply a watermark in Word 2013?

If you’re using Word 2013, you will need to note that they’ve added an extra Design tab, and you’ll find the Watermark feature there.

How do I create a default watermark for all of my documents?

There’s no way to save a default watermark or add one permanently to your watermark gallery. If all of your documents are going to have the same watermark, it’s best to create a blank document with the watermark applied, then save it as a Word template (Save – Save as – drop down Type – Word template). Then, use that template when you’re starting a new document in Word. Thanks to my commenters for suggesting this addition to the article!

———————

This is part of my series on how to avoid time-consuming “short cuts” and use Word in the right way to maximise your time and improve the look of your documents.

If you found this interesting, you might also be interested in:

How to protect your document in Word 2007

How to protect your document in Word 2010

Please note, these hints work with versions of Microsoft Word currently in use – Word 2003, Word 2007 and Word 2010, all for PC. Mac compatible versions of Word should have similar options. Always save a copy of your document before manipulating it. I bear no responsibility for any pickles you might get yourself into!

Find all the short cuts here

 
19 Comments

Posted by on July 3, 2013 in Errors, New skills, Short cuts, Word, Writing


Tags: , , , , , , , ,