Welcome to Lesson 3 in my MailChimp series. Following on from MailChimp 1 – Signing up, and MailChimp 2 – Setting up your list and importing contacts, this time we’re going to learn how to create a sign-up form to allow people to consciously and willingly sign up to receive your email newsletter.
Remember, once you set up a subscriber list, there are two ways to populate it:
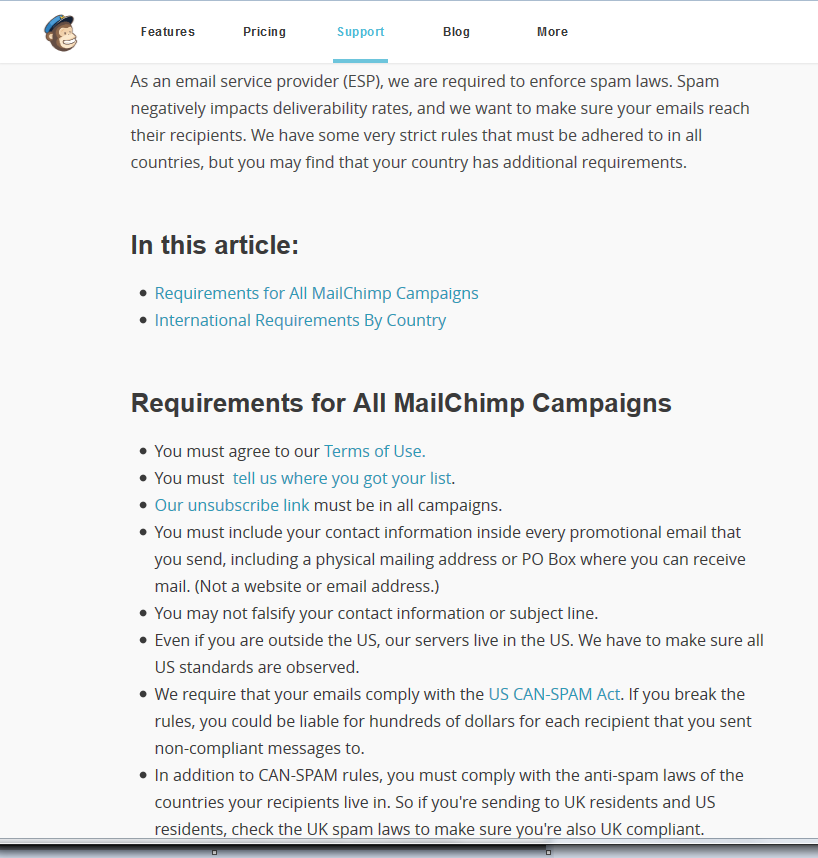
1. Import members from a previous mailing list (ensuring that you have their explicit permission to send them marketing communications)
2. Offer people a sign-up form via which they can choose to sign up for your newsletter.
I prefer Option 2, and we’re going to find out how to do that now.
How do access the MailChimp contacts list area?
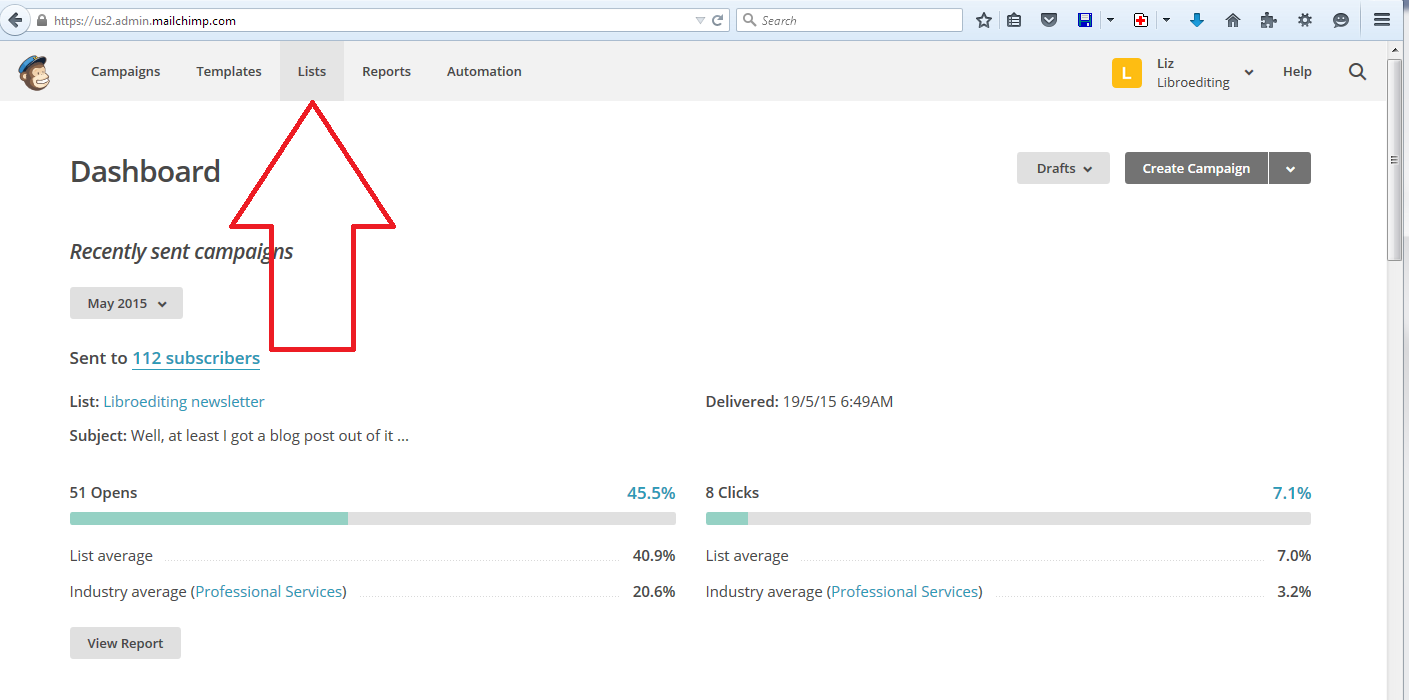
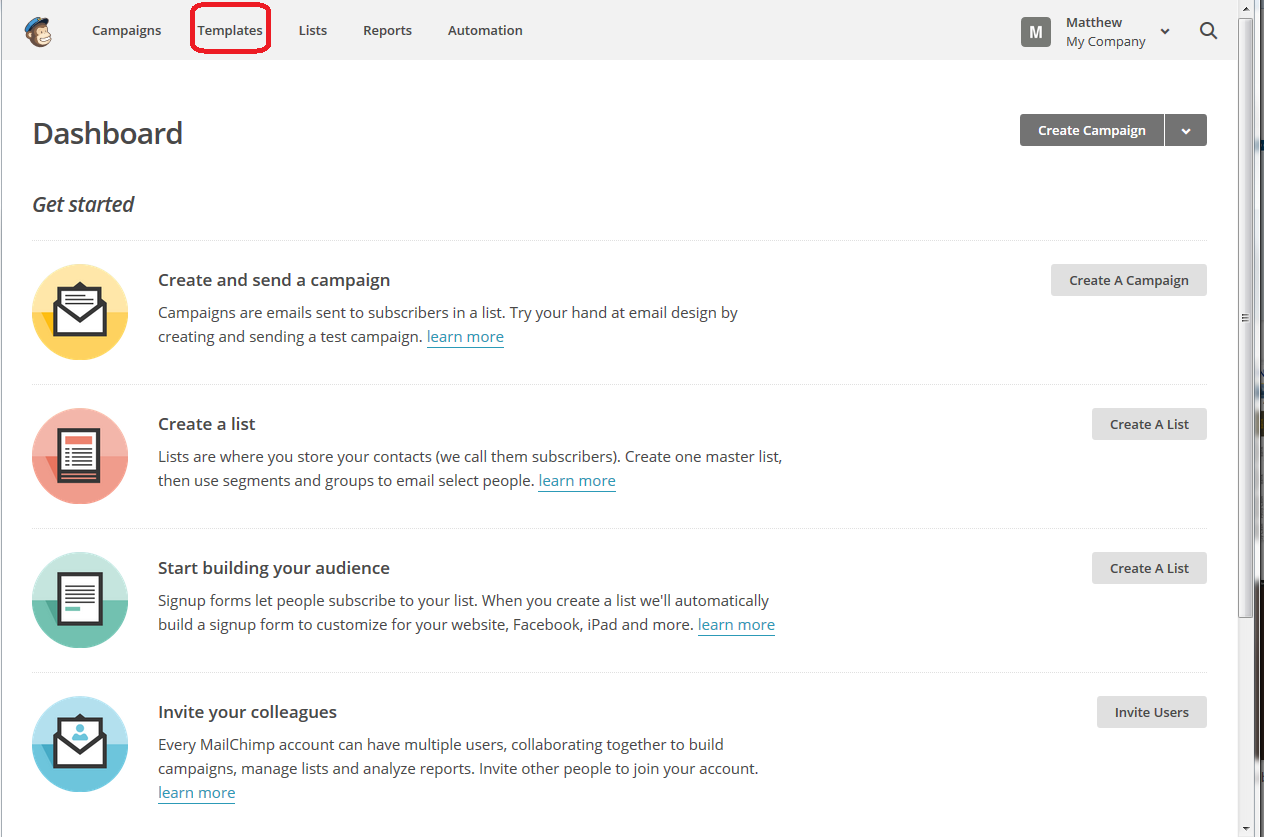
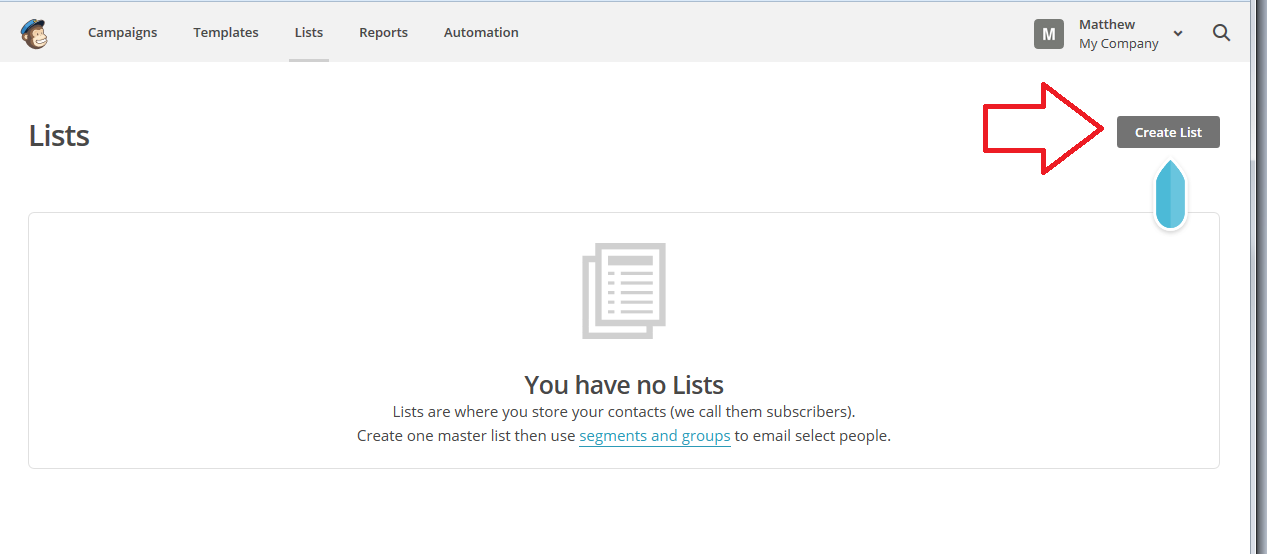
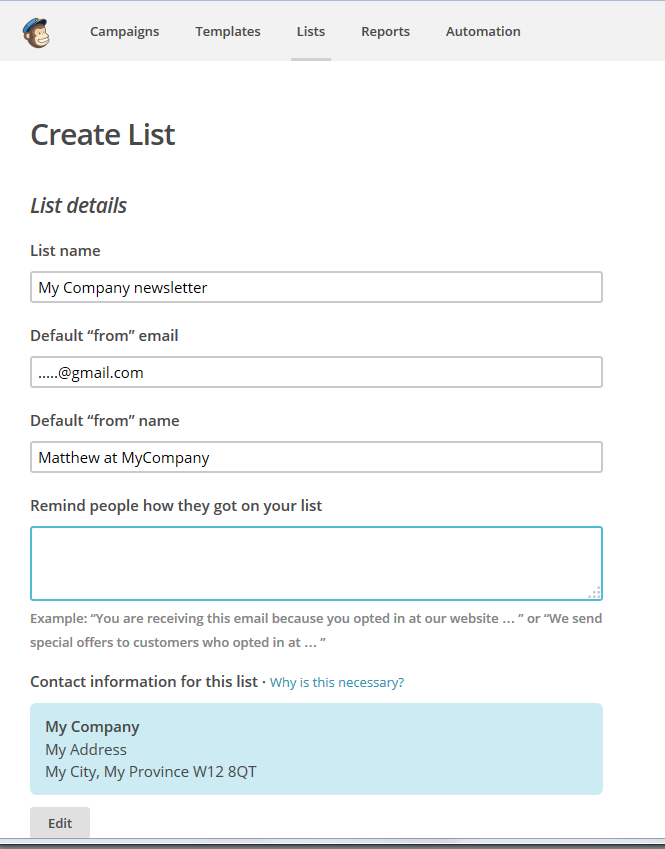
As a quick reminder (full details are in this previous article), when you sign in to MailChimp, you will find Create a List on your front screen, but at any time, you can click on Lists at the top to get into the Lists area:

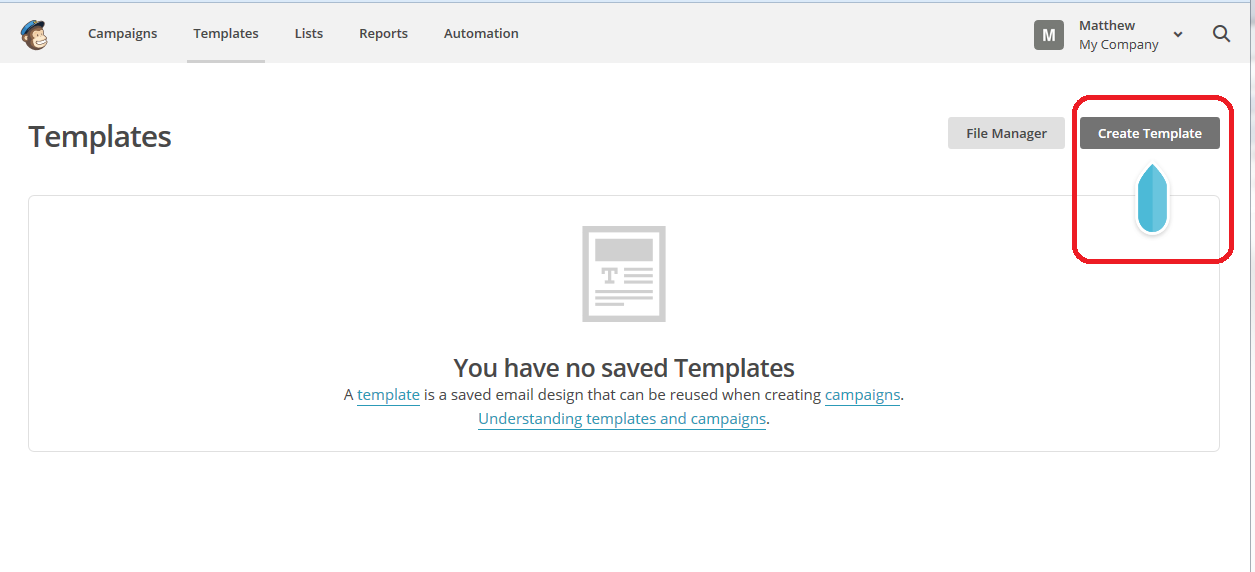
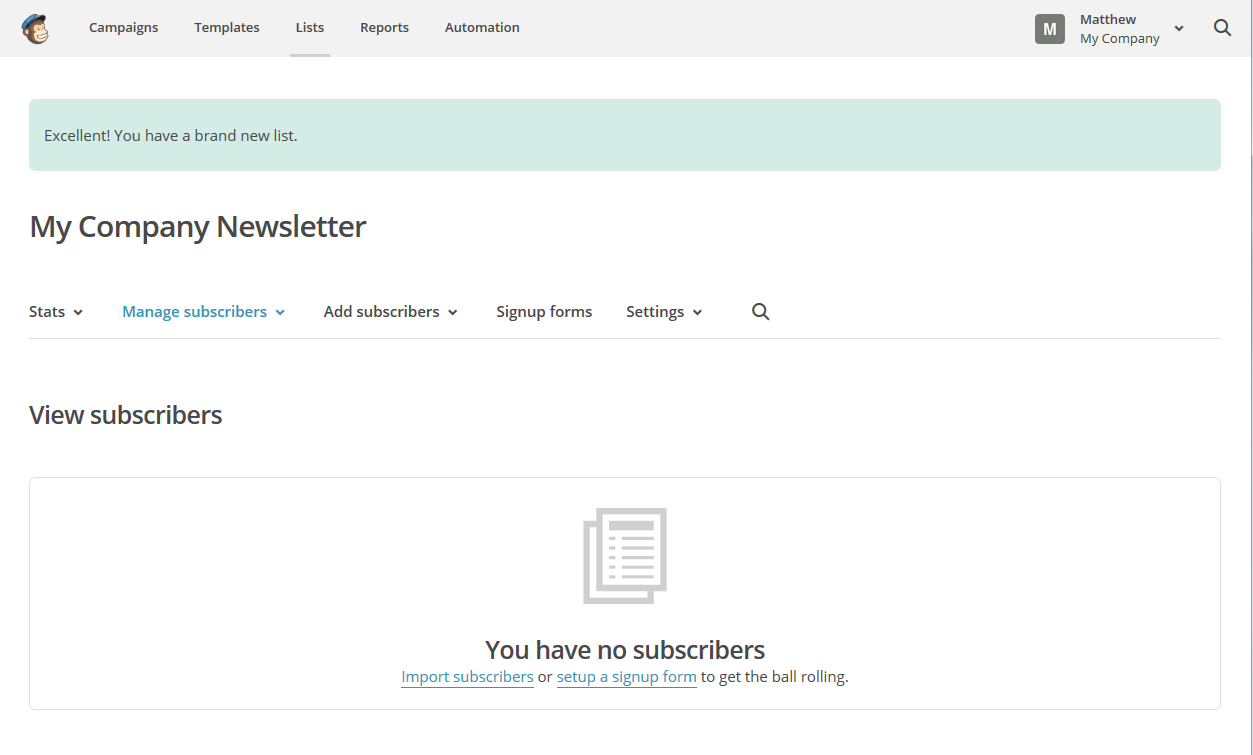
Once you’re in the Lists area, if you have any lists set up, they will show here, and if you are going in to do this for the first time, you will see that You have no Lists, and be pointed to the Create List button:

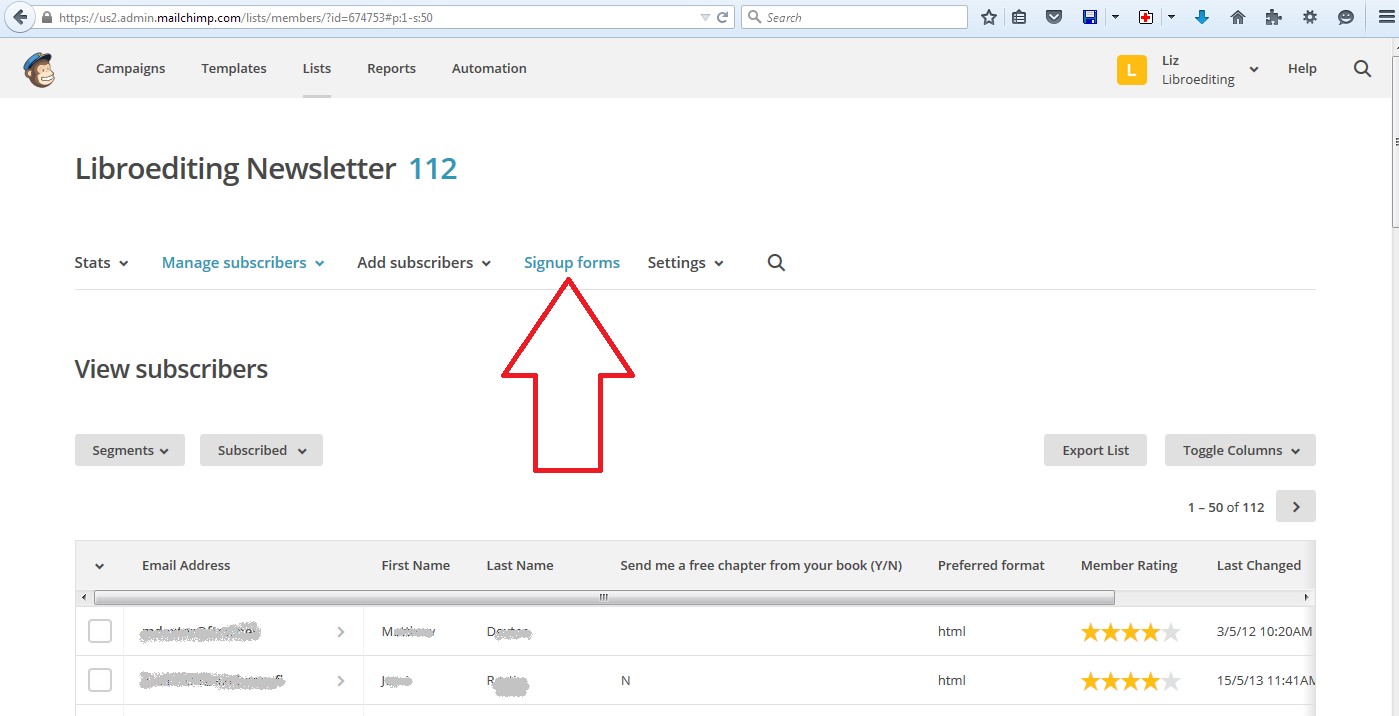
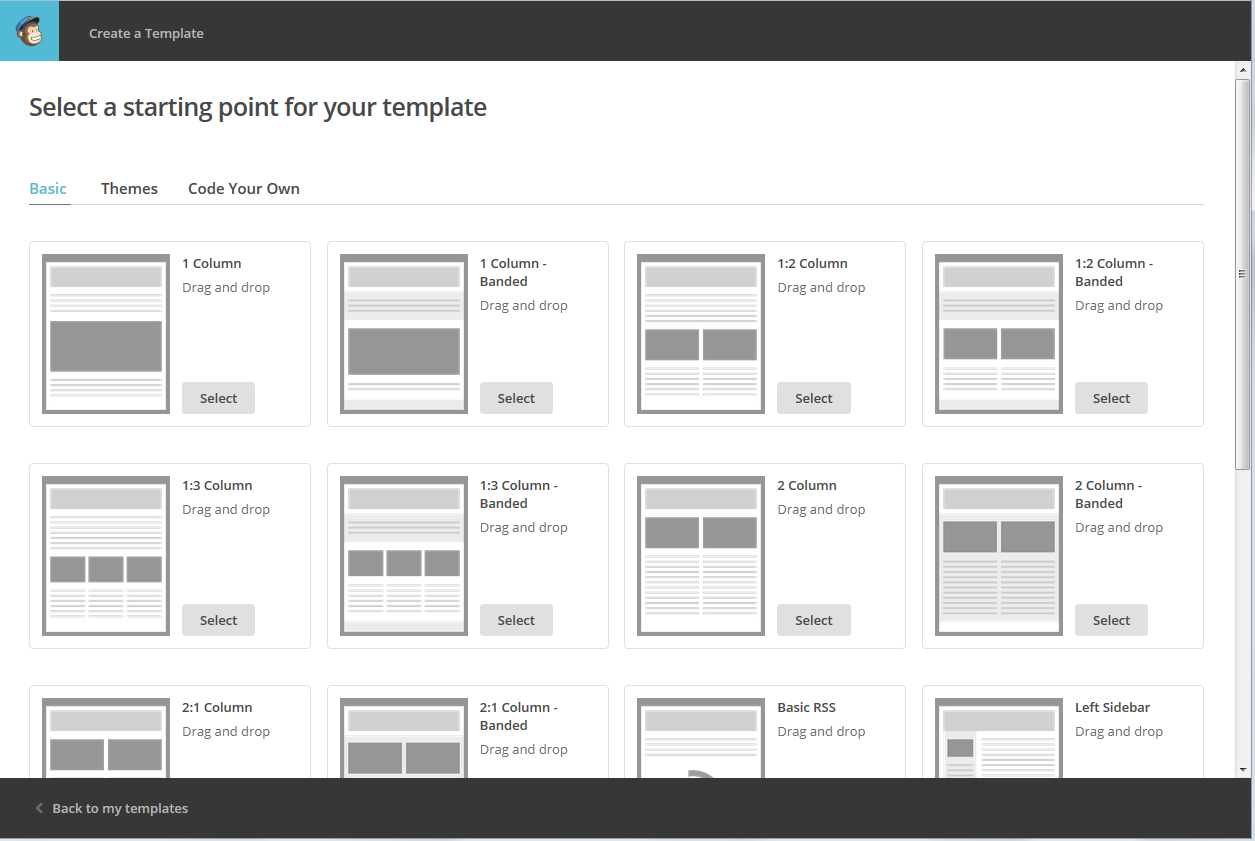
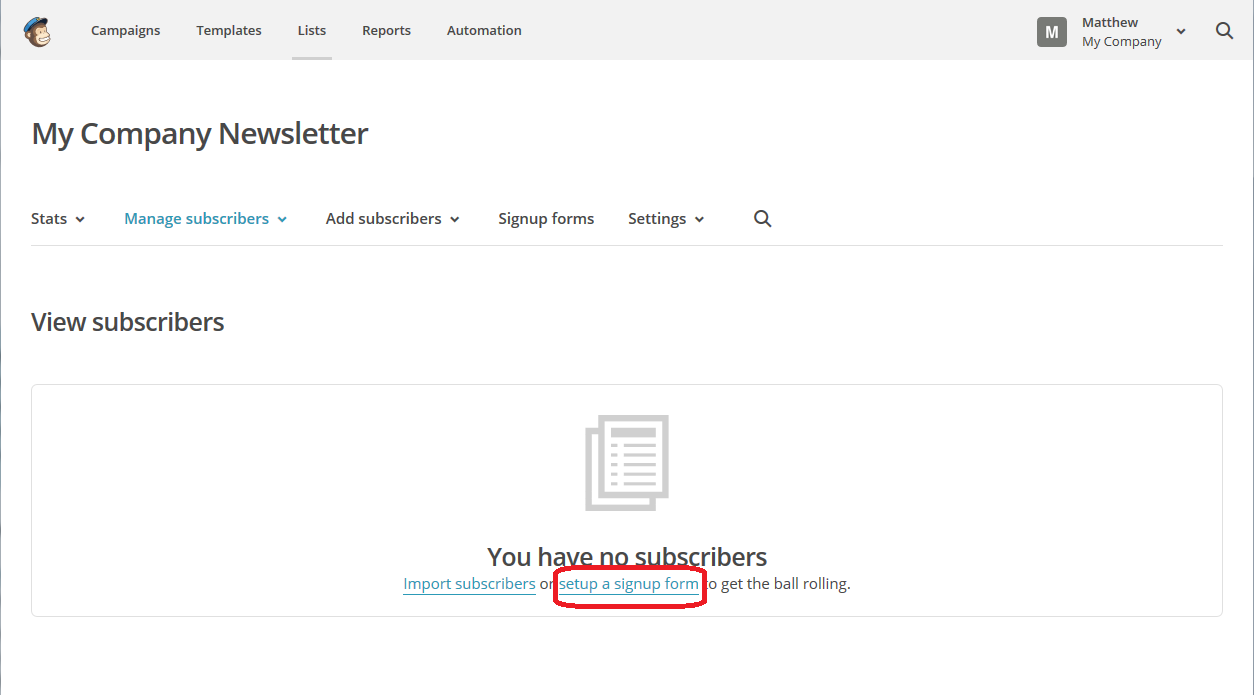
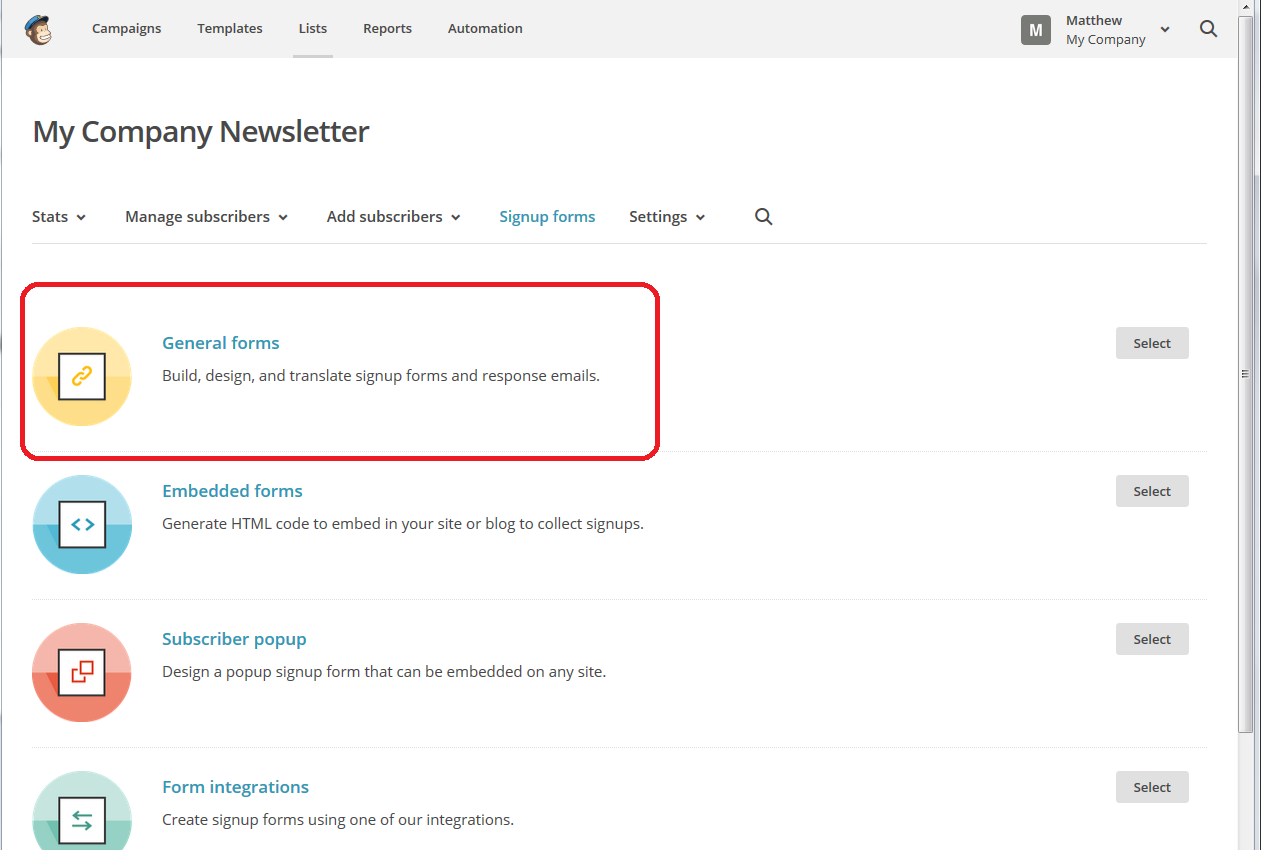
Once there, you have an option to click on setup a signup form (or set up a sign-up form, even), so click there:

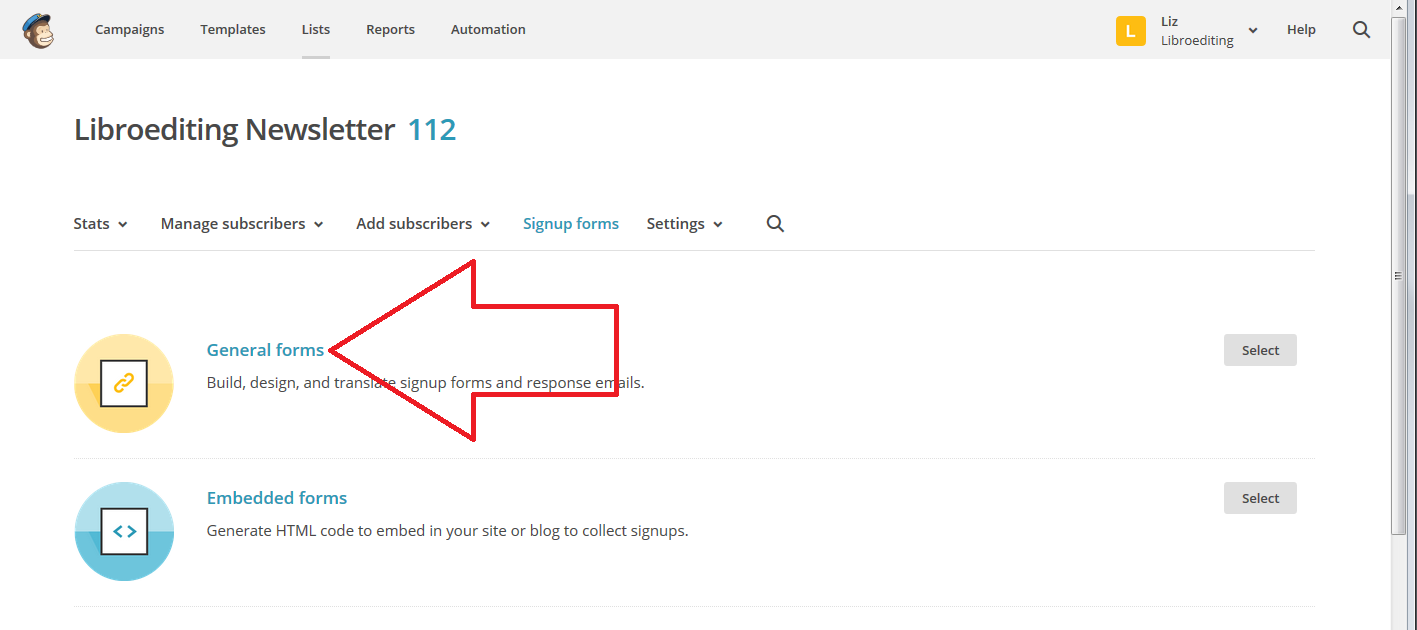
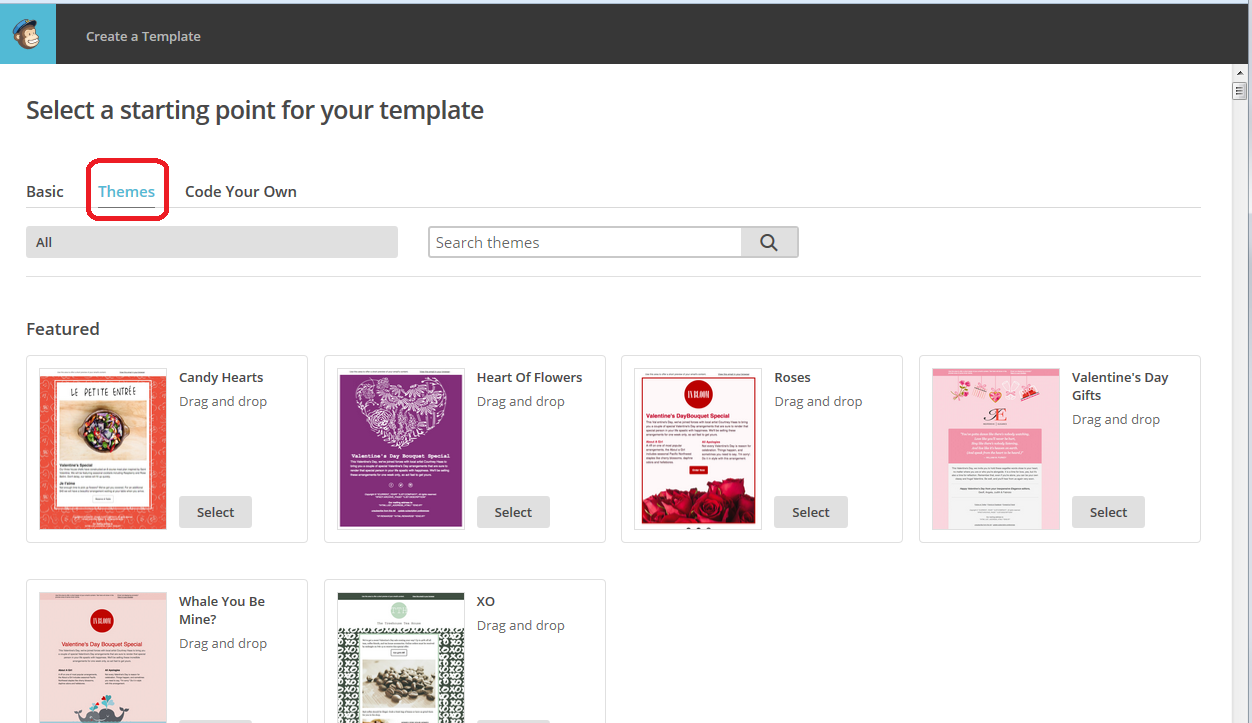
You will now find a few options on forms to create – all of them are designed in the same basic way, but some can be embedded into your website. For now, we’re going to create a General Form which will come complete with its own URL to which you can direct people from social media, your website, etc. (see top right in the top of the sidebar for what that looks like in real life).

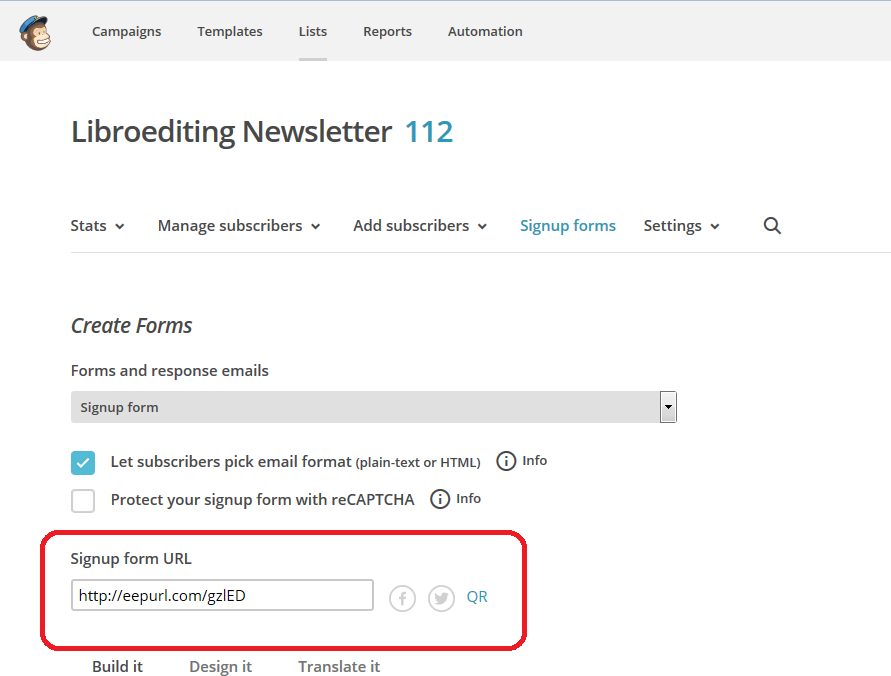
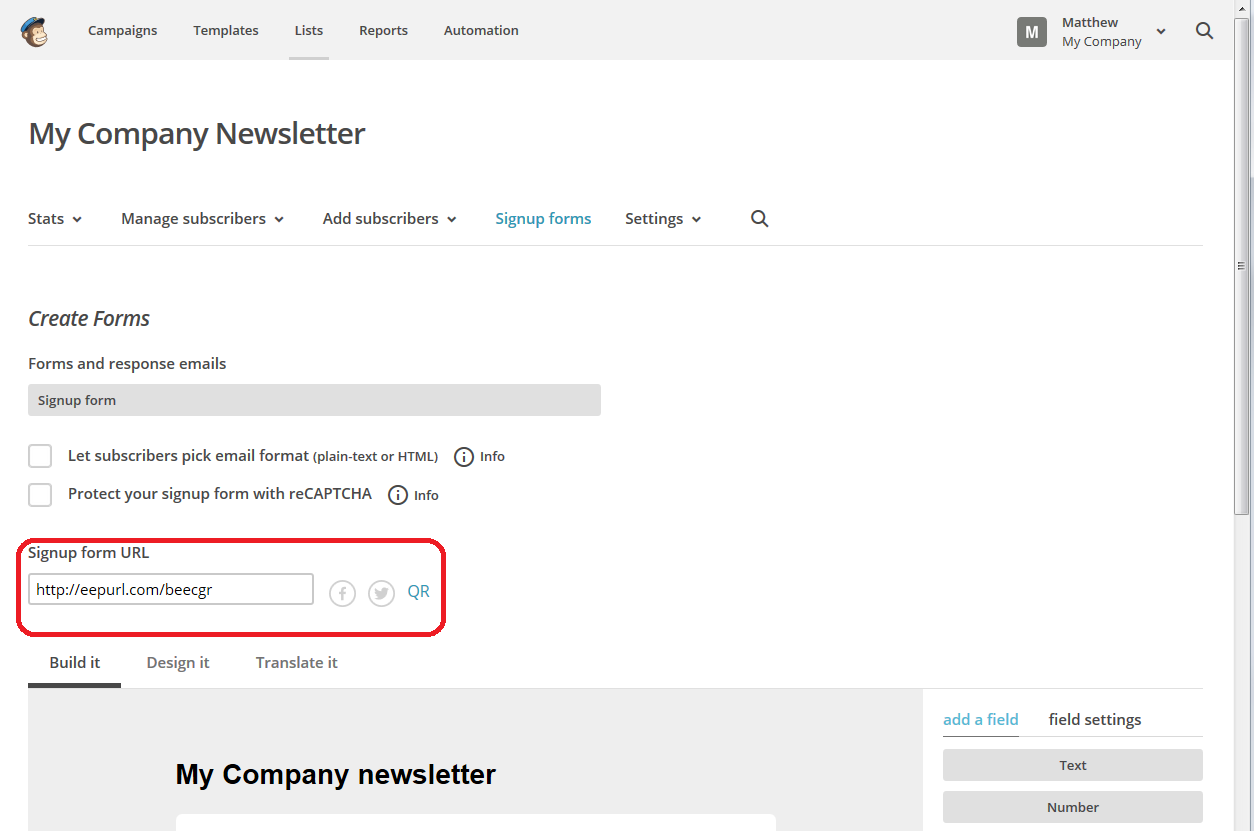
Once you’re in the Create Forms page, you can see at the top that you have a URL or web address. That will never change, and you can use that to direct people to your sign-up form. You can generate a QR code if you want to, by clicking on the button.
You can also see two options at the top: Let subscribers pick email format and Protect your signup form with reCAPCHA – I would recommend ticking both of these.
Let subscribers pick email format will give your subscribers the option to have emails delivered in plain text or HTML format. This means that if they’re using a slow Internet connection or don’t have much bandwidth, your newsletter will be sent to them in a text-only form, without the pretty pictures (this means you’ll need to make sure to add description and alt-text to any pictures in your newsletter), and just gives them more options.
Protect your signup form with reCAPTCHA means that subscribers will have to manually click and tick a box to prove that they’re a real person. It protects you from automated signing up bots filling in your form and giving you false subscriber numbers. It’s all very accessible and offers alternatives, so I’d go for it. It shows people signing up that you’re serious and are protecting your list, too.

Once you’ve filled in those details, you can go on to creating your sign-up form: let’s scroll down to have a look:

Now, in fact, you can just go with this form, as a very basic example. The subscriber will be able to enter their email address, first and last name and click to Subscribe to list. Simple. So you can actually leave it there.
But you might want to add more flourishes, text and options to your sign-up form – if you do, read on; if you don’t, then skip to the “What does my form look like in real life?” section near to the end.
How can I add more fields and text to my MailChimp sign-up form?
We’ve created a basic sign-up form but you might want more.
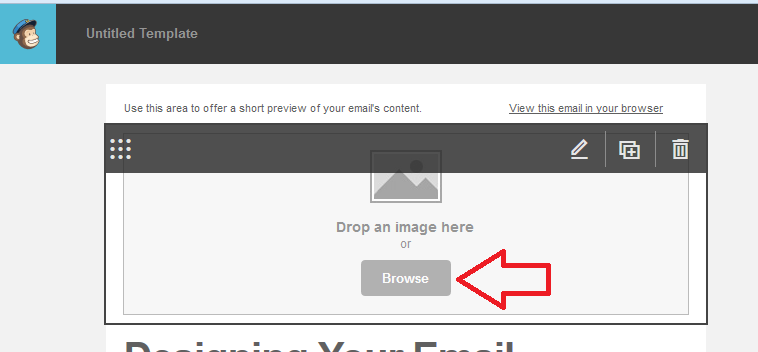
For a start, see that space where you can Click to add a message at the top? Here you can personalise the form and be a bit more friendly. Once you click in the text box, a text editor will come up – you can add all sorts of things in here, including links, images, etc. (this is the same text editor you will use when you’re creating your actual newsletter).
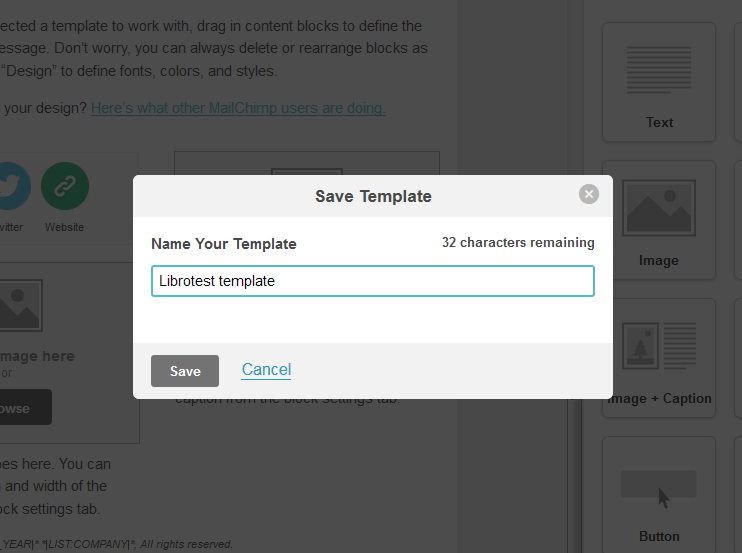
I’ve just typed some straightforward text in here – once you’ve added what you want, hit the Save & Close button …

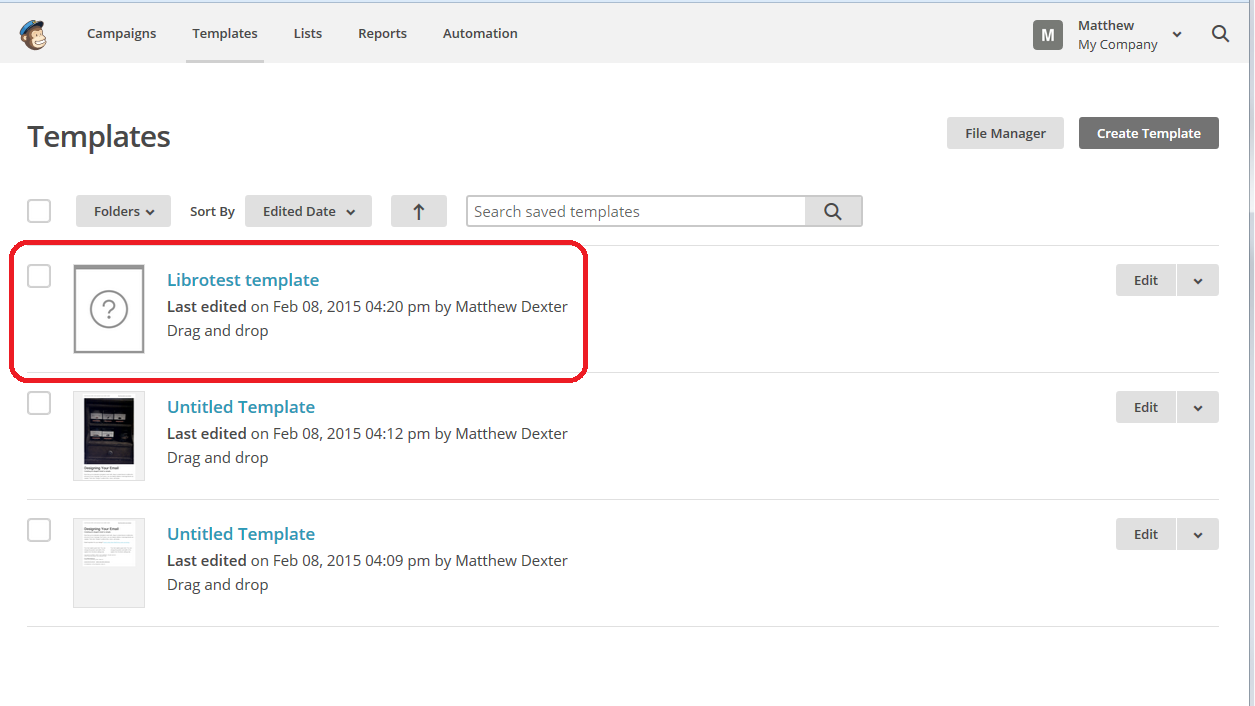
You will be returned to your Build It area, and you can see that the text has now appeared in that top section.
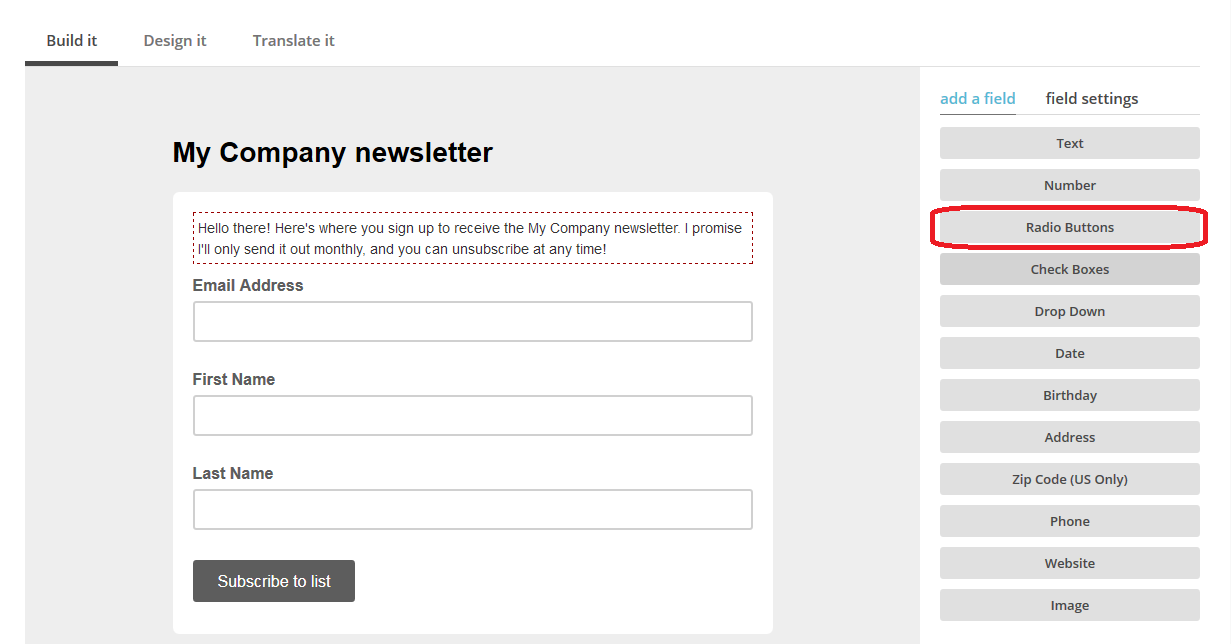
To add more options, such as collecting birthday dates (great if you’re a restaurant and want to collect that info to send out a special birthday meal offer) or full address if people are also signing up to have an item sent to them. Here we’re going to look at Radio Buttons, which gives you the option to give your subscribers choices about things …

What things do you want your subscribers to choose, you may ask. Well, although we’re not going to go into the ins and outs of getting people to sign up for your newsletter right here and now, it is common to offer subscribers a little freebie in return for their joining your newsletter (which is really a favour to you). For example, I offer subscribers a free pdf of a sample chapter from one of my books (as you’ll see in the final screenshot in this article).
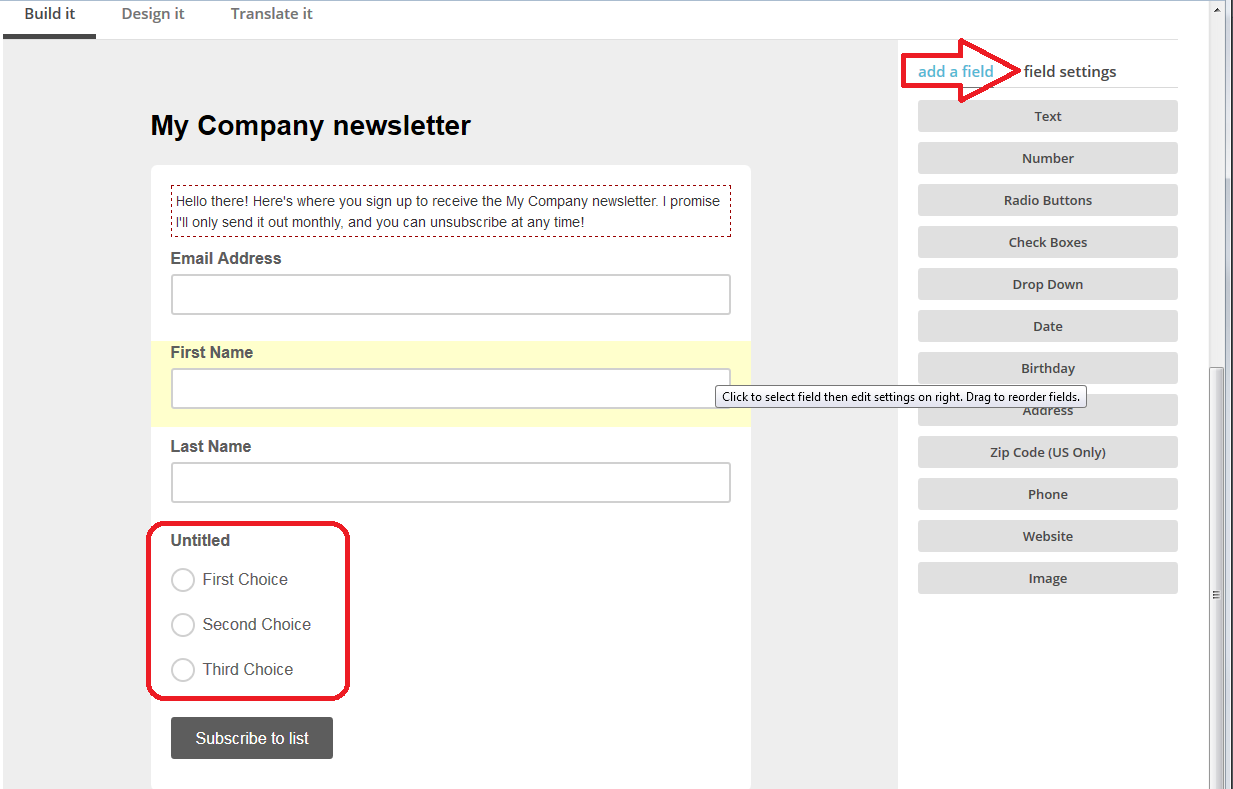
So, click on Radio Buttons and drag it across to between Last Name and Subscribe to List. There is is, in your sign-up form.
Now click on the field settings tab to personalise those choices:

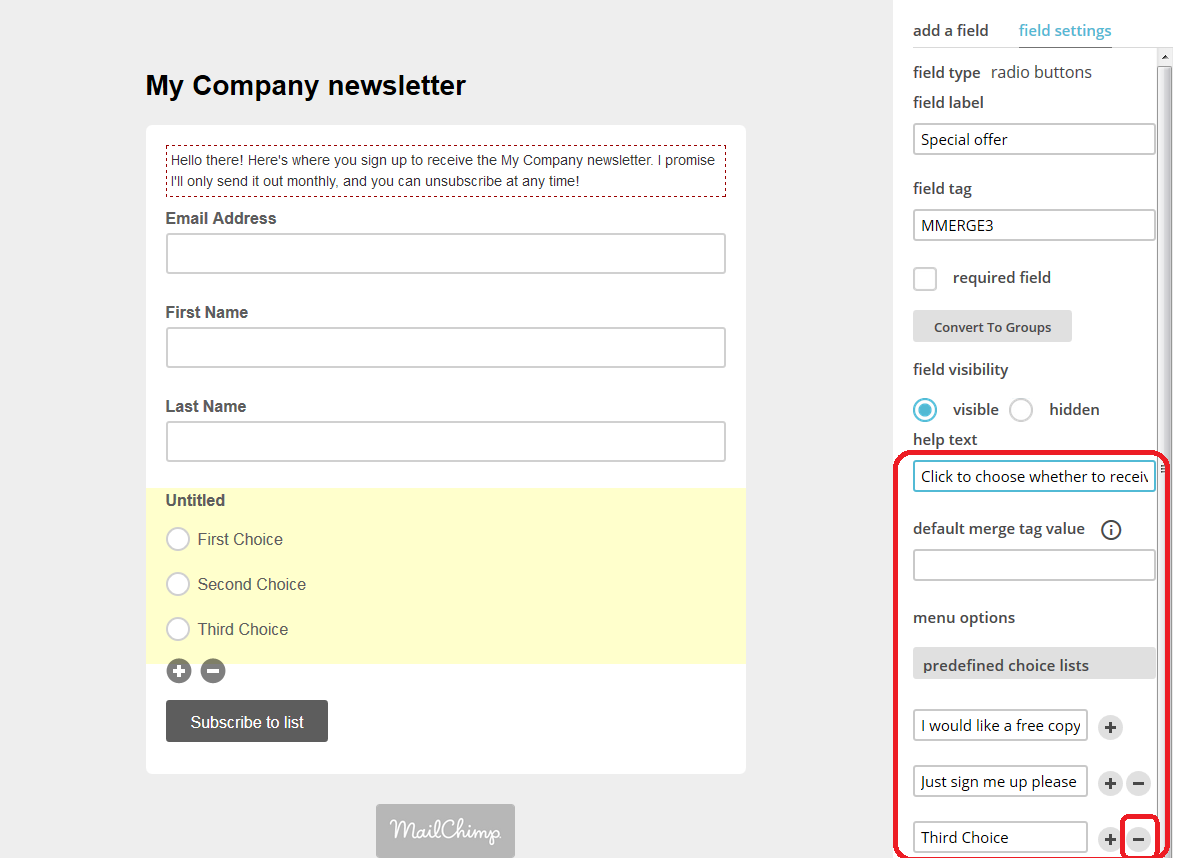
As you can see below, field settings allows you to give the radio buttons a name and to add text to those buttons, add and remove them, and generally personalise everything. Here I’ve …
- added help text to appear when the subscriber hovers over the buttons
- added two choices as to whether they want to receive something
- clicked on the minus button by the third choice, because I only want to offer two

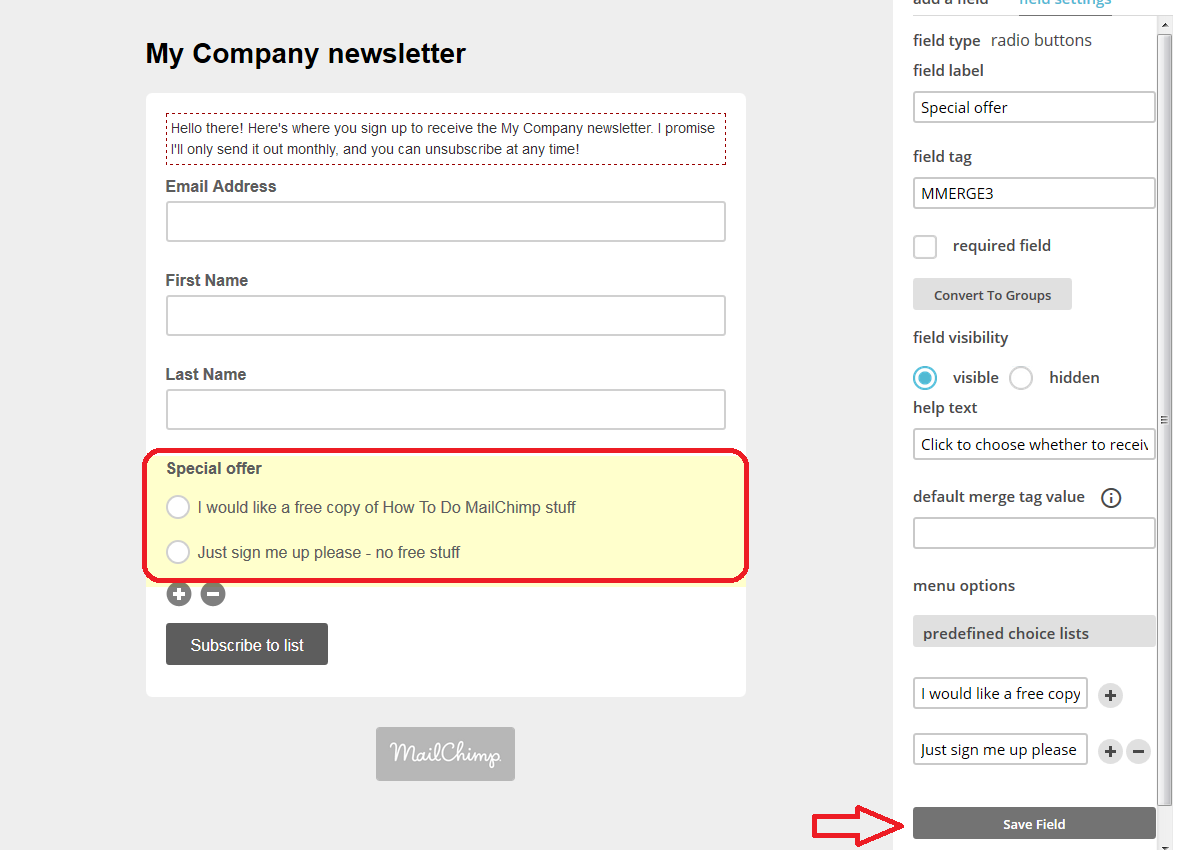
As you do this and press Save Field, there you can see just two choices, each with my text by it.

You can see plus and minus buttons under this area – this allows you to delete it if you decide not to have it (note, when you press the minus, MailChimp demands that you type the word DELETE in a box – make sure you do that or you’ll get stuck in a loop of endless error messages. It’s trying to help you not to delete your careful design by mistake …).
And there we have it – it’s fine to play around a bit with the form, you can see how to drag different fields across and then delete them if you want to, so have a play around with it.
How do I get back to my MailChimp sign-up form to check the URL or edit it?
If you want to return to your sign-up form, choose Lists from the top menu, then click the drop-down arrow next to Stats and click on Signup forms:

Once there, you can check your URL and amend your form if you want to.
What does my MailChimp sign-up form look like in real life?
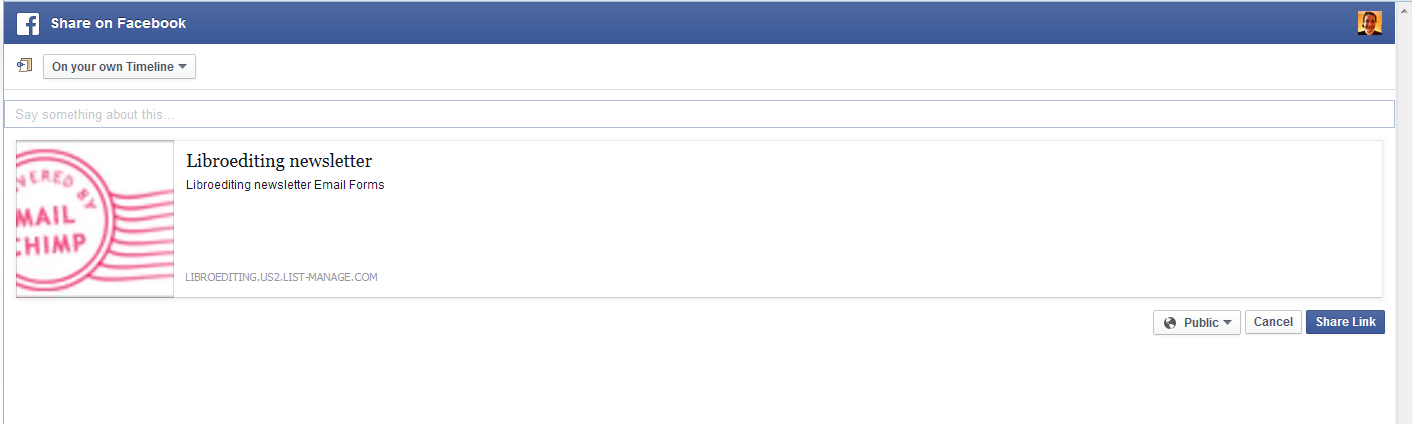
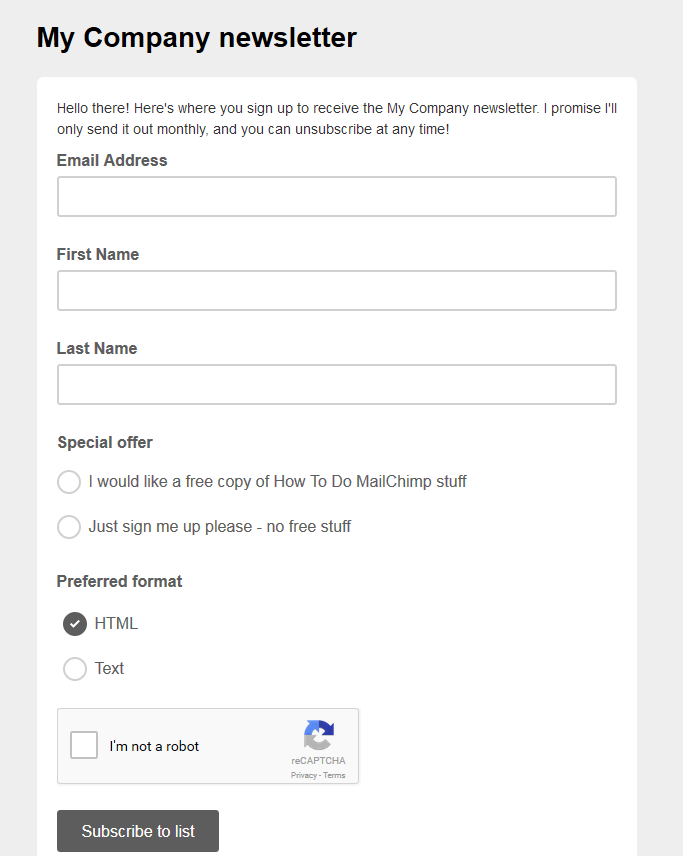
You’ve created your form – what does it look like to a new subscriber? Remember that URL at the top of the page? You can find that at any time by going to the signup forms page (see above section). Pop the URL in your browser address bar and you can see what your subscribers will see:

You can see the message we added and the options for receiving a free copy of something, receiving the newsletter in Text format, and a reCAPTCHA section which asks for a tick in a box, and a Subscribe to list button.
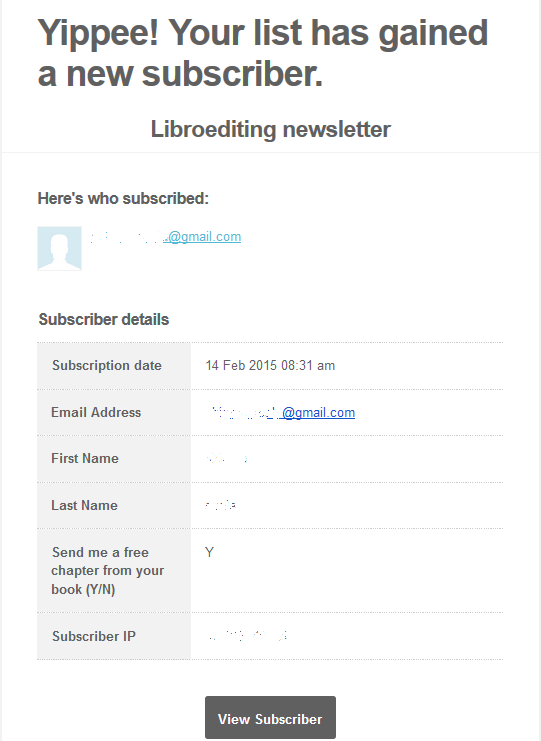
And what happens when you get a new subscriber?
You will receive an email in your inbox which includes all of the information you asked for – this is one of my own, so the question is a little different, but you get the idea. Now I can email that person their sample chapter and they will receive my email newsletter until they unsubscribe.

If you’re not sure how to publicise your sign-up form, read this article!
In this article, we’ve learned how to access the Lists part of MailChimp and set up a sign-up form. The other MailChimp articles will be listed below as I add them to the blog. You can find a growing set of articles on blogging, social media MailChimp etc. in my resource guide. Do click on the share buttons below or comment if you found this article interesting or useful!
Other relevant posts on this blog:
MailChimp 1 – Signing up
MailChimp 2 – Setting up your list and importing contacts
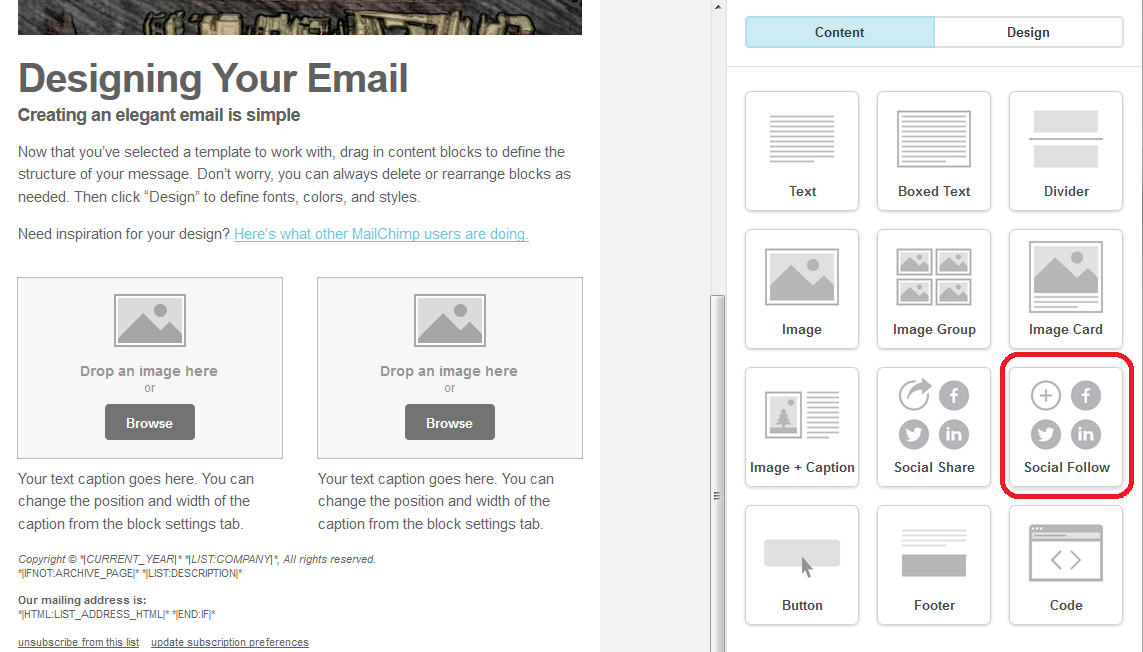
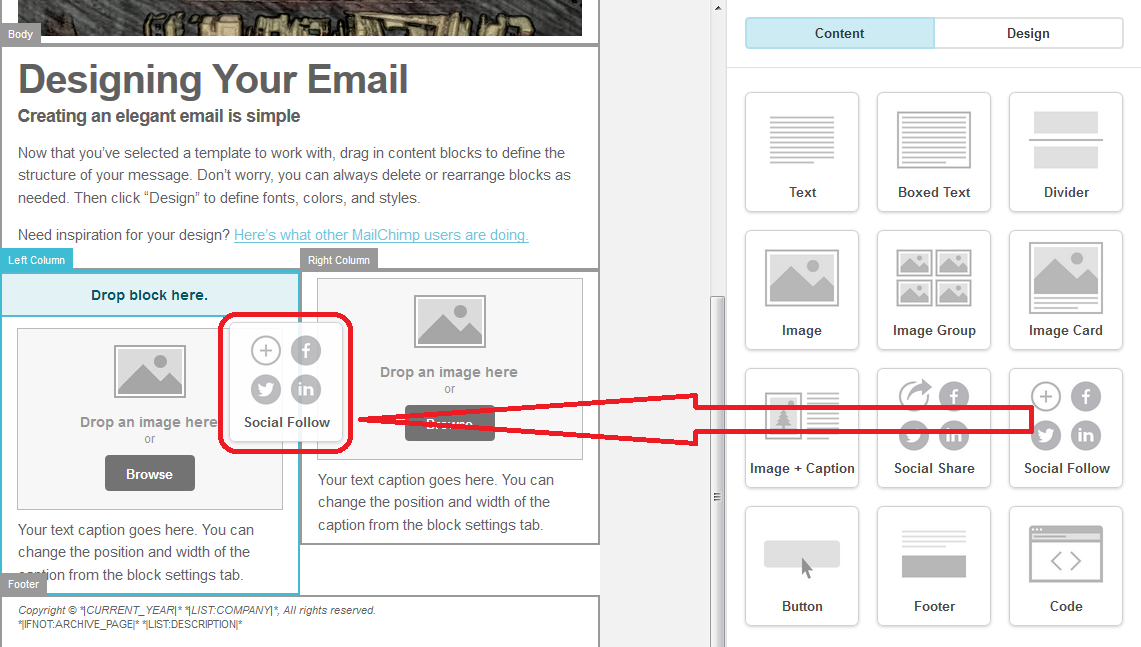
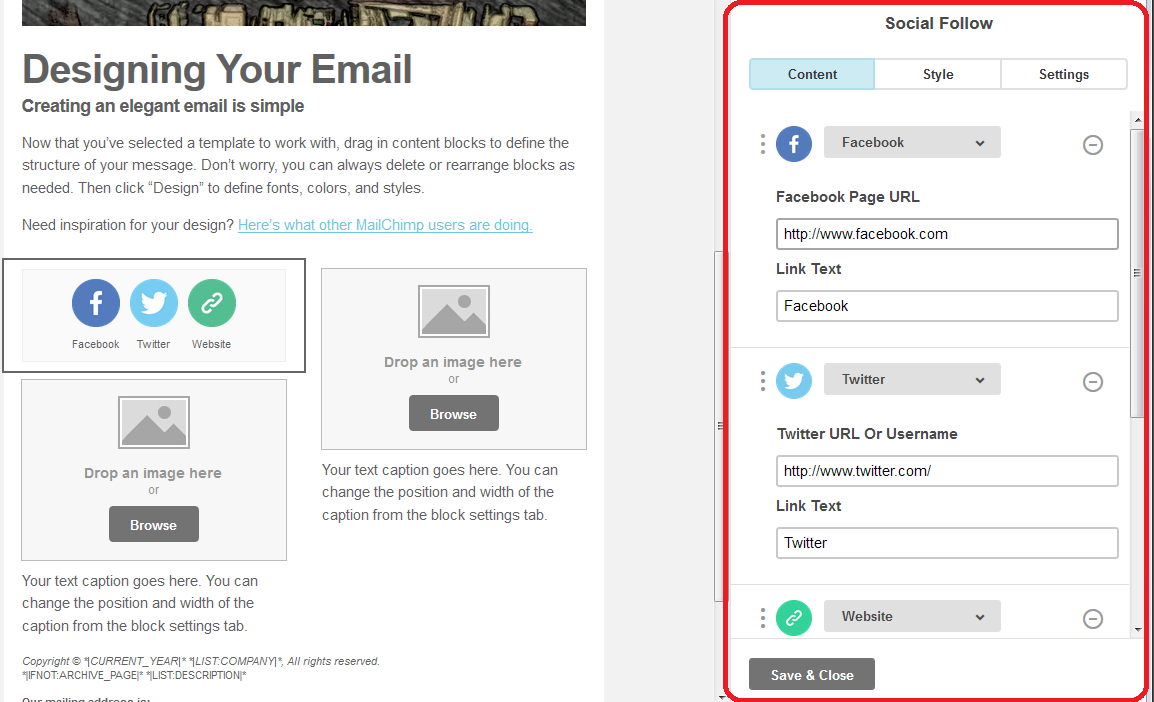
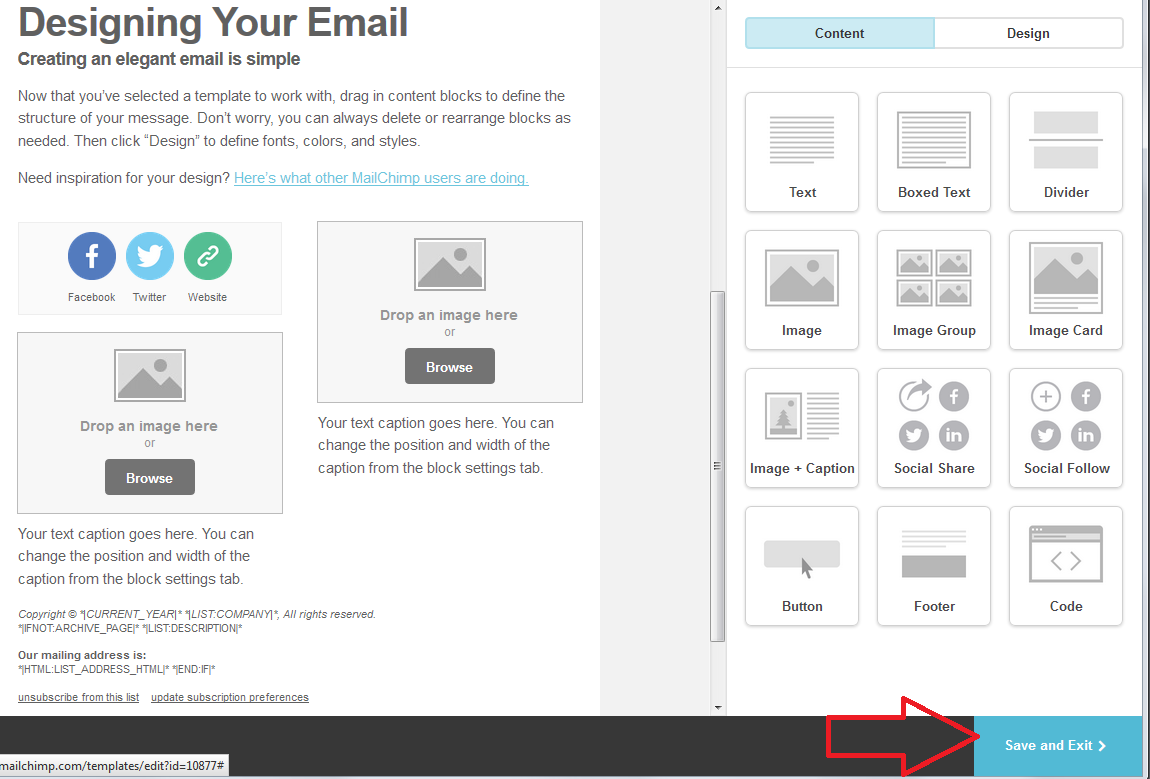
MailChimp 4 – setting up your newsletter template
MailChimp 5 – Linking to your sign-up form
How to avoid two common mistakes when using MailChimp