RSS

Category Archives: Writing

Guest posts 2: How to be the perfect guest

handshake

Getting guest posts published on other people’s blogs is generally considered to be A Good Thing. It can bring you new clicks, followers and even customers. But even if you’re being commissioned to write a blog post for someone else, there are some fairly unwritten rules that will help you to make it a success on both sides.

In this article, I share what makes a good guest blogger, from initial contact to thank yous and shares in ten top tips for being the perfect guest blog poster. I talk about being a good host here, by the way).

1. Do your homework

You’ve got a post you want to share and you think it’s a good guest post. Before you even contact the host to ask them to post it, do your homework. Check whether they have a guest post policy (I have one, and you can find a link to it on my main blog and in more detail on the Libro Full Time blog). Many busy bloggers will not even reply to you if you haven’t looked and noted any guidelines. I will give people a second chance if I have time – but not always!

Presumably you know the blog because you’ve been reading it already. Have a think about who the audience is. What sort of posts does this person publish? How does your prospective guest post fit in with them?

2. Pick your hosts wisely

Have a think about whether this person welcomes guest posts. Are they on your topic or are they specific interviews or on other subjects? Is this someone you’ve engaged with on a long-term basis? Have you liked, shared, commented on their posts for a few months already? If they know your name and where your expertise lies, they are more likely to welcome your guest post.

Note that common advice is to only guest post on blogs that are more popular than your own. You can look at their Alexa score and yours, for example, to see which is more popular. BUT, because part of my mission is to help other small businesses and colleagues, I’m happy to guest on smaller, newer blogs, like I did here and here, to help to promote them as well as myself.

3. Show that you’ve done your homework

When pitching to place a blog post cold, or when replying to a commission, make sure that the host knows that you’ve had a look at their blog, that you’re familiar with their style and content, that you have an idea who their readers are. Nothing annoys a blogger more than having a random person contact them saying “I have read your blog [on football] and I think this post [on nuclear physics] would fit really well, please post it and all my links as soon as possible”. Even super-polite old me doesn’t always reply to those ones!

4. Follow the guidelines

If a blog has guidelines for guest posts, like The Creative Penn does, for example, then do follow them! (These ones are very detailed because it’s a very popular blog with lots of guest posts, but as I said above, most people have them). In fact, if you can’t find any published guidelines, ask the blogger if they have any specifications as to the ideal length, angle, etc. Make your piece match these as closely as possible.

5. Don’t duplicate content

Google and other search engines do not like duplicated content. So make sure that any blog post you tout around is fresh, new content, not something that has appeared elsewhere or been pitched elsewhere. It’s fine to pitch the same post to several potential hosts as long as you do it in series not in parallel, i.e. you wait for the first rejection, then try the next blogger. Also see section 9 to avoid doing this on your own blog.

6. Help the host with the formatting

As we learnt in the last post on hosting guest posts, formatting text sent in by someone else can be a nightmare. If you really want to help your host, by all means write your post in Word so you can spell check it, etc., but then “save as” a plain text file with a .txt file (drop down the “save as” box when you’re saving and choose “plain text .txt”). Your host can then open the file in a text editor and paste it into their blog editor.

You can always send a Word version as well, so they can see any bold or italics or special formatting.

It goes without saying that you’ll spell check your post and – if necessary – have it checked by your proofreader first, doesn’t it?

7. Provide an author bio and links

To make it easy for your host, do provide a short author bio about yourself, and links to whatever it is you want to promote. I usually put together a few sentences on what I do and what I care about (this guest post by me has a good example which the host has altered slightly to fit her style and context) and then give the full URLs for the links, with an explanation of what they’re linking to. Some hosts will put the links under the text, some will put them next to the text, all should make them live.

8. Accept feedback and give feedback

Many bloggers who accept guest posts will want to tweak your article a little to make sure it fits their guidelines, style and readership. Please do accept this graciously – you’re playing round someone else’s house, so you do need to play by their rules.

I submitted one piece to a blog as a guest post, but it wasn’t what they were looking for. They came back to me with ideas for tweaks, but in the end I thought it was better to abandon that idea and do a whole new post for the other blogger. That was accepted immediately and proved popular with their readers. Not being one to waste some good text (and proving that it was fine as a blog post, just not as a guest post on that particular blog, I tweaked it to remove references to the original blogger and published it on my own blog!).

Once the piece has been published, have a look at it, and if there are any errors, do let the host know. Typical things to look for include spelling your name incorrectly and not putting live links on. If you spot anything like this, let them know right away and give them an opportunity to put it right. No one’s perfect, and I would certainly prefer my guests to let me know if there was a problem.

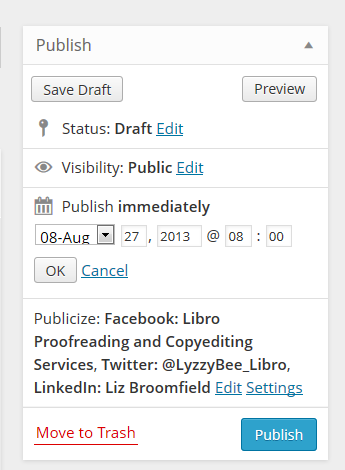
Related to this, though: don’t push. If you’ve submitted a request to guest and haven’t heard back, by all means drop one reminder or question a week or so later, but that’s it. For many bloggers, blogging isn’t their only job. Sometimes my blog has to come second to my paid work (I pre-write and auto-post, so even if it looks like I’m spending time on the blog every few days, I might not be!) and I’m sure other people are in that situation, too. Hassling will probably lead to a refusal!

9. Promote and share

Your guest post will build hits for and interest in both your host’s blog and products/services and yours. So get promoting and sharing on their behalf, since a hit on your guest post is likely to generate a click-through to your blog or other resource. I get a lot more hits on those posts that both my guests and I promote – AND because there are more hits, the click-throughs go up, too (this is particularly noticeable on my small business chats, when it can make a big difference). So you have a vested interest in promoting the blog on which you’re guesting.

One important point: don’t paste the whole of your guest post into your own blog. By all means write about it and link back to the original (this is a good example by one of my guests) but duplicating content over two different blog posts will make your content disappear down the search engine rankings very fast, as the search engines are suspicious of anything that looks like automated activity and will ignore two blocks of identical text.

10. Say thank you

It’s always nice to say thank you. So email the blogger who has hosted you and also put a public thank you out there on the social media. I’ve got a page on my blog where I list my own guest post requirements but also list all the guest posts I’ve placed – and that sends a few people over to my hosts every day.

———–

This post has talked about how to be a good guest blogger. If you enjoyed this post, please click some of the share buttons below or post a comment yourself – all are welcome! And if you have an idea for a guest post for this blog … do get in touch!

Related posts:

Guest posts 1: How to be the host(ess) with the most(est)

10 reasons to start a blog

10 reasons NOT to write a blog

Reciprocity and Social Media

Top 10 blogging sins

Scheduling blog posts and keeping going

 
9 Comments

Posted by on September 16, 2013 in Blogging, Business, Social media, Writing


Tags: , , , , ,

Using tables in Word 1 – Menus and options

This is the first in a series of articles about Tables in Word. It covers Word 2007 and Word 2010, and will include Word 2013 in time. The following articles will cover all of the different types of table and option in detail, as well as useful features such as how to retain your table heading line on every page of your document.

Why use tables in Word?

Tables can be a very useful way to show information in an easy-to-read form, and are essential if you have a lot of data – in words or numbers – to share with your readers. There are many different ways to construct tables in Word, so this post will show you the basics, then further posts will elaborate on each method.

How do I insert tables in Word?

To put a table into a Word document, you need to choose the Insert tab and then look for the (very small) Tables section. There you will find a Tables button

1 menu

Press the Tables button and you’ll be shown a grid followed by a list of other options:

2 menu

We will now take a quick look at all of these options in turn.

Insert table

The first option gives you a grid which you can highlight to create the table you want. The squares represent the number of rows and columns you want, although on the page, the columns will fit to the width of your page and the rows will be one line deep.

Move your mouse over the grid and the table will appear on the document behind the menu:

3 grid

Let go, and there’s your table (we’ll learn about adding and deleting rows and columns in another post).

Insert table (2)

The first text option on the list below the grid is, rather confusingly, also called Insert table. But if you choose this option, you’ll find a rather more familiar and in some ways simpler menu.

4 insert table

The Insert Table menu allows you to choose the number of columns and rows by moving the up and down arrows for each. We’ll look at the other options later. For now, these choices will give you a table five columns across and two rows down when you click OK:

5 insert table

Draw table

The Draw table option allows you to hand draw the cells of your new table.

6 draw table

The Table tab will open up and Draw Table will be highlighted. You get a cursor that looks like a pencil and you have to draw each cell with that (there’s an eraser next to the draw button).

7 draw table

I personally find this really fiddly to use: you do have to play with it a bit to work out what to do with it. But I suppose it must be useful!

Convert text to table

This is particularly useful if you’ve imported text or figures from another program. Highlight your text and choose this option …

8 convert

… and you can specify whether you want the columns to separate at each comma, full stop or other character. Apparently, Mr Libro always uses this option when he creates a table, creating the text first and then the table!

Insert Excel spreadsheet

This option allows you to have a mini Excel spreadsheet, with all its normal functionality, inside your Word document:

9 spreadsheet

Note: this inserts a blank, empty spreadsheet into your document:

10 excel

Once you’ve created your data and clicked away from the spreadsheet, you will have a table made out of your spreadsheet (click on it to amend):

11 excel

If you want to insert an Excel spreadsheet that you’ve already created into your Word document, you need to choose Object from the far right-hand side of the Insert tab

Insert Quick Tables

The last option in the list will allow you to choose from a ready-made set of sample tables …

12 quick tables

As you can see, this is particularly useful if you want to print out or insert a calendar!

——————–

This post has gone through the Table menu and the options it offers for inserting tables. In other posts, I will go into more detail about how to edit tables, add and delete rows and columns, etc. If you want to know more, subscribe to this blog (see links at the top left or add to your RSS reader) or keep your eye on the resource guide.

If you have enjoyed this post, please share the link!

Please note, these hints work with versions of Microsoft Word currently in use – Word 2007 and Word 2010, for PC. Mac compatible versions of Word should have similar options. Always save a copy of your document before manipulating it. I bear no responsibility for any pickles you might get yourself into!

Find all the short cuts here

 
1 Comment

Posted by on September 11, 2013 in Errors, New skills, Short cuts, Word, Writing


Tags: , , , , , , , ,

Guest posts 1: How to be the host(ess) with the most(est)

handshake

We know that placing your guest posts on other people’s blogs and hosting other people’s guest posts on your blog is A Good Thing. It increases traffic to both of your websites, gains you social capital, and gives you new, fresh and different content for your blog.

But how do you make sure that you do it right – for both you and your guest? Here are ten top tips to help you get the most out of hosting guest blog posts. If you only read and apply two of these, please make them numbers 7 and 8!

1. Know what you want

It’s all very well deciding to welcome guest posts onto your blog, but what do you want to achieve? Do you want to show different angles on your line of business? Allow so-called competitors space to talk? Give your clients some publicity? Help other people in your geographical area? Start to formulate a policy rather than having a scattershot and random approach. This will help your readers to understand why you’re hosting guest blog posts, and will help potential guests match their posts to your blog.

I accept guest posts on writing, especially on editors as writers and writers as editors. The more random ones I’ve posted up in the early days didn’t get many hits, because they didn’t really mesh with what I write about. The most popular – ones that chime with my experiences, and the odd Troublesome Pair or Be Careful post that someone has written from the heart.

2. Know what you don’t want

Once your blog has a certain reach, you’ll find that people get in touch regularly wanting to place guest posts. Many of these seem almost completely random, with almost no (or absolutely no) relevance to my blog. I might give these people a second chance, but not often. I realised early on that there wasn’t room on my blogs for random links to unconnected companies, or links to companies doing things that I didn’t quite approve of – I get a lot of requests for “guest posts” which are just ways for a company to place their client’s URLs in popular places and build their SEO, and a good number for links to student proofreading companies that I wasn’t entirely sure about.

3. Be clear on what you will and will not accept

Once you know what you want and don’t want, you can narrow this down to what you will and will not accept. Most of the guest blog posts you publish will probably be suggested to you rather than commissioned, and it’s up to you to say yes or no to these ideas. Personally, I will accept trial copies of relevant software or hardware but I’ll say if that means my review is effectively a sponsored post, but I won’t accept requests to place blatant ads. I might in future accept ads for products that I have reviewed, found good and am happy to recommend. I have got a few links that earn me an affiliate fee on my Links page, but I make it clear that I earn a fee from purchases coming from those clicks. Some people won’t take any ads, some will take anything that pays. I don’t mind what you do but it’s best to be clear about it.

So, once you know what will and won’t accept, get clear about it. I have a Guest Post Guidelines page on my other blog (linked to from this one) – I put it there because it linked in with my policy on reviewing books I’m sent. I refer enquirers there when they want to place a guest post with me.

4. Commission guest posts

I get a lot of requests for guest posts, but I’ve also commissioned them (and been commissioned to write them too – I was asked to write this one after chatting about exercise with a fellow attendee at a networking event). Commissioning doesn’t mean paying: it means asking someone if they’d like to contribute.

I have done this recently with a fellow editor who is less far along her business path than I am. She’s got a specialism in which I’m interested, and fits with what I do, but isn’t something I do, personally. So I’ve asked her to contribute a guest post on it, which will be interesting for my readers and get a link to her website on mine, too.

Another aspect of this is reciprocal posting. I did this recently with Tammy Salyer. I asked her to write a post on being an editor/writer, and she then commissioned me to write about 10 top tips for fiction writing. I’ve noticed a good flow of hits and referrals between the two posts – win-win for the two of us!

5. Don’t be afraid to give feedback

Once the post has been written and sent to you, rather than just publishing it as is or rejecting it wholesale, if there are aspects that I think could be changed, or I think the post needs major work, I will feed that information back to the poster. If there are minor spelling and grammar errors in Small Business Chats, I tend to change them silently (my initial instructions should make it clear that I’m likely to do that), but if there’s a more major content change, I will send a note to the poster before I publish (or reject)

6. Help people out

I try not to use guest posts just to give me me me more content, more hits, more interest. If I can give someone an opportunity to promote their book, service or specialism, AND it fits in with my blog and its readers, I’ll offer them a guest post or accept their proposal. I do care about hits, but I also care about helping people and promoting things that are of value. That’s why I’ve turned my own posts over to topics like Kiva and the Soberistas, and am happy to work in guest posts on topics that I feel are valuable.

7. Format the post

Most people will send their guest post to you in one of two ways: text in an email, or a Word document attached to that email.

Probably, like me, you usually write your own blog posts straight into the blogging interface you use – you hit “new post” and start typing. Fine, that’s all new text and it should format OK. If you copy text straight from an email or Word document and dump it into your blog interface in a “new post”, you are likely to end up with a mess.

This is because most emailing programs and definitely Word documents contain all sorts of invisible formatting commands that will carry over into your blog post and run paragraphs together, put it all in unfeasibly tiny print, and all sorts of other sins.

It’s easy to avoid this. Copy the text that will form your blog post and paste it into a text-only editor – most PCs will have Notepad installed as standard, for example. Paste it in there and then copy it and paste into your blog editor. Job done. You may have to reformat any links that the guest blogger has given you, but see the next point for how to work that one out.

8. Include links and an author biography

In my opinion, this is the most important one of the lot – and something that sadly I see going wrong quite a lot of the time.

If someone is decent enough to provide you with a guest blog post for your blog, be decent enough to tell your readers about them, and put links to their product / service / book / cat pictures / whatever they want to promote – and that’s LIVE LINKS, not just URLs that you can’t click through with – on the post.

This is a good example (I won’t share a bad one to save people’s blushes, but I’ve come up against this with my own blog posts). It includes an author bio with proper links that make sense and are in a different colour, so readers can find me and the book I wanted to promote easily.

It’s great to reciprocate, but the effort someone has put in to writing a guest post for you will be simply thrown away if you don’t provide links so that people can click through to them and their websites.

So make sure you ask your guest blogger for a quick biography and links to the things they want to promote (don’t assume!), and then place the links in the article.

If you don’t know how to create live links in your blog posts, read this article. Now.

9. Share and promote

Once you’ve published your guest post, make sure that you share and promote it just like you do your own ones. It’s nice to include the author’s name and link in any posting you do on Facebook, Twitter, LinkedIn and Google+ etc.

This extends to telling the author that you’ve published the article and where they can find it – send them a link to the URL. And ask them to promote it, too. That way, you can leverage the social capital of both of you – or in simple terms, get more people to look and click. And that’s really what guest posts are about!

10. Say thank you and feed back again

Once someone has been kind enough to provide you with a guest post, do say thank you publicly and privately. It’s also nice to let them know how many hits the post has had – say in the first week. You look at your stats for your posts, right? You can also let them know how many click-throughs they got to their website or other resource. Also let them know if there are comments on the post that you think they should see or even reply to – not every guest will bookmark it and check obsessively for comments. But don’t leave them to do all the responding – take part yourself, too. Again, this one is a good example – look at the comments, where both I and the guest poster respond to them in turn.

———–

This post has talked about how to be a good host to guest bloggers. Next week I’ll look at how to be a good guest. In the meantime, if you enjoyed this post, please click some of the share buttons below or post a comment yourself – all are welcome!

Related posts:

Guest posts 2 – how to be the perfect guest

10 reasons to start a blog

10 reasons NOT to write a blog

Reciprocity and Social Media

Top 10 blogging sins

Scheduling blog posts and keeping going

 
8 Comments

Posted by on September 9, 2013 in Blogging, Business, Social media, Writing


Tags: , , , , ,

What to do if your paragraph spacing won’t work in Word

This article tells you what to do if you think you’ve set your paragraph line spacing for the whole document but individual paragraphs refuse to behave. This is valid for Word 2007 and Word 2010, with Word 2013 to follow soon.

My spaces between paragraphs are uneven – help!

This just happened to me, which is why I’ve written up this article.

I was working on a bibliography for a client.

I set the paragraph and line spacing as I normally do: highlight the whole document, go to the Home tab, Paragraph section, and click the down arrow on the Spacing button:

1 paragraph and line space menu

This gives you the Spacing menu:

2 menu options

from which you choose your line spacing and lines after paragraphs options (I will write up a main post about this soon).

But it didn’t work!

Individual paragraphs still had no automatic spaces between then, even if I removed the line feed and pressed Enter again.

How to solve the problem of inconsistent paragraph spacing

Here’s how I did it.

I highlighted all of the text.

I right-clicked on the highlighted text and chose Paragraph from the options:

3 para

I then stayed on the Indents and Spacing tab and set my After spacing to 12pt and my line spacing to 2 (just in case). I also unticked Don’t add space between paragraphs of the same style (it was filled in with blue rather than ticked so I clicked twice to get a tick and then no tick):

highlight all

I pressed OK and the paragraphs all behaved beautifully.

I’m not entirely sure why this method works over the previous one, to be honest, but it worked for me and it was hard for me to find an easy, quick answer, so hopefully this will help a few people!

————————–

If you have enjoyed this post or found it useful, please share the link!

Please note, these hints work with versions of Microsoft Word currently in use – Word 2007 and Word 2010, for PC. Mac compatible versions of Word should have similar options. Always save a copy of your document before manipulating it. I bear no responsibility for any pickles you might get yourself into!

Find all the short cuts here

 
61 Comments

Posted by on September 4, 2013 in Errors, New skills, Short cuts, Word, Writing


Tags: , , , , , , , ,

How to maintain a good online reputation

a man's hands typingYou are your brand. I know that that sounds a bit marketing-speaky, but it’s true. If you run a business, people are going to look for you online as well as your business name. I can vouch for that, because I get loads of searches coming through to this blog for the people I feature in my Small Business Chat. Far more of them are looking for the person’s name than for their business name (if it’s different). Today I’m going to talk about my personal methods for maintaining a good and positive online image, with some tips which should be useful for you, too.

These tips mostly relate to social media, but you can extend them to anywhere where people see you, and your business, in operation, such as networking events, trade fairs, etc.

What do you mean by “You are your brand”?

This is particularly important if you run a small business or are a sole trader. However, even if you look at a  multinational, the person at the head of the company and the reputation they personally have has an effect on the perception of the company.

Think about Richard Branson. What about Theo Paphitis and Duncan Bannatyne? Remember Gerald Ratner and how he ruined his business with one sentence?

In the same way, when you go out networking, or you do stuff online, and you run a business (or even if you don’t), people are getting an impression of you which extends to the perception they have of your business.

My personal dos and don’ts

This is of course a personal list. Maybe you disagree? I know that I’m ultra-careful about my brand and company reputation, but I’d rather be ultra-careful than too relaxed. Reputations can be destroyed in an instant!

This is not about manipulating your image to sell more of your product or service; it’s about making sure that you’re representing your company in a positive light and making sure you match in your behaviour the message that you want your business to get across.

DO be yourself

It’s no good trying to hide who you are. Yes, if you’re shy, you can project more of an image of self-assurance, but also kindness, respect and care often come with shyness, and they’re good things for your clients to see. Personally, I’m very open and honest, and I try to give something back through charity donations and helping people. Therefore I have made small business loans to celebrate Libro’s anniversary and help out other small businesses with my weekly features, etc. I also keep my blog posts linked to what I do and my own practices – someone mentioned to me just the other day that my posts are very personal and friendly – which is how I hope my business comes across, too.

DO stay true to your morals and ideals

As an addition to this, I try to make sure that what I do with Libro mirrors my own personal morals and ideas. This is why I won’t put ads on my blogs unless it’s a testimonial for someone’s work that I know is good, and why I am very careful about the guest blog posts I publish (I recently turned down a fair amount of money offered to me to mention a blog hosting company on a blog post, because I was asked not to disclose that it was a sponsored post. Not my thing). I have also turned down work through my personal ideals.

DO be human

If you have a personal presence on social media, and even if you only have a business presence, make sure that the person behind the business shows through. This applies especially if you’re sharing your business posts on your personal account. I have a Libro Facebook page (where I make sure you can see photos of me and ask for feedback as well as sharing my blog posts) and a personal page, and I try to make sure I post more personal than business stuff on the personal page. People want to know the person behind the business, and they particularly don’t want the friend they’ve followed to turn into a corporate mouthpiece all of a sudden.

DON’T bombard friends with your business message

It’s very tempting to repost all of your business blog postings, etc. on to your personal Facebook and Twitter streams. It’s even more tempting to shoehorn a mention of your business into every comment you make to your friends. We all know at least one person who does this (I’ve been accused of it myself by one person, but I do try hard to keep the balance), and what does it do? It puts you off buying their goods or service. Sorry, but it does. Do share your business stuff with your friends, but not at the expense of the normal friend stuff!

DON’T moan about your customers

This one is oh-so-tempting, too. Especially if you work alone, sometimes you have to MOAN. Here’s the thing: moan, but don’t do it in public. Really, don’t. If you only follow one of these tips, follow this one. If you moan about a customer, even “just” on your personal Facebook timeline, how many of your friends might have been going to recommend your services to a friend, and might now not be inclined to. It’s unprofessional.

Of course, we do all need to moan, but this is what you do: do it in private. I set up a local homeworkers’ support group and an “Editors’ Rah and Argh” group on Facebook – as private, invitation-only groups. If we want to roar, sob or moan, we do it there, or in an email to a friend, or in a cafe, not in public!

DON’T talk about your customers at all, actually

Not only the moaning, but be careful what you say about your clients in public. I have Non-Disclosure Agreements with some of mine, which means no talking, ever, but even with the others, I do not identify them by name, when talking in public or writing about them in my book. I don’t Tweet to my music journalist clients, outing myself as their transcriber, unless they specifically mention it in public first. I don’t put their comments on my references page and CV before asking first. It’s just good practice.

DON’T let people see the frantic paddling, just the serene swan

Cash flow problems or upset by something? I might mention in the most general terms that I’m feeling a bit stressed, but I usually won’t. Although it’s good to talk things out, if you run a business, you don’t know who is watching. If you would be worried if a customer or prospect saw what you were writing, do it privately – create a filter or a private group on Facebook. If in doubt, don’t talk about it in public.

DO be appropriate

If you manage rock bands and hang out at heavy metal festivals, by all means swear a bit on your public tweets. If you earn your living editing, try not to have spelling mistakes and typos all over your blog (this is really hard to do – I know. Collect a group of friendly people who will let you know privately if such a thing occurs). I lead a pretty quiet life, but I do try not to swear or have inappropriate pictures of me all over social media. Obviously that’s easier the older you are and the less of your adult life has been lived in the full glare of social media, but you can always politely ask people to untag you from that hen party pic or horrendous shot from your younger days. If you explain politely that your business is linked to your name, and you’re worried about affecting it, most people will surely comply with that! You can also untag yourself from Facebook posts and pictures and set up your profile so that you have to approve all tags, if you’re at all worried (thanks to Linda for that tip!)

My golden rule for maintaining a good online reputation

This is my golden rule. I’ve stuck by it ever since I started having an online presence:

Never say anything in public online that you wouldn’t be happy shouting out loud in the middle of Birmingham.

What if your reputation is already less than stellar? I think that’s a post for another day, don’t you?

Related posts:

10 reasons to start a blog

10 reasons NOT to write a blog

Reciprocity and Social Media

Top 10 blogging sins

Scheduling blog posts and keeping going

 
22 Comments

Posted by on September 2, 2013 in Blogging, Business, Social media, Writing


Tags: , , , , ,

How do I print out table headings at the top of every page in Excel?

I recently wrote about retaining your headers across multiple pages in a Word document. This post will tell you how to make your header rows (or columns) in Excel 2007 and Excel 2010 print on multiple pages when you print them out.

What is the header row in Excel?

The header row is the row in a spreadsheet that contains the headings for all of the columns in your spreadsheet. It’s usually Row 1, or maybe a few rows at the top of the spreadsheet.

(If your columns have headings in Column A instead or as well as your rows, you can use all of the stages in this post but choosing the columns option where appropriate, or both.)

1 spreadsheet

Why would I want my header rows to print out on multiple pages?

If you’ve got a complicated spreadsheet that you want to print out in a report, as a handout, or as a pdf, it’s useful to have the header row show on every page. When you’re using Excel itself, you can freeze the rows and/or columns so you can see them as you scroll down. But this doesn’t carry over to the printout.

How do I check if my header row will be printed on every page?

To check what the printout will look like, you need to change from the standard Normal view of your document (see the first image in this post) to the Page Layout view.

To do this, choose the View tab, then the Workbook Views section and press the Page Layout button. Your view will change to what the document will look like on the page (this is also where you add headers and footers to an Excel document – more on that another time)

1 view menu

If we scroll down to the second page of our document in this view, we can see that the second page just starts with the next line of the spreadsheet – not very useful if you want to be able to see the headings at the top of each page:

2 no headers

How do I make the heading row print at the top of every page?

Staying in the Print Layout view, choose the Page Layout tab and look at the Page Setup section. In the bottom right corner, you’ll find a little arrow. Click on the arrow to access the Page Setup menu:

3 page layout menu

The Page Setup menu will default to showing you the Page tab. Click on the Sheet tab at the extreme right:

4 page setup menu

At last we’re in the Sheet menu. This is where you can choose the print area, titles, gridlines, quality, etc., but what we’re interested in is Rows to repeat at top (and/or Columns to repeat at left, if you have either or both of these):

5 page setup menu sheet

Now, how do you tell Excel which row you want to print at the top of every page? I got a bit flummoxed by this at first, I have to admit. Here’s how you do it:

Make sure your cursor is in the appropriate input box – in this case I have left-clicked with the mouse in Rows to repeat at top.

Then click with the mouse on the far left of the row you want to select. Can you see the dotted line round it on the image below? That means that it’s been selected. If you just click on one row, $1-$1 will appear in the text entry box. If you highlight more than one row, it will read $1-$2, etc.

6 page setup menu sheet choose

If you want to make sure that a heading column appears on every page of your printout, make sure the cursor is in the Columns to repeat at left box and click above the column you want to choose. You can choose a row(s) and a column(s) if you want to!

Once you’ve clicked on OK, you can scroll down in Page Layout view to see the top of the second page. There are the headings, ready to print on every page! You can change back to Normal view: the instructions that you’ve given Excel here will stay the same.

7 done

We’ve learned how to make sure that your heading row (or column) prints on every page of your printout when you’re printing out your Excel 2007 or Excel 2010 document.

If you’ve enjoyed this post, please do share it using the buttons below!

Related posts:

Freezing rows and columns in Excel

How do I keep my table headings over multiple pages in a Word document?

———————

This is part of my series on how to avoid time-consuming “short cuts” and use Microsoft Office in the right way to maximise your time and improve the look of your documents.

Please note, these hints work with versions of Microsoft Excel currently in use – Excel 2007 and Excel 2010 for PC. Mac compatible versions of Excel should have similar options. Always save a copy of your document before manipulating it. I bear no responsibility for any pickles you might get yourself into!

Find all the short cuts here

 
54 Comments

Posted by on August 29, 2013 in Errors, New skills, Short cuts, Word, Writing


Tags: , , , , , , , ,

Scheduling blog posts, scheduling writing, and keeping going

Things to doAs part of my series on blogging, in this article I’m going to talk about how frequently to blog, keeping going, and how to get down to writing those posts. This is primarily aimed at people who are blogging for their business, but this advice applies to anyone who wants to build the audience for their blog and needs help getting down to writing posts and sticking to blogging.

So that’s everyone, right?

How often should I blog?

How often should you publish a blog post? Well, that’s up to you to a certain extent. But if you’re looking to appear high up in the search engine results and keep your readers happy, you should keep it regular.

Most advice that I’ve read suggests posting at least twice a week. This will keep your readers engaged, keep your content updated enough for the search engines to promote it up their lists, and get enough keywords and content out there to keep your statistics nice and busy.

Varying your blog posts

Even a book review blog could do with a bit of livening up every now and again. A good example is my friend Ali – she mainly posts long-format book reviews, but she also takes up general topics or talks about book-buying trips – which varies things for her readers and gives them something new every now and again.

I choose to vary things and give myself a structure by running series in different topics every week. I tend to publish a short Troublesome Pairs post about a pair of easily confused words or at present an article on blogging on a Monday, a Word tip or business post on a Wednesday, and I always run a Saturday Business Chat or Chat Update each Saturday. I don’t stick to this slavishly – this post is coming out on a Tuesday to avoid the bank holiday, but it helps me to structure things and means that there’s something for everyone every week (I hope).

You don’t have to just publish text pieces, either. I’m sticking to text for the moment, but you can include video and audio pieces as well.

This article by Joanna Penn of The Creative Penn has really good advice about when she schedules her text, audio and video content. Her blog is really popular, with loads of comments and great search engine optimisation, and if you’re planning on using different media, this would be a good plan to follow.

Including guest posts on your blog

I’ve talked about this a bit already in my article on Reciprocity in Social Media, but hosting guest posts (and having them on other people’s blogs, too) is a great way to spark up interest in your readers and get reciprocal links and readers. I’m going to write more about the etiquette of guest blogging soon. But again, it varies things a bit. I wouldn’t personally have a guest post more than once every couple of weeks.

How do I remember my ideas for blog posts?

If you’re anything like me, you’ll have ideas and inspirations for blog posts at the oddest moments. If I’m anywhere near my desk and PC, I pop into my WordPress platform and create a Draft blog post, sometimes with just a title, sometimes with a few jotted notes. If I’m learning something new (like turning footnotes into endnotes, just today), I’ll take screenshots as I go along, and save them ready to insert into a post on the subject. If I spot a picture I want to take or have a document with a feature I want to use, I take a photo and email it to myself or save the document in the relative folder.

If I’m out and about, I use the note app on my phone to make a quite note of what I want to write about, or, if I’m feeling brave, I go into the WordPress app and create a draft from there!

How do I organise my images for my blog posts?

Because many of my blog posts are very screen shot based, and I always include some kind of image in my posts (looks good when sharing, attracts readers, etc.), I have a folder in my Windows Explorer called Blog posts. This has sub-folders for all of the blog posts I write, or plan on writing, so I can pop screen prints and pics into the appropriate folder and know they’ll be there for later. I have a set of generic pictures in the Blog posts folder, too, that I can use as images at the top of posts. I prefer to use my own images to avoid copyright issues.

How do I get down to writing my blog?

Here’s my secret: blogging SESSIONS.

You do not have to write your blog posts on the day you publish them! You can write them in advance, save them up, and publish in advance!

I’ve always got some draft posts on the go – either because I’ve had ideas (see above) and not yet written them up, or I’m part way through a series and I’ve planned the whole thing out. So when I can see at least a 90 minute slot in my schedule, I’ll schedule in time to write blog posts.

I’ll then bash through as many as I can, using my draft posts for inspiration and possibly already having pictures ready to go, either saved or inserted into the posts. Then I just need to write the text. In a good session I can get at least a week’s worth of posts ready in one go.

I’m used to having to write because that’s some of what I do in my job. If you have to wait for inspiration to strike before you write posts … just make sure that inspiration has plenty of room to keep going! Anyway, it’s surprising what you can produce when you sit down and tell yourself that you have 90 minutes to generate a load of blog posts!

Scheduling publication of blog posts

schedulingI would imagine that all blogging platforms have a scheduling feature. Here in WordPress, I can edit the Publish Immediately field to the right of my writing pane, and choose a date and time to publish the post (I also automatically post a link to Twitter, Facebook and LinkedIn. This means I can schedule a post to publish when I’m going to be away from my desk and the post will still be publicised).

If you don’t know how to schedule blog posts on the platform you’re using, Google your platform name plus something like “schedule blog posts” and you should be able to find instructions.

So, when I do a big writing session, I write the posts I want to write, then schedule them all in for the appropriate days. I can view just the posts I’ve scheduled to make sure there aren’t any clashes, then I can get on with work or even go on holiday, knowing that my blog will be publishing when I’m away.

How do I make myself keep on blogging?

If you get stuck and don’t post for a while, or don’t feel like posting, don’t panic! Here are some things you can consider doing:

  • Have a think about why you’re blogging and whether you do actually want to continue (try reading my article on 10 reasons not to blog or the one on 10 reasons to write a blog!)
  • Have a little brainstorm and think of some ideas for blog posts – just jot them down and write them up later
  • Get into a writing routine that suits you – whether that’s posting once a day or having a weekly blogging afternoon
  • Sign up for one of the various schemes that suggests something to post, or ask your friends or readers to make suggestions about what to write about
  • Consider creating some themes – it’s easier to come up with an idea for a Word tips post than an idea for “a post”
  • Don’t beat yourself up. Look at other people’s posts for inspiration. Ask for some guest bloggers. Review something you use in your work life. Write about something personal

————–

This article has talked about how often to blog, how to organise your blogging, how to schedule posts and what to do if you get stuck. I’d love to hear your thoughts on these topics – do post a comment, and if you’ve enjoyed this post, please share it using the buttons below.

Related posts:

10 reasons to start a blog – why you should do it now!

10 reasons NOT to write a blog – and why you should stop and think, at least!

Reciprocity and Social Media – how to negotiate social media kindly and politely

Top 10 blogging sins – avoid these if you can!

 
20 Comments

Posted by on August 27, 2013 in Blogging, Business, PowerPoint, Social media, Writing


Tags: , , , , ,

How do I keep my table headings over multiple pages in a Word document?

If you have got a table that extends over several pages in a Word document, it’s useful to be able to repeat the header row at the top of each page automatically, so that it stays there no matter what you change in the table itself. This article shows you how to do that in Word 2007 and Word 2010 (we use the same procedure for both)

Why would I want to repeat my header row on multiple pages?

If you’re presenting a table which contains fairly self-explanatory information, for example, name, surname, book title, year, then you probably don’t need to repeat the heading row, even if the table runs across more than one page. But if you think that the person who will consult the table will need to keep reminding themselves about what the different columns contain, it’s useful to add the header row at the top of each page.

Doing this automatically rather than manually inserting a new row into each page of the table ensures that however much the table changes, the header row will stay at the top of each page.

How do I repeat the header row in Word?

We’re going to use the example of a list of books I have read. Here’s the table:

1 table

Now, this is a long list, and it goes over more than one page. OK, it’s fairly self-explanatory, but I might forget what the Acquired and Read headers are.

At the moment, when the table goes onto the next page of the document, the table just carries on, with no  header rows on the second and third pages:

2 table

Please NOTE that we’re in Print Layout view on the View menu at the moment: when we repeat the headers, the repeat is only visible in Print Layout or Print Preview, both of which show you what your document will look like when it’s printed. Word defaults to Print Layout view, but check, just in case:

3 view

Select the header row of your table so that you can tell Word that this is the header row by left-clicking with your cursor to the left-hand side of that row:

4 select

Now, because you’ve got a table in your document, Word will have added the Table menu tabs to your ribbon. There are two: Layout and Design. Choose the Layout tab. Find the Repeat Header Rows button:

5 repeat header rows

Click on the Repeat Header Rows button. Like magic, if you scroll down the page, you will now see that your header row is repeated!

6 repeat header rows done

Note: if you don’t have a row selected, the Repeat Header Row button will be greyed out and you can’t press it.

Here’s the magical thing: you can of course do this manually by inserting a row at the top of each page of your table. But then, if you move the text of the table around or resize it, you risk your manual header row not being the top row of your page.

Using the automatic function means that, whatever you do to your table, the top row of a new page will always be the header row (UNLESS you force a manual page break).

Here, I’ve changed the text size to make it larger. You can see that the first entry on the second page is no longer Coleridge, but the header row is still in place:

7 repeat header rows done

How do I repeat multiple header rows in Word?

You can display multiple header rows in Word in the same way. Make sure that you highlight BOTH rows that you want to repeat, and press the Repeat Header Rows button as before:

8 repeat multiple header rows

And there you go: the first two lines of the table repeat on each page:

9 repeat multiple header rows done

How to repeat header rows in Word 2003

In Word 2003, you will need to use menus rather than the ribbon.

Highlight the header row of your table.

Select the Table menu and click Heading Rows Repeat.

———–

Today we’ve learned how to make the header rows repeat in a Word document. This is part of a series on Tables which I’ll be writing and publishing over the next few weeks.

Related posts:

Tables 1 – how to create a table

Please note, these hints work with versions of Microsoft Word currently in use – Word 2003, Word 2007 and Word 2010, all for PC. Mac compatible versions of Word should have similar options. Always save a copy of your document before manipulating it. I bear no responsibility for any pickles you might get yourself into!

Find all the short cuts here

 
61 Comments

Posted by on August 21, 2013 in Errors, New skills, Short cuts, Word, Writing


Tags: , , , , , , , ,

Top 10 blogging sins

pens and ink bottleI’ve been talking about why and why not to blog recently. Once you’ve committed to your blog, it can be a bit of a minefield. Here are the top ten blogging sins that I see over and over again, or hear other people complaining about. No one can be expected to know everything straight away, and we’ve probably all made at least one of these mistakes, so hopefully I’ll help you to avoid the big, bad ones with this list.

1. Not having an RSS feed

File:Feed-icon.svg RSS is a way to allow blog reader software to collect your content whenever it’s  updated and send it on to any of their readers who subscribe to your blog This Wikipedia article explains it all and examples of RSS readers include Feedly.

If you look at the top of this blog page, you will see that I have an RSS feed logo in the top right-hand corner, and a link in the right-hand menu bar, and I also offer a link to subscribe by email. All blogging software will have something in their settings that allows you to add this. If you don’t add this link, it makes it that bit harder for people who want to subscribe to your blog to do so (they can usually put the URL in their reader software, but are they going to do that extra process? Not always). Not having a button to use to do it quickly and easily can give the impression that you’re not interested in people reading your blog. That’s probably not true. But I’ve seen people get really cross about this and say that they’re not going to look at a person’s blog any more if they don’t have this. I know … but if one person’s saying it, how many are thinking it?

If you get stuck trying to add this button to your blog, the easiest way to find out how, is to Google your blogging software’s name and “RSS feed button”. You should find a YouTube video or set of instructions telling you how to do it.

2. Not updating your blog

If you set up a blog and you then don’t update it, it won’t help you to get more readers or to promote whatever it is you’re promoting. Google and the other search engines thrive on updated, fresh content. If you don’t update your blog regularly, it will fall further and further down the search rankings and no one will be able to find it. If you want to write a blog, commit to updating it regularly.

I’ll be publishing a post about scheduling and keeping active with your blog posts soon, so watch this space!

3. Stealing content from other people

It’s fine to “reblog” other people’s blog posts onto your own blog (where a snippet of the post appears on your page, with a link to the real thing). It’s fine to link to other people’s blog posts and tell other people about them. It’s even fine to be inspired by another person’s blog or content – one of my friends has started a questionnaire series a little like my Small Business Chat one but with an emphasis on marketing techniques: similar idea, different content, that’s fine.

It’s not fine to lift content wholesale from another person’s blog or website. If you quote large amounts of text written by someone else, it’s just the same as if you were using that in an article or essay – you need to reference where it came from and acknowledge the author. It’s fine to talk about newspaper articles or reports in your blog and react to them, not fine to quote them verbatim, or quote people they have quoted, and not give the original source.

Never be tempted to take someone else’s content for your blog post. At best, you won’t get picked up by the search engines anyway (see below). At worst, you’ll find yourself slapped with a lawsuit for plagiarism! And it’s just not right.

4. Reusing content in exactly the same form

Say you’ve had a guest post on someone else’s blog and you’re really pleased with how it’s turned out – so much so that you want to share it. So you post it in its entirety on your blog, too. Not a good idea.

All of the search engines, like Google, like to offer their users varied content. So if the same content appears in two places, both places won’t come up in search results. Effectively, one of them will be invisible to search engines, therefore invisible to people searching for keywords that might lead them to that content.

To look at it from a different viewpoint, if you’ve published information in a guest post, the owner of the blog you’re guesting on will want to be posting up original content, not things that can be found elsewhere. Some people actually specify that the content must be original in their guidelines for guest posters. See more about this in a week or so when I blog about guest posts.

How do you deal with this? Publish a snippet of the post on your blog, with a link to that post. Put some of your own text around it, then the search engines will find your post and your guest post, both of you will get found and viewed, and no one’s copied anything. There are clever ways to deal with all of this in the coding behind your blog, but I’m guessing that most of us aren’t the kind to deal with that level of complication – I’m certainly not!

5. Being rude or negative

I feel like a  bit of a hypocrite writing this, because obviously this post is a little bit negative. But I’m also genuinely trying to help people to avoid making common mistakes! In the same way, I tried to make sure that my 10 reasons not to write a blog article talked about reasons for reviewing your blogging and content and making a positive decision. Whining and moaning and relentless negativity won’t make your readers like you any more than they would like you in real life.

Being rude can get you views in the short term. But it’s like those restaurants that people go to only because the waiters are desperately unfriendly. Fine for a laugh: but will they go back regularly for birthdays and anniversaries? Probably not. Even ranty blogs about politics or issues have to be constructive as well as rude!

If you want to have a rant or talk about a mistake you’ve made, try to vary and space out these posts, and make them as constructive as you can. We can all get a good blog post out of a bad experience, but make sure that you and your readers come away having learned something. I’m going to post soon about managing your social media brand, and this comes very strongly into that, too.

6. Posting inappropriate content

I don’t just mean lurid or dirty pictures here. If you want to share information about your management courses, then blogging about your exercise classes won’t get you the audience you want to buy your courses, unless you’re doing some very clever keyword placement and making the articles valuable to both groups of readers.

I have to admit to having a laugh at funny spelling mistakes as much as the next person. However, I’m careful not to mock or talk about or post pictures on this blog, because a lot of the people I work with as an editor are unsure about their English and using it as a second, third, fourth language … and would be mortified if they thought people were laughing at them (I don’t laugh at their English: I know I couldn’t do half as well as my overseas clients if I was writing in my second language. Bong joor toot le world).

7. Not giving your guest posters what they need

If someone takes the time to write a guest blog post for you to to give you more, fresh content, bring their fans over to your website, give you a marketing opportunity, etc., etc., then you need to do certain things to make the experience a good one on all sides. Chief among these, and something I see people having issues with all the time, is making sure that you provide live links back to their website and whatever it is they’re promoting, be it another website, their book on Amazon, or whatever. A live link is one that your readers can click on and be taken to their page, like this one which takes you to a post I wrote telling you how to add links to your blog posts!

Formatting guest posts that have come through in an email or an attachment can be tricky, full stop. I recommend pasting the text into a Notepad file on your computer, then pasting it from there into your blog post. Lots more on this in an upcoming article. But please make your guest blogger’s links live so that your readers can visit them online!

8. Not letting people respond to your posts

I like responding to blog posts. We all like responding to blog posts. We like to feel it’s a two-way conversation when we read something online, don’t we. But I still come across blogs every day that either don’t allow any comments at all, or make the commenting process so complex that people give up.

I have to say that the blogging software can be a culprit here. I can never seem to reply to Blogger posts, and WordPress itself can give the impression that you have to sign up to a WordPress account in order to comment on one of its blogs (you really don’t, you just need to add your name and email address).

Enable comments, even if you moderate and check all of them for spam (most blogging platforms allow you to set the level of moderation, for example, I hand-moderate the first post by anyone, and am alerted to all new comments, so I can check they’re not spammy or inappropriate). And listen to your readers – if you’re getting complaints about how hard it is to reply to a post, have a look at your settings and see if you can make it easier. One of my blogging friends has a note whenever you go to comment with an email address to use if the process won’t work – very helpful!

9. Not responding to comments

Allied to the above, if people take the time to reply to your blog, it’s only polite to take a moment to respond to them. Some people who get a lot of comments will do a general reply mentioning all of the previous commenters with a sentence addressed to them, and that’s of course fine. But I get a bit frustrated if I comment thoughtfully on a blog post and the author never responds. You don’t have to do it immediately, but I try to do it within 24 hours, a couple of days at most.

Conversations on your blog can be one of the most interesting things about blogging – so get out there and engage with your readers!

10. Only advertising, never helping

Yes, I and other people have told you again and again that having a blog will help your business. That’s true. But just blaring out adverts to your readers won’t make them keep coming back. Imagine two blogs, both about plumbing:

  • One lists the different areas of plumbing the plumber can do, and has carefully inserted keywords to attract the search engines
  • One talks about the jobs the plumber has done this week, including how she solved a particularly tricky question. She sometimes posts a question and answer about a common type of issue, like changing the washer on a tap

Which blog will you go to once, to find a plumber? Which one will you bookmark and read, share and tell other people about? Which one will actually bring the plumber more business in the long term?

I give away quite a lot of free advice on my blog, but just because I tell people how to set up a table of contents doesn’t mean that none of my clients ever ask me to do that now. On the contrary, seeing my expert advice, they trust that I can sort it out for them!

———–

That’s my personal top 10 list of blogging sins. Would you add any to that? Are any of those NOT sins in your book? I’d love to know what you think, and whether you’re enjoying this new series of articles all about blogging!

Related posts:

Top 10 reasons to write a blog

Top 10 reasons not to write a blog

Scheduling blog posts and keeping going

You can find a growing set of articles on blogging and social media in the resource guide. Do click on the share buttons below or comment if you found this article interesting or useful!

 
35 Comments

Posted by on August 19, 2013 in Blogging, Business, New skills, Writing


Tags: , , , , , , ,

Portrait and landscape orientation in Word and Excel

In this article, we’re talking about the Portrait and Landscape orientations in Word and Excel, what they are, why you might want to use each one, and how to swap between them.

What are Portrait and Landscape?

Portrait and Landscape are the terms used for the orientation of the page in applications that deal with pages, such as Word and Excel. Orientation means the relative position of the page when you’re looking at it:

1 pages

Portrait means that the page has the shorter sides at top and bottom. Think of a portrait in a gallery or museum. They are usually this way round. Landscape means that the page has the shorter sides on the left and right. Again, think of an art gallery. Which way round are views painted of the landscape? Exactly.

Why would I want to use the landscape orientation?

Word and Excel documents default to being in the portrait orientation. That’s the format of most books, reports, folders, etc. But landscape can be very useful if …

In Word

  • Your layout is such that it comes out wider than it’s high – maybe a poster or a sign to put up in your office or building
  • You have a wide table to insert into the document with lots of columns and it gets too squashed up and hard to read if you try to fit it onto a standard portrait A4 page
  • You have a diagram to insert into the document that’s wider than it’s high
  • You have a picture to insert into the document that’s wider than it’s high

In the last three incidences, you might only want one page of the document to appear in landscape. That’s easily done, and you can find out how to have portrait and landscape in one document here.

In Excel:

  • Your spreadsheet is too wide to fit comfortably onto a portrait A4 page

How do you change between Portrait and Landscape in Word 2007 and Word 2010?

You swap between Portrait and Landscape using the Orientation menu in Word. This can be found in the Page Layout tab, in the Page Setup section:

2 menu

Press the Orientation button (or the little arrow at the bottom) to access the menu:

3 menu

Choose your orientation, and the whole document will change to that orientation, unless you’re only changing one section (see below)

How do you change one page in Word to be in Landscape?

To change one page in Word to be in Landscape, you need to set Section Breaks first, so that Word knows which pages you want to change. See this post on Section Breaks for instructions on how to do this and change just one page or section.

How do you change between Portrait and Landscape in Excel 2007 and Excel 2010?

Changing the orientation in Excel works in exactly the same way as doing it in Word. Find the Orientation menu by going into the Page Layout tab and Page Setup section:

4 excel

Then press the Orientation button to make your selection.

How do you change between Portrait and Landscape when you’re printing?

Sometimes you don’t realise that you need to print your document in Landscape rather than Portrait (it’s usually this way around, I find) until you have printed out one copy and find that your lovely picture or table falls off the edge of the page.

You can change the orientation of the printing while printing – however, the orientation of your original document will NOT change if you use this method, and if you want it to change to Landscape permanently, you will need to go back and follow the instructions I give above.

If you want to change the orientation of your printing (in Word or Excel or when you’re printing off a web page or a map or anything!) …

First, select the Print option. When the Print dialogue box comes up, click the Properties button:

5 printer

You will usually then be given a screen something like this which will have a Features tab:

6 printer

Find choice buttons for Portrait / Landscape, select the one you want, and OK, and then your printout will be in that orientation.

—————–

In this article we have learned what the portrait and landscape orientations are, why they are useful, how to change them in Word and Excel and how to change orientation when you are printing.

If you have enjoyed this post, please share the link using the buttons below or sharing the Facebook, Twitter or LinkedIn alert that you followed to get here!

Other useful posts: Section breaks in Word

Please note, these hints work with versions of Microsoft Word currently in use – Word 2007 and Word 2010, for PC. Mac compatible versions of Word should have similar options. Always save a copy of your document before manipulating it. I bear no responsibility for any pickles you might get yourself into!

Find all the short cuts here

 
28 Comments

Posted by on August 14, 2013 in Errors, New skills, Short cuts, Word, Writing


Tags: , , , , , , , ,